Demo
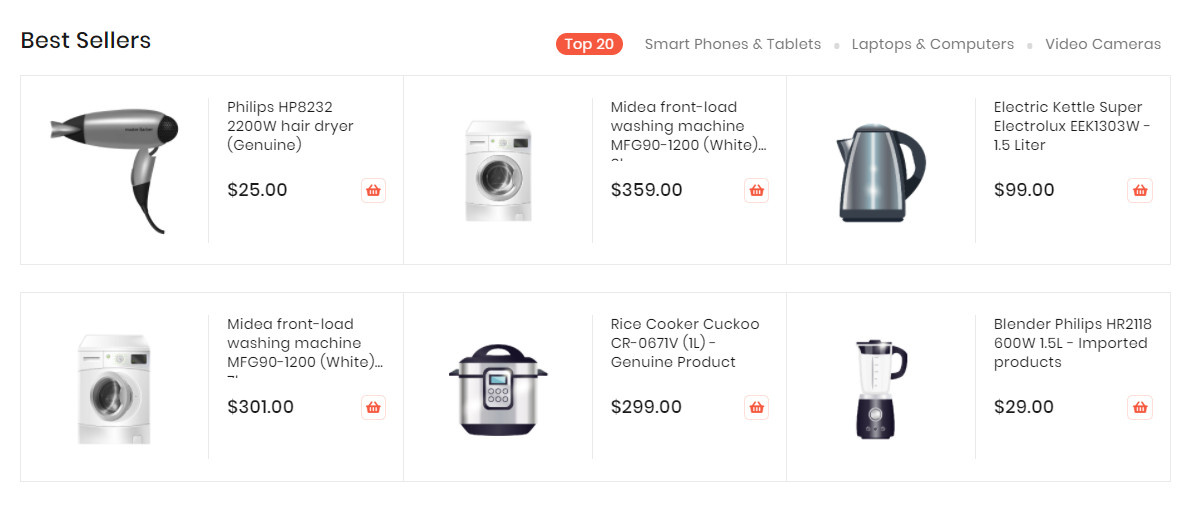
The Products By Attribute element helps to show products by attribute (Yes/No) with different view options (grid, list, slider, category tabs).
Create (Yes/No) Attribute Product
- In backend, go to
STORES → [Attributes] Product. Click Add New Attribute button.

Complete the Basic Properties

The Basic Properties is required for an product attribute.
- Insert the
Default Labelto describe the attribute. - In the
Catalog Input Type for Store Owner, choose Yes/No of the input from a list. - Choose Yes for the
Value Requiredto ask customers to select the options before purchasing.
Complete the Advanced Properties (Optional)
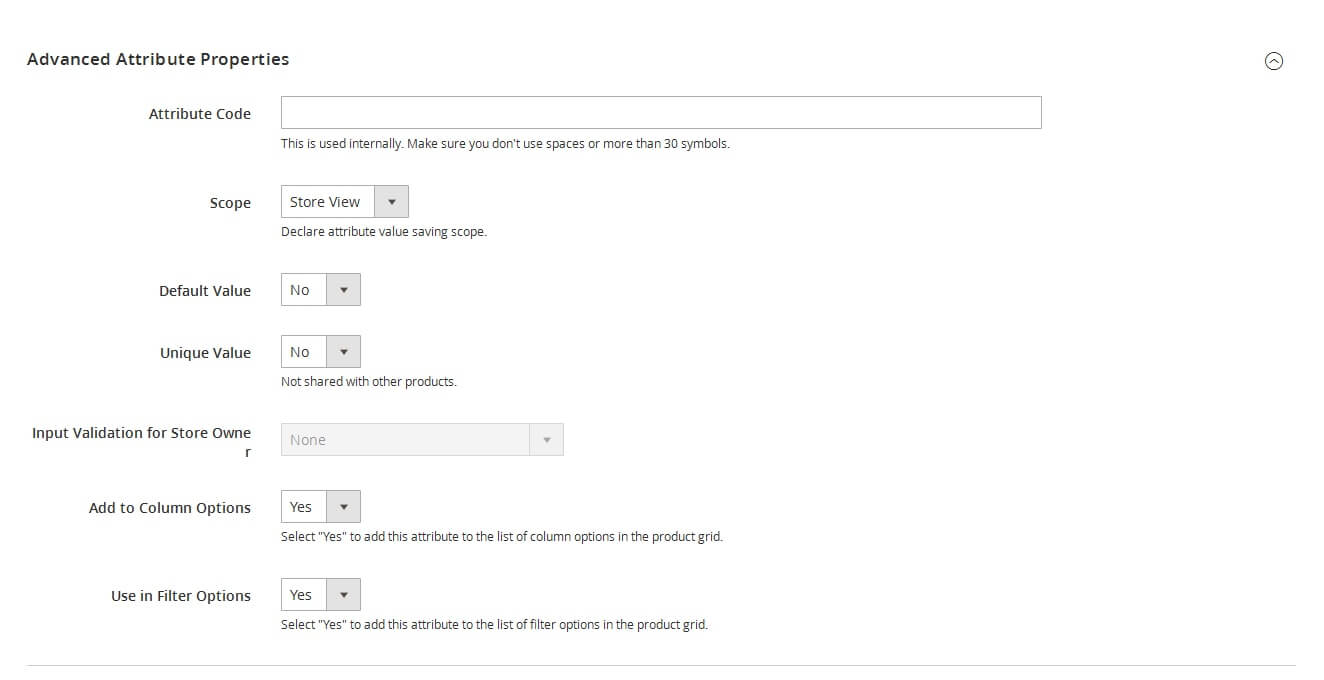
- Insert the
Attribute Codethat is less than 30 characters and excluded spaces. - The
Scopeincludes Store View, Website, and Global.You will choose one of three places in your store system where the appearance of attribute is approved. - Apply the
Unique Valueif you not want to share it with other products.
Insert the Field Label

- Open the
Manage Titlesection. - Insert the
Titlethat is shown for the field label. In case of multiple languages supported on your store, insert the translation of the title for each view.
Complete the Storefront Properties
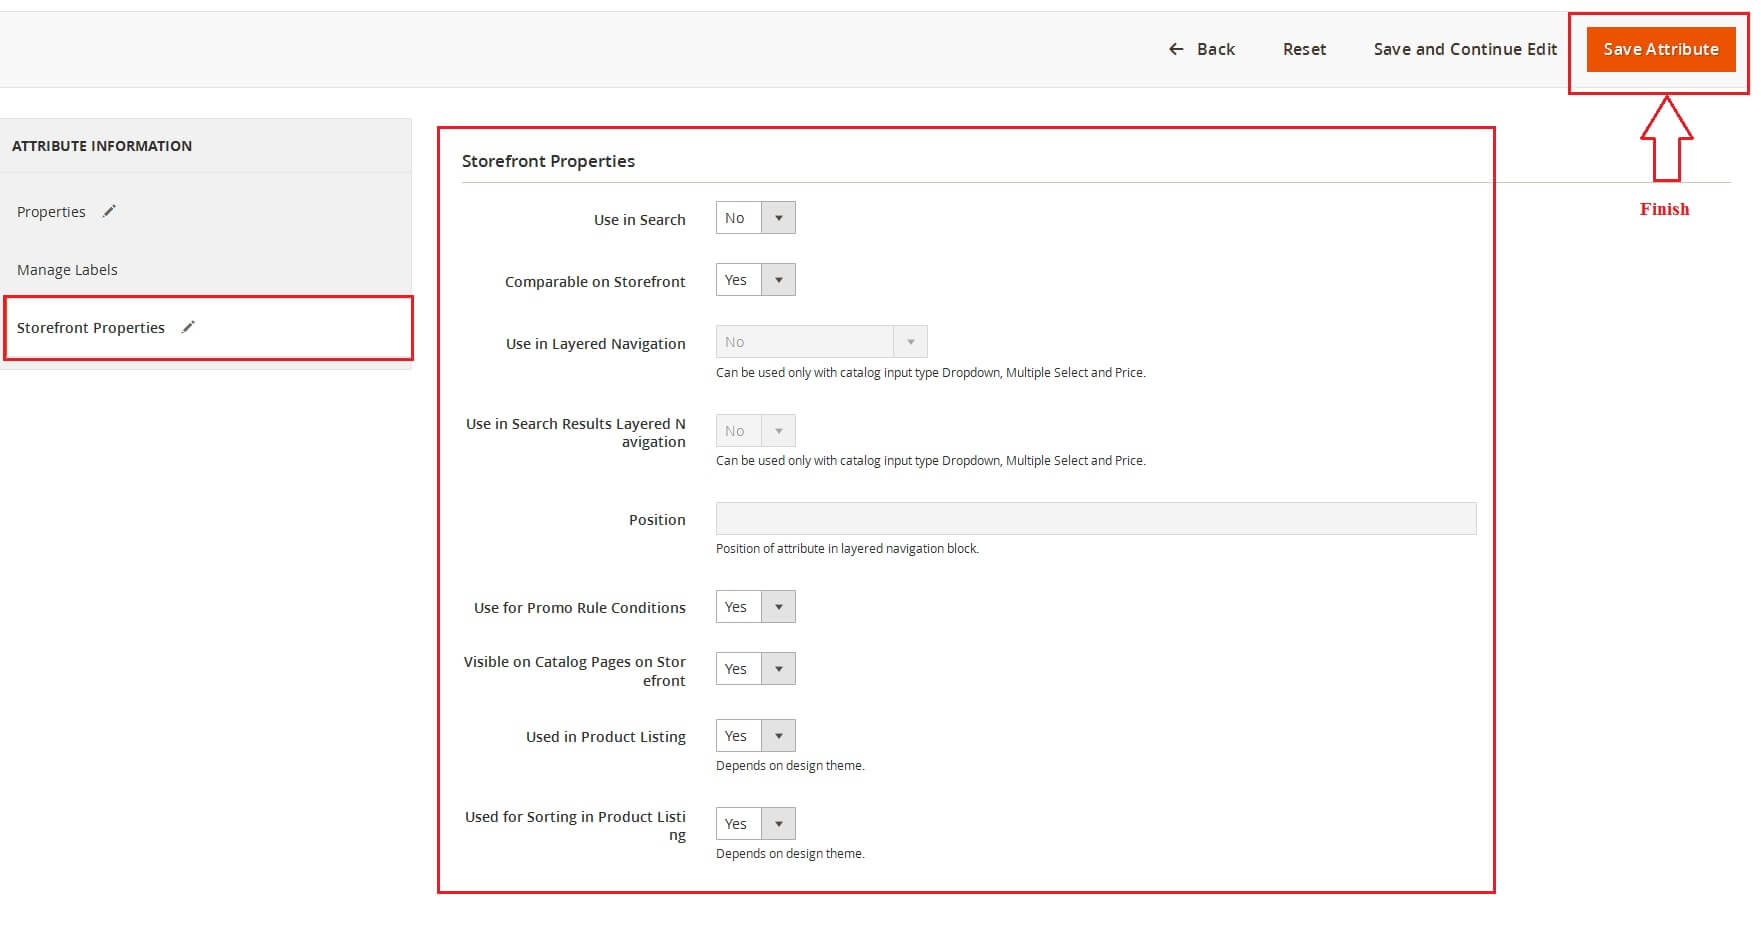
- Choose Yes for the
Use in Searchto be ready for searching the attribute. - Allow comparing the product attributes in Product Compare if you choose Yes in the
Comparable on Storefrontfield. - Choose Yes in the
Use for Promo Rule Conditionsfield to apply the product attribute for the price rules. - To make the attribute visible in catalog page listing, choose Yes in the
Visible on Catalog Pages on Storefrontfield. - If Product Listing is supported at your store, the attribute can be appeared and used as sort parameter. Configuring that from the
Used in Product ListingandUsed for Sorting in Product Listingfield. Save Attributeto finish all.
Reindex Data
- Login to your server with your SSH account
- Switch to apache user
- Change to magento root directory
- Run command line: php bin/magento indexer:reindex
- Run command line: php bin/magento cache:clean (if your site enable cache).
CREATE PRODUCT ATTRIBUTE BUILDER
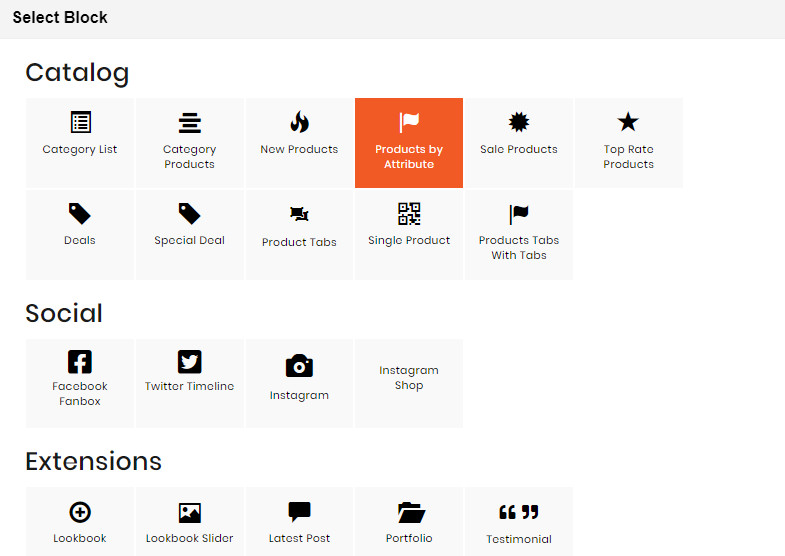
- On CMS Builder, click Add New Block button.

- On popup list blocks, click “Products by Attribute” item.
CONFIG BLOCK
Product Config Tab
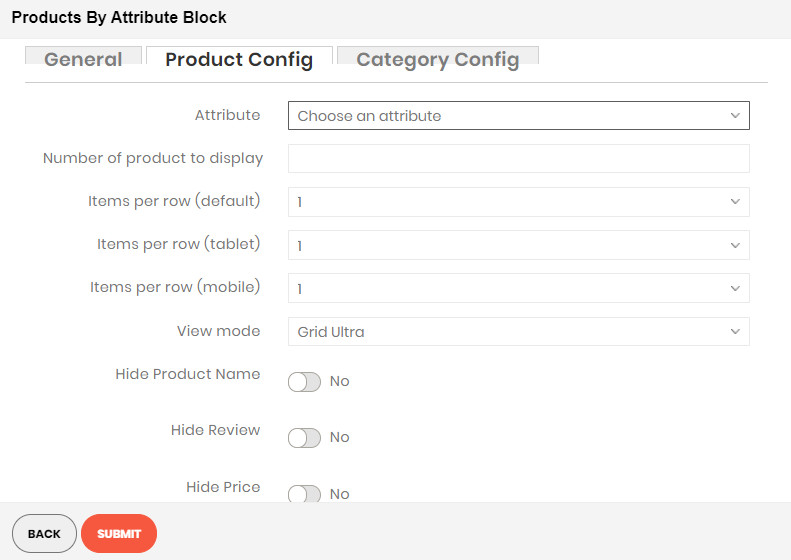
- Attribute: Choose attribute of product to filter.
- Number of product to display: Limit the number of products shown.
- Item per row: Limit the number of items in a row on default resolution.
- Item per row (tablet): Limit the number of items in a row on tablet.
- Item per row (mobile): Limit the number of items in a row on mobile.
- View Mode:
Grid Mode
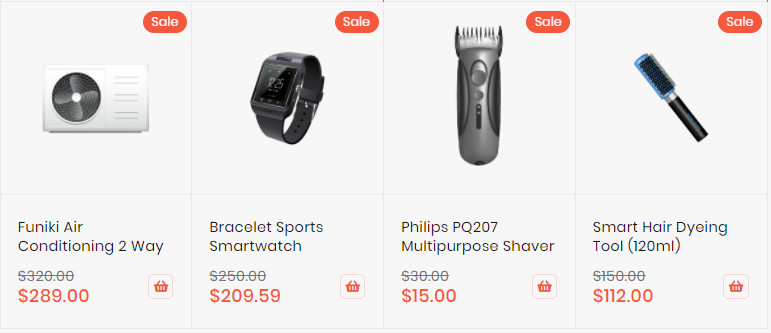
List Mode
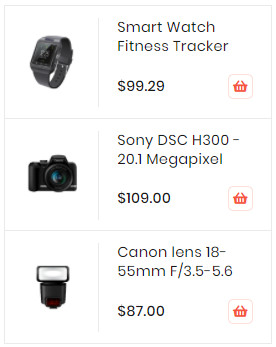
Grid Ultra

- Hide Product Name: Choose Yes to let the product name disappear.
- Hide Review: Choose Yes to let the product review disappear.
- Hide Price: Choose Yes to hide the product price.
- Hide Add to Cart: Choose Yes to hide the Add to Cart button.
- Hide Add to Wishlist: Choose Yes to hide the Add to Wishlist button.
- Hide Add to Compare: Choose Yes to hide the Add to Compare button.
- Use Slider: Choose Yes to add Carousel Slider for block product.If you use slider, you can see more config to owl slider:
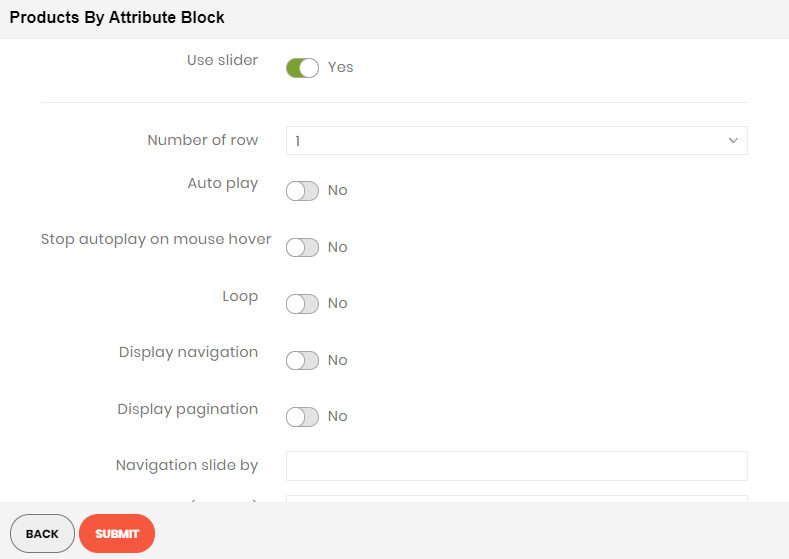
- Number of row: The number of rows displayed in slider.
- Auto play: Choose Yes to let the slide play automatically.
- Stop autoplay on mouse hover: Choose Yes to stop the slide from playing when hover mouse.
- Loop: Choose Yes to let the slide play in loop.
- Display navigation: Choose Yes to display the navigation icons on the slide.
- Display pagination: Choose Yes to display the pagination indicator on the slide.
- Navigation slide by: Limit the number of items will be shown after each time you click on the navigation.
Category Config Tab
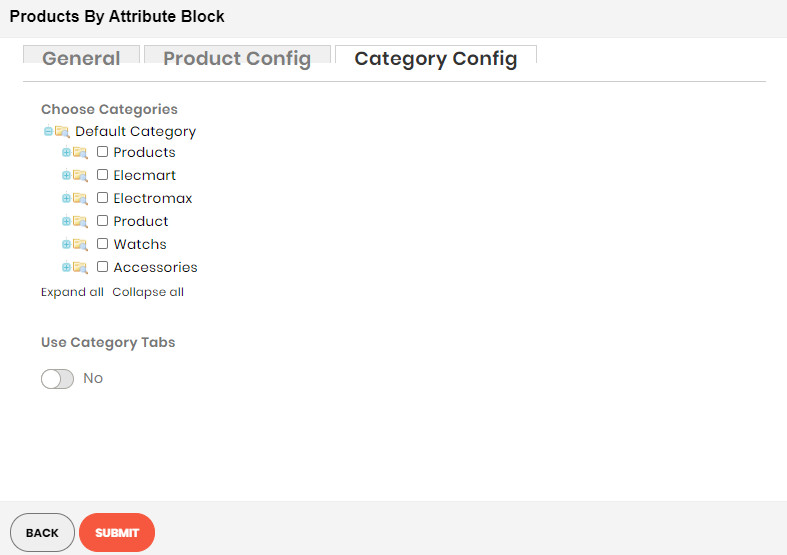
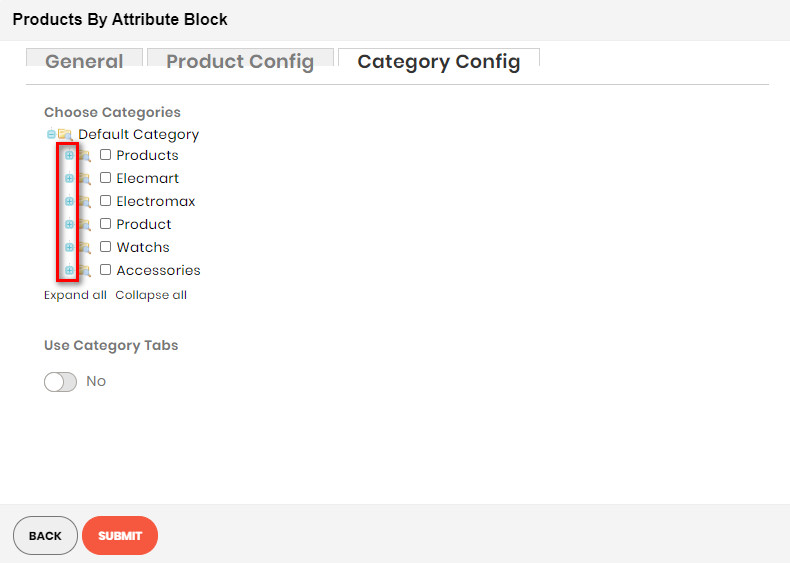
- Click plus icon button to show sub categories.
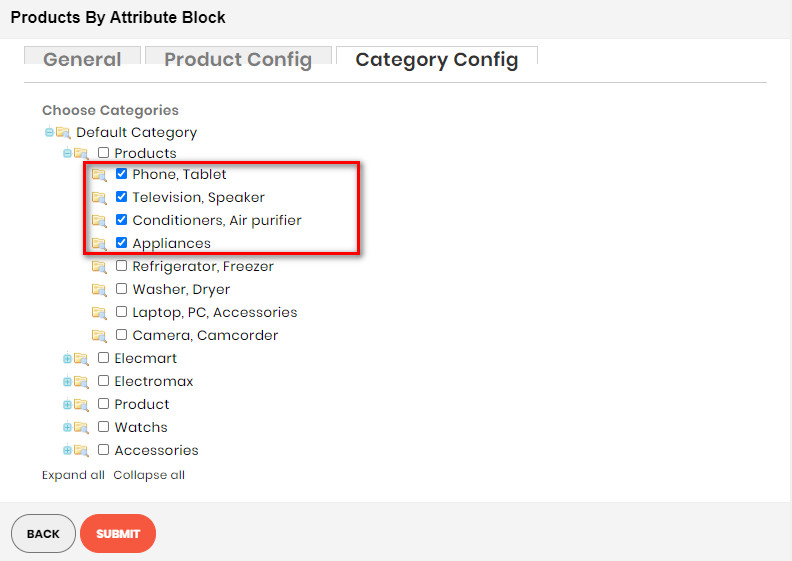
- Choose categories to filter product by selecting categories.
- If you want show product with tab. Change Use Category Tabs to Yes
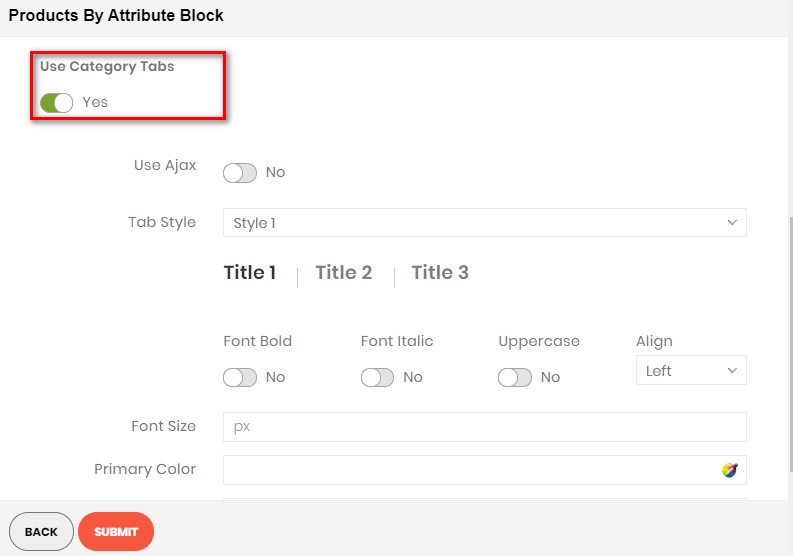
- There you can see more settings for tab slide:
- Tab Style: Choose one of the 7+ style in the list. You can see the demo below.
- Font Bold, font Italic, Uppercase: Choose Yes to let the text in bold, in italic or in uppercase.
- Align: Choose among Left, Center or Right for text align.
- Font Size: Enter the value of font size (in px unit).
- Primary Color, Secondary Color and Third Color: Choose the 3 main color for your category tab. You can enter the hex code color directly in the blank or use color picker tool at the right.

