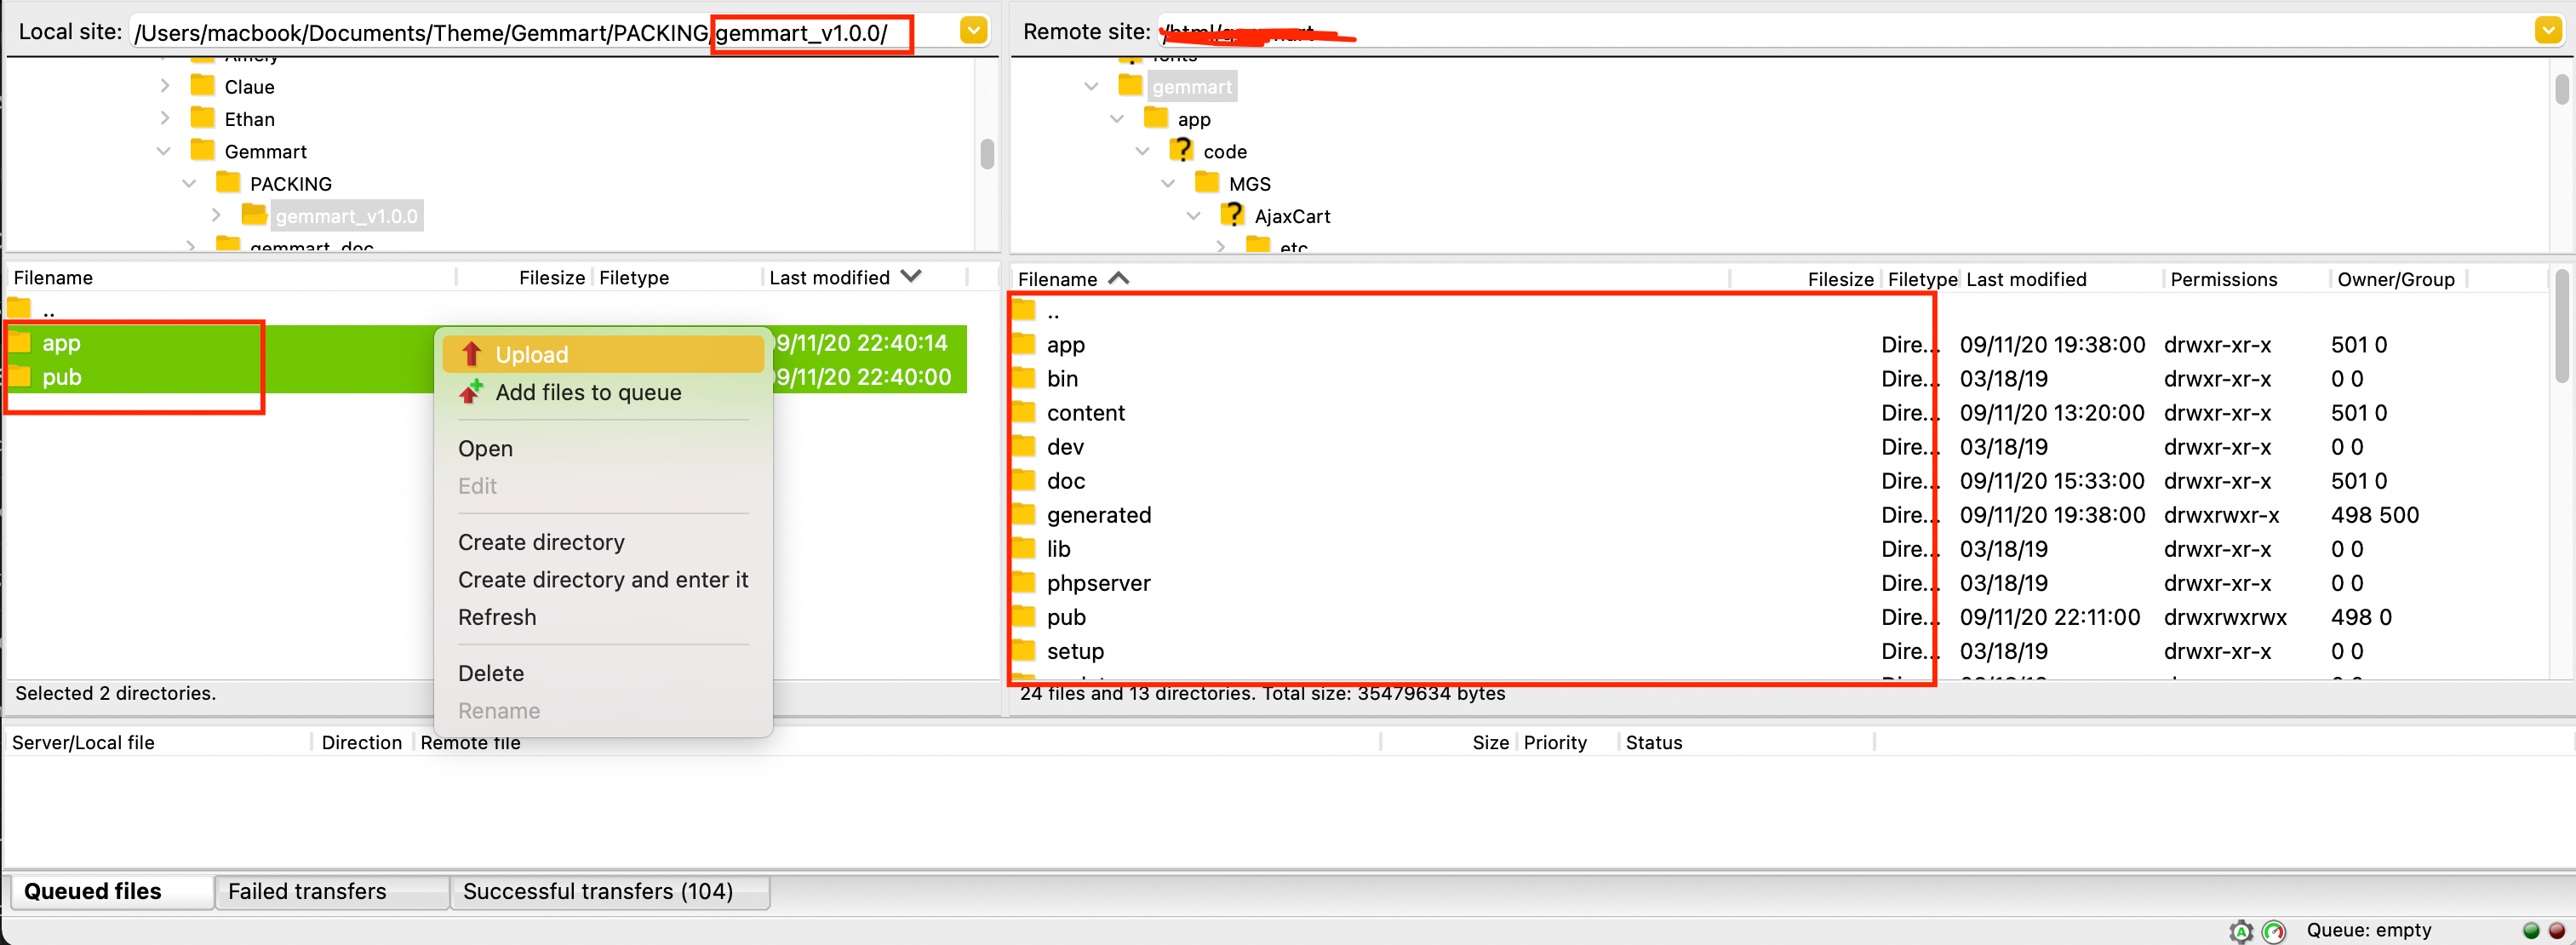
STEP 1: Upload Pack
Using a FTP client to upload content of upload folder to the root folder on your Web Server (usually named public_html).You need upload app folder, lib folder and pub folder to your magento root folder
If you are using Magento version 2.3.5 or older, please open gemmart_v…/Themes/Source/patches/patch_for_magento_2.3.x/, read Readme file and apply this patch
If you are using Magento version 2.4.0, after upload 2 above folders, please open gemmart_v…/Themes/Source/patches/patch_for_magento_2.4.0/, read Readme file and apply this patch
If you are using Magento version 2.4.1, please open gemmart_v…/Themes/Source/patches/patch_for_magento_2.4.1/, read Readme file and apply this patch
STEP 2: Refresh Cache
Go to System -> Cache management. Select all, choose refresh action and submit.
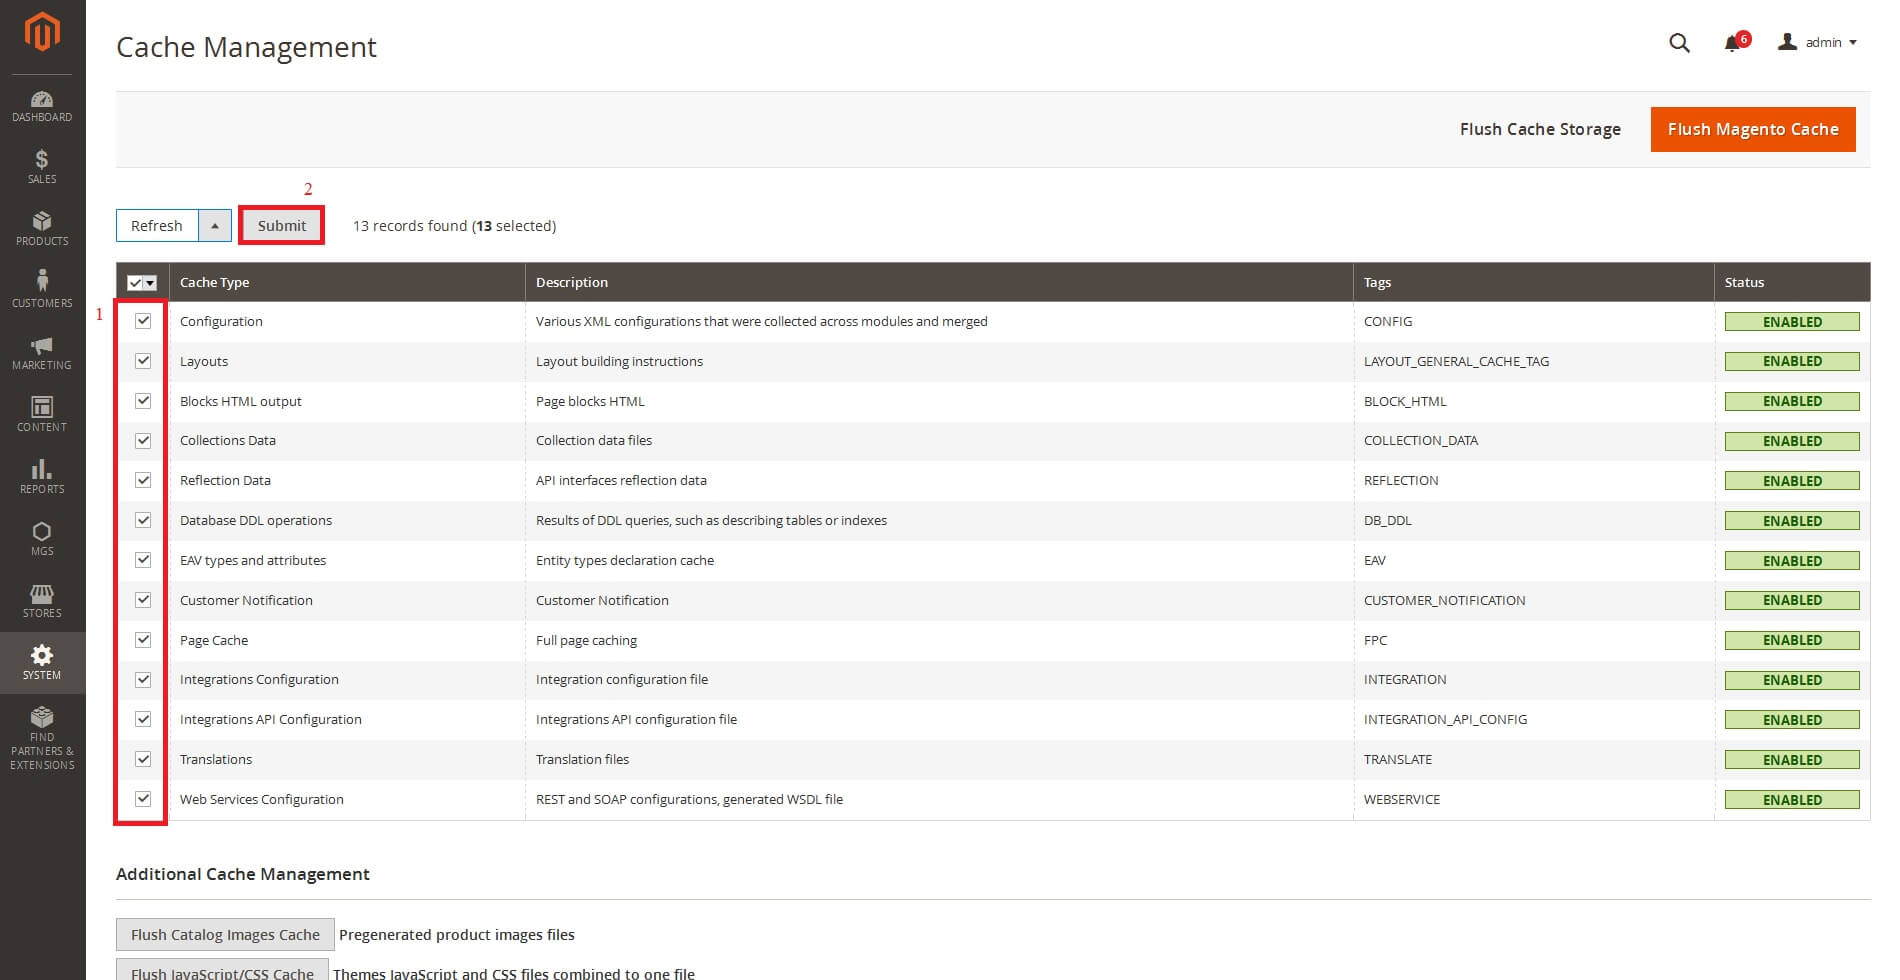
You can use command line: php bin/magento cache:clean to refresh cache
STEP 3: Enable Module and Deploy theme
- Login to your server with your SSH account
- Switch to apache user
- Change to magento root directory
- Run command line: php bin/magento module:enable MGS_Fbuilder
- Run command line: php bin/magento module:enable MGS_Mmegamenu
- Run command line: php bin/magento module:enable MGS_Portfolio
- Run command line: php bin/magento module:enable MGS_Testimonial
- Run command line: php bin/magento module:enable MGS_Brand
- Run command line: php bin/magento module:enable MGS_StoreLocator
- Run command line: php bin/magento module:enable MGS_Blog
- Run command line: php bin/magento module:enable MGS_Aquickview
- Run command line: php bin/magento module:enable MGS_GemmartTheme
- Run command line: php bin/magento module:enable MGS_ThemeSettings
- Run command line: php bin/magento module:enable MGS_Lookbook
- Run command line: php bin/magento module:enable MGS_AjaxCart
- Run command line: php bin/magento module:enable MGS_Protabs
- Run command line: php bin/magento module:enable MGS_InstantSearch
- Run command line: php bin/magento module:enable MGS_Ajaxlayernavigation
- Run command line: php bin/magento module:enable MGS_CustomTheme
- Run command line: php bin/magento module:enable MGS_ExtraGallery
- Run command line: php bin/magento module:enable MGS_GDPR
- Run command line: php bin/magento setup:upgrade
- Run command line: php bin/magento setup:static-content:deployDeploy static view files document
STEP 3: Enable Gemmart Theme
Go to CONTENT -> Configuration [Design], edit store view you want to use the Gemmart theme then select to use “MGS Gemmart”
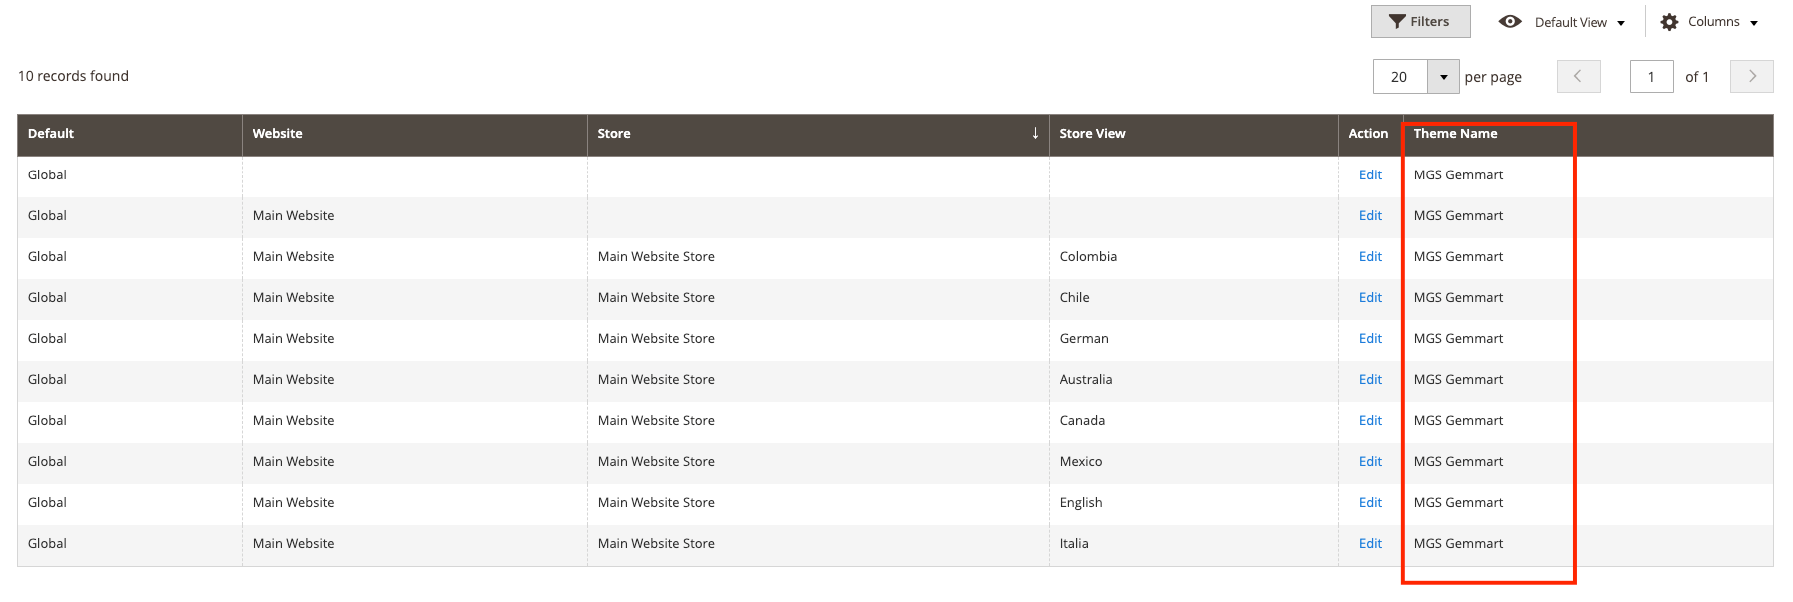
After selecting the Gemmart theme, refresh magento cache
STEP 4: Activate Theme
After install theme, please log in admin panel through your admin account, the go to Backend > STORES > [Settings] Configuration > [MAGESOLUTION] Activate Theme and insert the “Purchase Code”.
Click here to know how to get Purchase Code. Note that, with “Regular License”, one Purchase Code is used for only 1 domain.
- Option 1: Work on your localhost.
- Option 2: Use subdomain. We allow using unlimited subdomain for dev site purpose. However, you have to insert the purchase code for the principal domain before using this purchase code for other subdomains.For example, with your main domain “ mydomain.com”, you are able to create several subdomains such as dev.mydomain.com, staging.mydomain.com, abc.mydomain.com…
STEP 5: Import Static Blocks
Go to MGS -> Page Builder Setting [Page Builder], you can see Export & Import panel. Click Import Gemmart’s Static Blocks button to import the static blocks
Until Backend returns success message, Go to System -> Cache management. Select all, choose refresh action and submit. All of static blocks sample are imported, you can go to CONTENT -> Blocks and see them
STEP 6: Import a Homepage
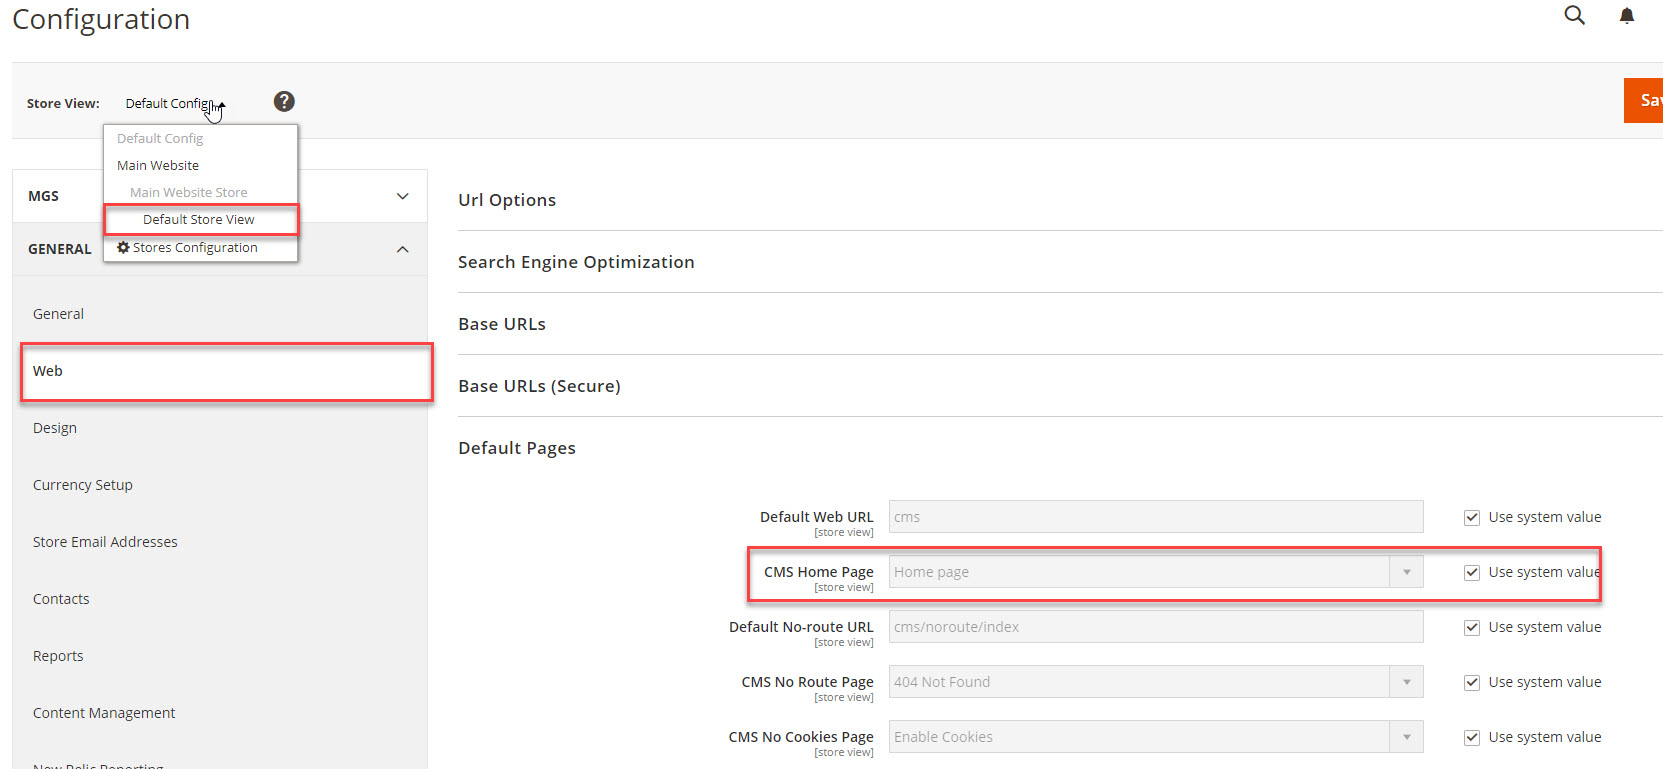
Select defaul homepage:
- Go to
STORES -> Configuration [Settings] -> Web [GENERAL] -> Default Pages, here you can select the default page you want in “CMS Home Page” field. Note that if you have multi store view you should select a store view before selecting the default home page.
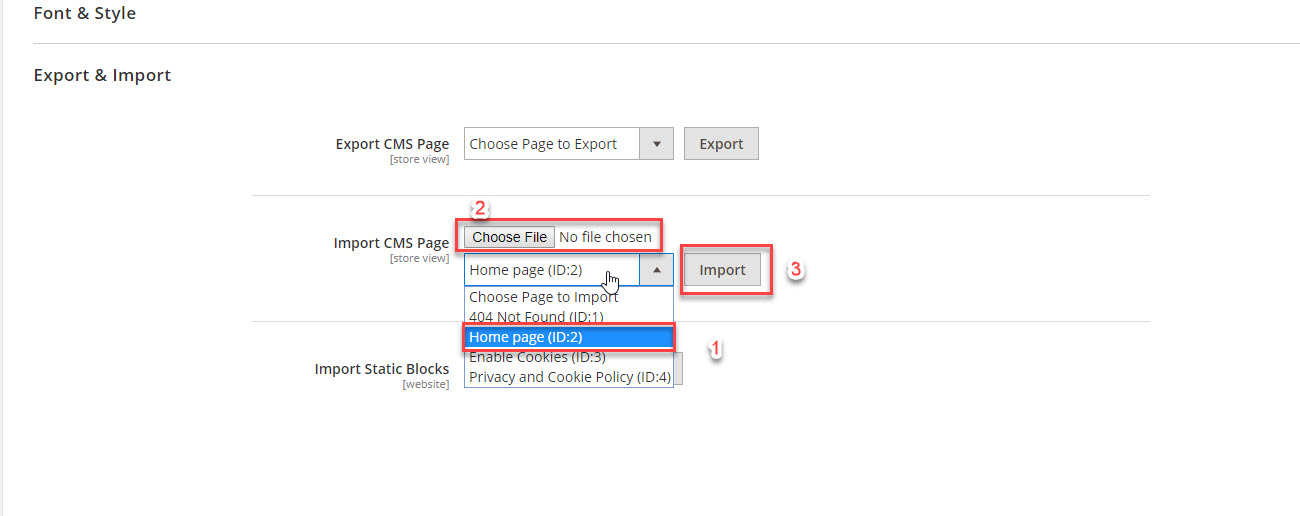
Import a homepage:
- Go to
MGS -> Page Builder Setting [Page Builder], you can seeExport & Importpanel. - You can see “Import CMS Page”, select the default homepage you just specified above then “Choose File”, you can find the homepage demo file in gemmart_v[…]/Themes/Homepage Demo/ then click “Import”, please wait until the homepage is imported then refresh cache.
STEP 7: Refresh Magento Cache
Go to admin SYSTEM -> Cache Management then refresh all Cache