Installation
– Requirements for Theme
You can click here to find out more about requirements of WordPress.
Below are three requirements for working version of WordPress, php, and mysql.
- WordPress 4.0 or higher.
- PHP 5.4 or higher.
- MySQL 5 or higher.
You also need to make sure that your host can comply with follow requirements. We recommend using WP Engine or Blue Host for all your hosting needs.
- Your web host has the minimum requirements to run WordPress.
- Your host are running the latest version of WordPress.
- You can download the latest release of WordPress from official WordPress website.
- Always create secure passwords for FTP and Database.
– Recommended PHP Configuration Limits
Low PHP configuration limits can cause many issues. When related issues occur, you need increase your PHP limits to a minimum as follows:
- max_execution_time 180
- memory_limit 128M
- post_max_size 32M
- upload_max_filesize 32M
1. Theme Installation
– Install new theme manually via FTP Client
In order to add a new theme to your WordPress installation, pleae follow these basic steps:
- Download the zip package of Barber theme in ThemeForest
- Unzip Barber.zip package which you can find inside Theme files folder.
- Connect to your FTP server and navigate to the WordPress installation folder.
- Open WordPress admin panel (navigate through web browser to the folder where you have installed the WordPress e.g www.your_domain.com/wp-admin/) and go Appearance > Themes on admin sidebar. Activate Barber theme.

– Install Theme via WordPress Admin Panel
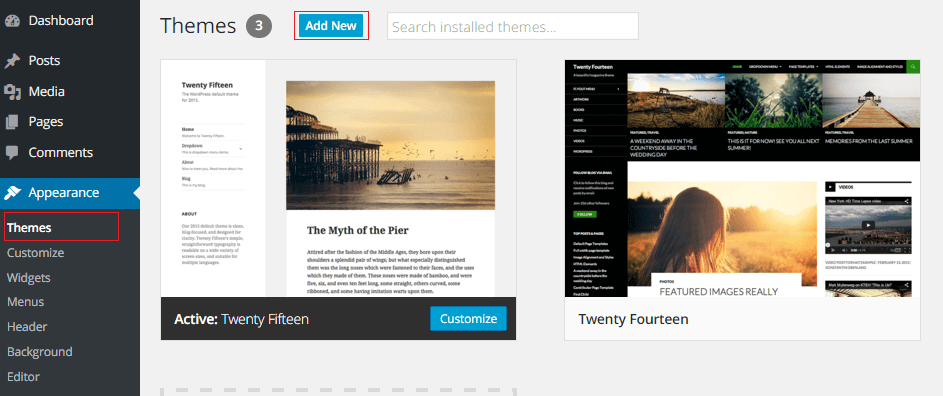
1. Open WordPress admin panel (e.g www.your_domain.com/wp-admin/) and go Appearance > Themes on admin sidebar and click “Add New” button.
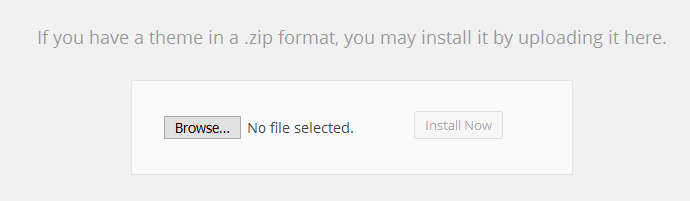
2. After that, click Upload Theme link and upload zip package of Barber theme.

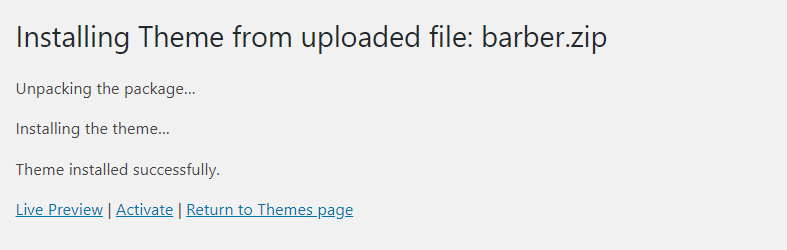
3. Once uploading theme is finished, it will install theme automatically.
You can click Activate link or go to Appearance > Themes on admin sidebar to activate theme.
Once theme is installed, you need to install Required Plugins to get full working features.
2. Plugins Installation
– First method
Install plugins via “Begin installing plguins” message.
After installing and activating the theme you will see the message about installing required plugins at the top of the page.
You should click Begin Installing plugins link in order to install needed plugins for Barber theme.
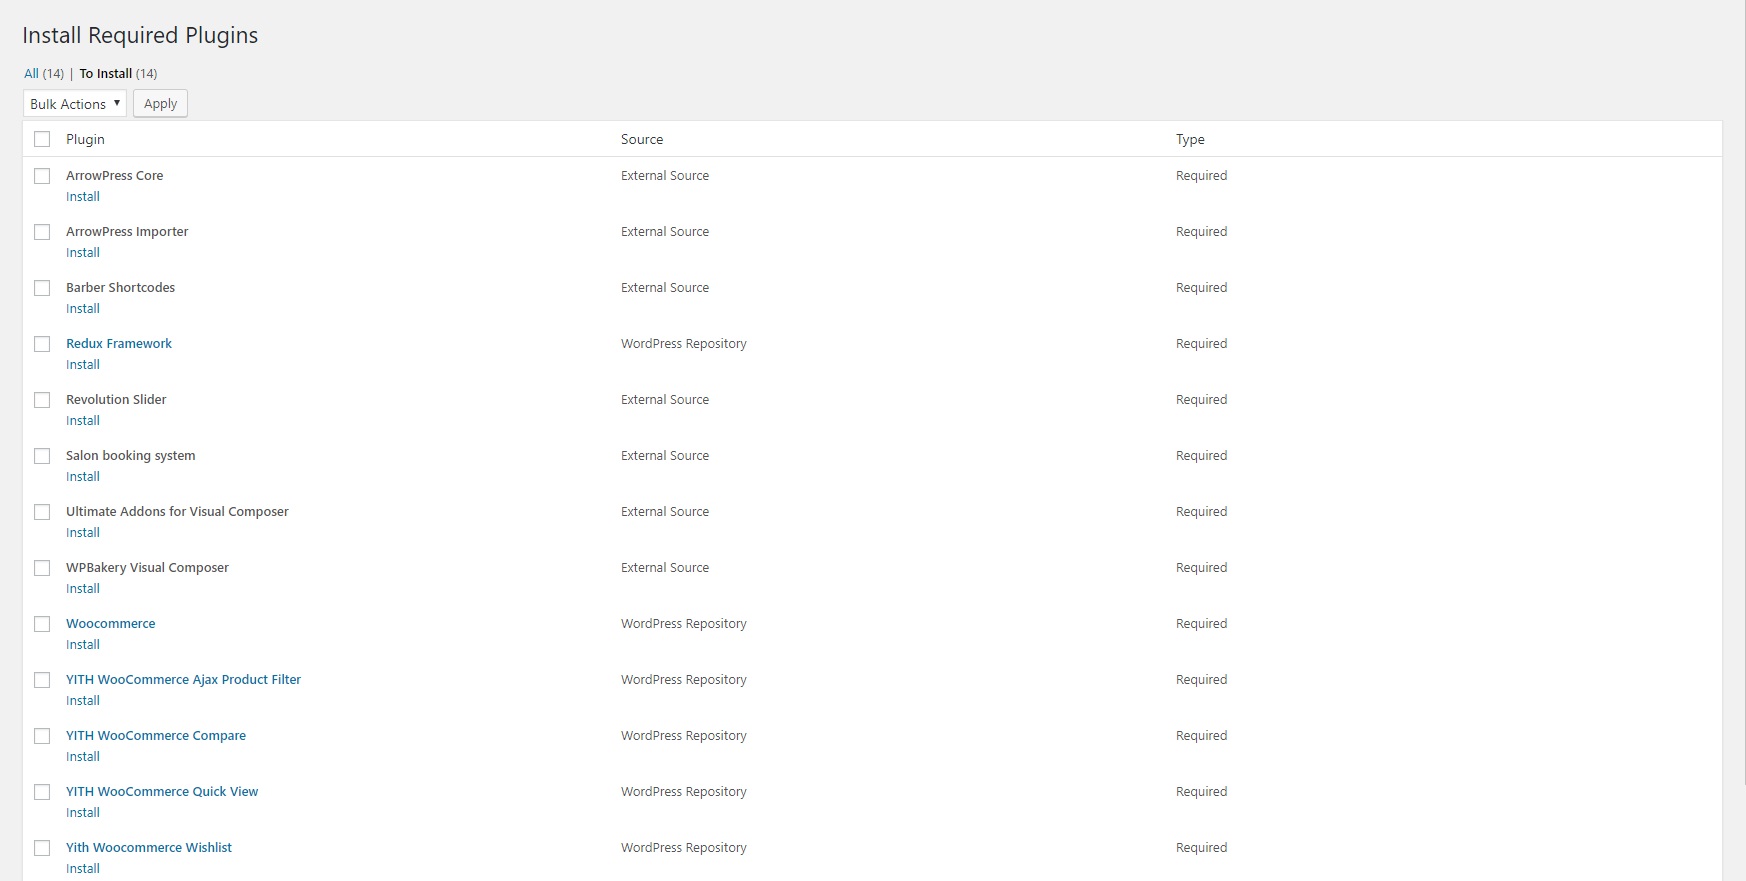
You will be redirected to Install Required Plugins page, here you will find all of the theme required plugins. In order to install these plugins, you just need to check all of them and select install then click apply.

– Second method
Install plugins via WordPress Admin Panel.
Besides, you can install some plugins for Barber by navigating Plugins > Add New in admin sidebar. After that, enter plugin name to search plugin and click “Install Now”.

When installation process is done, you can click Return to Required Plugins Installer and select active then check all plugins to active these plugin.

– Third method
Install plugins manually (Via FTP)
If you want to manually install plugins, you can follow some basic steps below.
- Download your WordPress Plugin to your desktop and extract plugin folder if it is a zip archive.
- With your FTP program, upload the Plugin folder to the wp-content/plugins folder in your WordPress directory online.
- Go to Appearance > Plugins and find the newly uploaded Plugin in the list.
- Click Activate to activate it.
After finishing plugin install, you need to configure the plugins.
3. Plugin Configuration
– WPBakery Page Builder
WPBakery Page Builder for WordPress is drag and drop frontend and backend page builder plugin that will save you tons of time working on the site content. You will be able to take full control over your WordPress site, build any layout you can imagine – no programming knowledge required. Moreover, now you can choose either work on a backend or move your page building process to frontend and instantly see changes you make.
You can see here for more details.
– After installing the WPBakery Page Builder, please go to WPBakery Page Builder > Role Manager. In the post types field, you should select Custom and check all post type as the screenshot below.

– Ultimate Addon
– Google Map
If you want to use different google font in some Ultimate Addon shortcodes, you can go to Ultimate > Google Fonts. Click to Just a click button
– Google Fonts
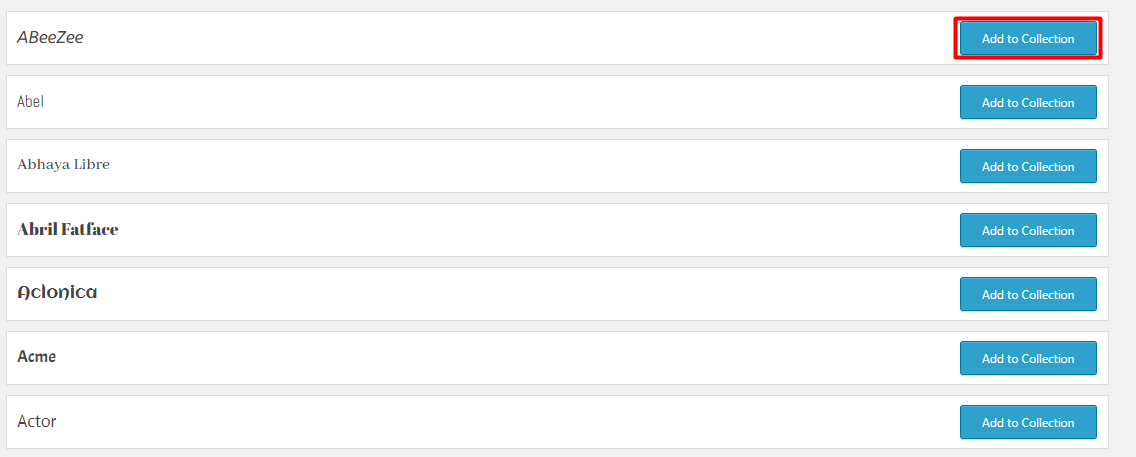
If you want to use different google font in some Ultimate Addon shortcodes, you can go to Ultimate > Google Fonts. Click to Just a click button

– After that, you can select the font you want and click “Add to Collection” button
– Icon Manager
In order to add new icons to Ultmate Icon Manager, you can follow some steps below.
- Download barber icon font zip fileDownload pe icon stroke7 icon zip file
- Go to Ultimate > Icon Manager
- Click Upload New Icons
- Select font icon zip file you downloaded in step 1 and click Insert Fonts Zip File
– Please see detail guide of Ultimate author. Icon Manager Guide
– ArrowTheme Instagram Feed
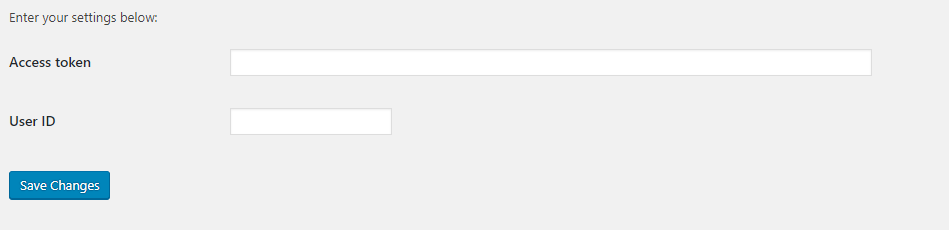
Navigate to Settings > Instagram Settings to access “Instagram Settings” page. You need to enter Access token and User ID of your instagram account in order to get images. Remeber to click Save Changes to save information.
You can find user ID in this link
You can get access token via this website
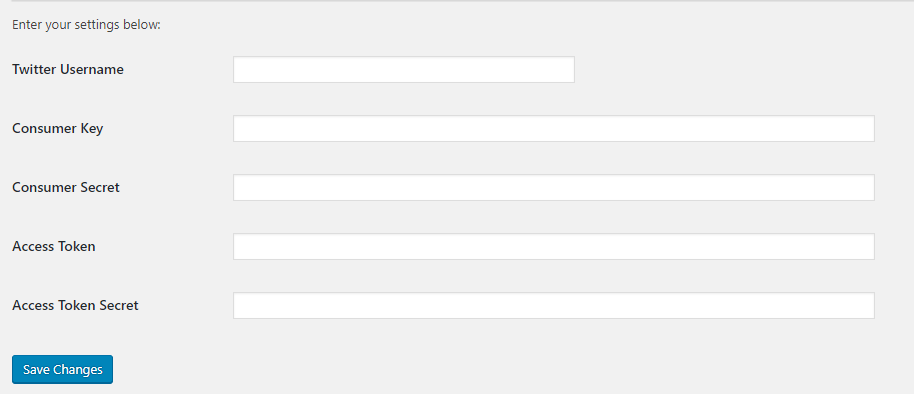
– ArrowTheme Latest Tweets
Navigate to Settings > ArrowTheme Latest Tweets to access “Twitter API Authentication Settings” page. You need to enter Consumer Key, Consumer Secret, Access token and Access Secret and twitter username in order to get posts from your twitter account.
In order to get Twitter Access keys, you need to create Twitter Application:
- Go to https://dev.twitter.com/apps/new and log in, if necessary.
- Supply the necessary required fields, accept the Terms Of Service, and solve the CAPTCHA. Submit the form by clicking the Create your Twitter Application.
- Go to the API Keys tab and copy the consumer key (API key) and consumer secret from the screen into our application.
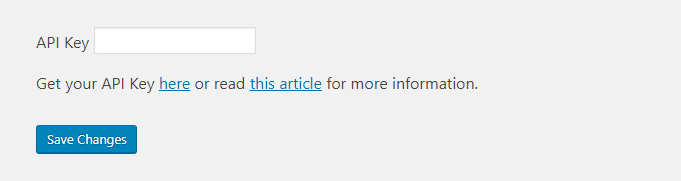
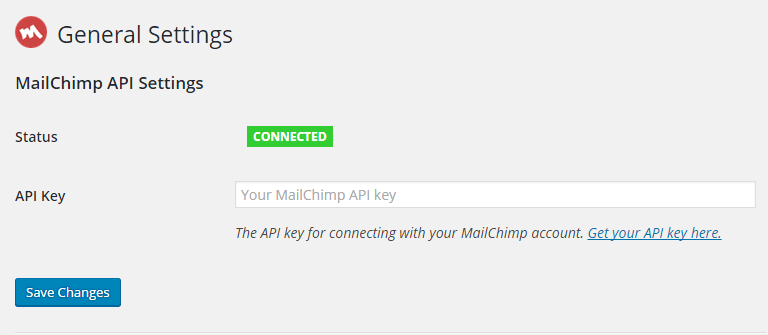
– MailChimp for WP
Go to MailChimp for WP > MailChimp to access general setting page of MailChimp. You should connect to your mailchimp account by entering API Key.
Also, in order to make MailChimp Form work effectively, you should navigate to MailChimp for WP > Forms in admin sidebar and click Save Changes.
For detail instruction, please click MailChimp for WP.
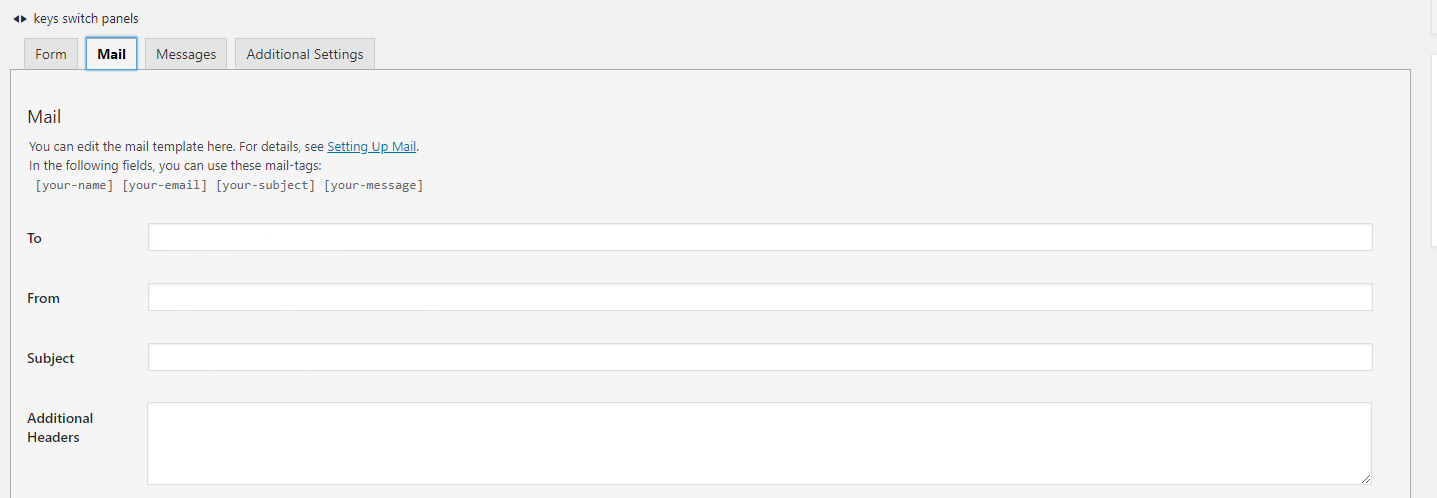
– Contact Form
Go to Contact > Form and create the form you want or edit existing form.
You will find form content we used in our demo site in this link. Each form can have different style based in the content in the contact form. If you imported demo content successfully, you can skip this step.
After that, you need to set up Mail tab. Please see this guide for more detail. Mail setting
– Woocommerce
WooCommerce is the most popular WordPress eCommerce plugin. Packed full of features, perfectly integrated into your self-hosted WordPress website.
You can see here for more details and woocommerce documentation.
– Change Image Sizes
You can change the product image sizes in Appearance > Customize > Woocommerce > Product Images on admin sidebar.
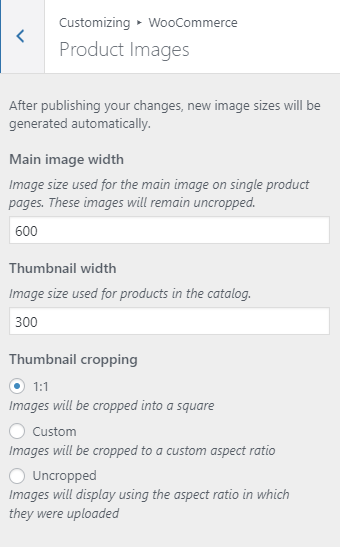
After changing the image sizes, you should regenerate all the thumbnails using Regenerate Thumbnails plugins.
Please go Tools > Regen.Thumbnails and click Regenerate All Thumbnails.
– Regenerate Thumbnails
Regenerate Thumbnails allows you to regenerate the thumbnails for your image attachments. This is very handy if you’ve changed any of your thumbnail dimensions (via Settings -> Media) after previously uploading images or have changed to a theme with different featured post image dimensions.
You can either regenerate the thumbnails for all image uploads, individual image uploads, or specific multiple image uploads.
You can see here for more details.
Please go Tools > Regen.Thumbnails and click Regenerate All Thumbnails.
– APR Appointment
– Adding available services.
- Go to APR Appointment > Add Services
- Enter service name
- Click Add new

– Changing available times for booking.
- Go to APR Appointment > APR Appointment
- Add opening time and closing time
- Change opening day
- Click Save changes

– Manage booking list.
- Go to APR Appointment > APR Appointment List
- Click edit.
- Approve or deny existing booking request.
- Click Save changes

Once Required Plugins are configured, you may be interested to install sample content as our demo sites. In the next section, we will guide you about demo installation.
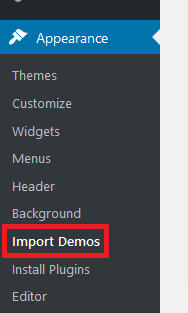
4. Demo Installation
Note: For successfully demo importing, you should make sure to set up Php configuration limit and max_execution_time as theme requirement before importing demo. Please read Install Theme > Installation for all requirements.
Make sure to install and activate all required plugins before installing demos especially ArrowTheme Importer plugin
– First Method
Install demos via Barber option.
The First, You must active plugin ArrowTheme Importer
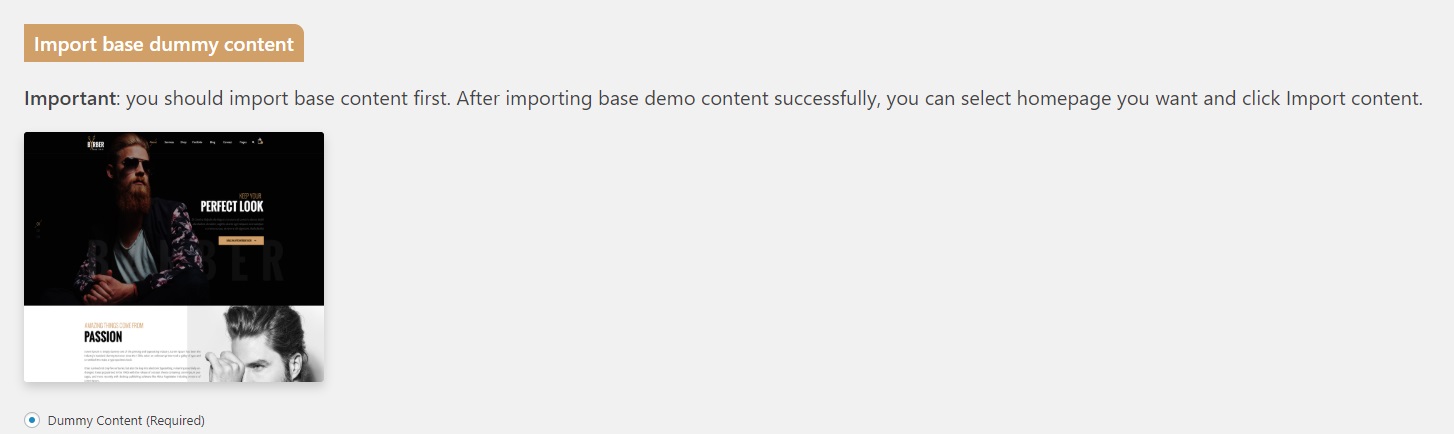
With Barber theme, you will be able to import several demos separately. Barber contains 9 awesome demos for you to choose. In order to import demo content, please see steps to import demos below
Before installing demos, remember to check all PHP configuration to ensure your server meets all requirements for a successful import. Please read Install Theme > Installation for all requirements.
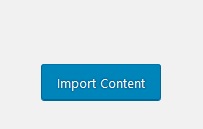
In order to import demo, you must import dummy content. After import dummy content successfully, you can choose which demo version you want and click Import Content as normally.
After that, click button Import Content
Note: If this method don’t work with your server, you can try import all demos by second method.
– Second Method: One click demo import plugin
Install demo with One click demo import plugin.
1. Install and activate One Click Demo Import plugin.
2. Download import file in this link. Extract it.
3. Go to Appearance > Import demo data and choose XML file placed in theme_import/theme/content.xml
4. In Widget import section, you should select import file for widget in theme_import/theme/widget.wie
5. Click Import button.
6. After successfully finish above process, you should go to Setting > General and select homepage. Go to Appearance > Menu and assign menu to menu location such as Primary Menu. If you don’t know how to set menu, please see Build your site > Menu setup.
7. Import Slider Revolution
Remember to install and active Slider Revolution plugin.
– Step 1: Navigate to Slider Revolution in admin sidebar and click Import Slider button.
– Step 2: Click Choose File and select slider import file which placed in theme_import/theme/slider/ folder. After that, you should select “Import Slider” button.
– Step 3: After process of importing slider finish successfully, you will be redirect to Slider Revolution page.
– Third Method (All-in-One WP Migration)
Install demo via All-in-One WP Migration plugins.
Remember that your site database will reset entirely after using this method.
Please follow steps listed below to import demo.
– Step 1: Install and activate All-in-One WP Migration plugin to use this method.
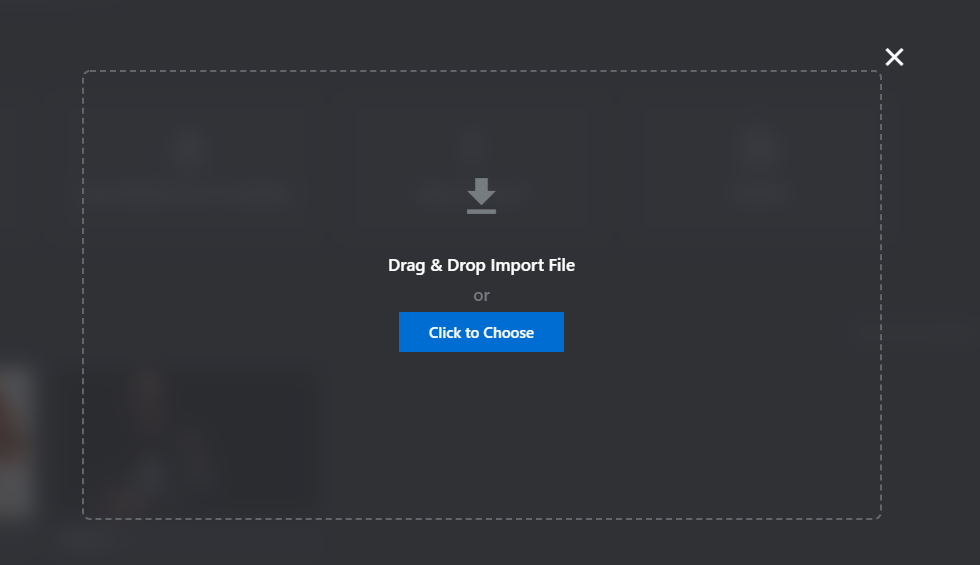
– Step 2: Download Demo backup file
– Step 3: Upload backup file to wp-content/ai1wm-backups folder.
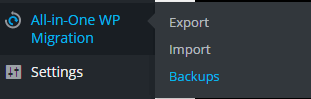
– Step 4: Navigate to All-in-One WP Migration > Backups on admin sidebar.
– Step 5: Click Restore button and wait for few seconds. You will see success message after click continue.
– Step 6: Login to the site with the account: Username: admin, Password: admin After login with this account, you can change username and password back to your credentials.
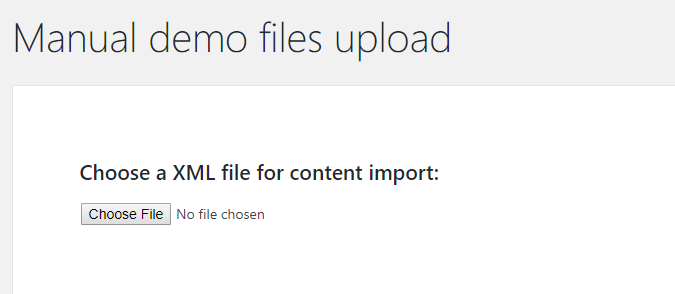
– Fourth Method (WordPress importer)
Import demo data manually.
Note: Please remember to install all needed plugins before import demo data. If you have not install plugins, please see Plugins Installation to finish that step.
- Import widget
– Step 1: Extract zip package of Barber theme you downloaded in ThemeForest.
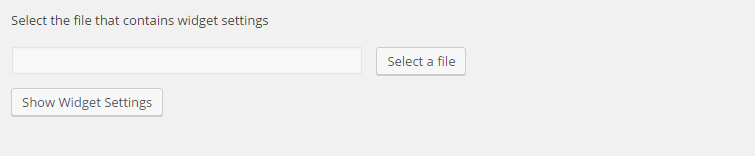
– Step 2: Navigate to Tools > Widget Settings Import and click Select a file button.
– Step 3: Select widget file in import/widget folder and click “Open”.
– Step 4: Click Show Widget Settings.
- Import Data
– Step 1: Navigate Tools > Import and click on WordPress link. This will bring up a popup box that allows you to install the plugin directly from your website.
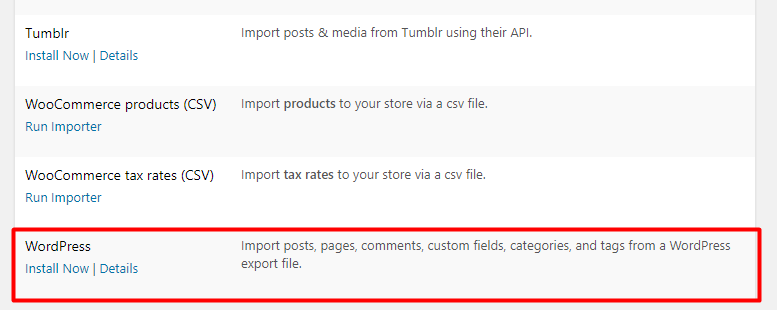
– Step 2: After clicking Install Now button, you should activate plugin by clicking Activate Plugin & Run Importer.

– Step 3: After that, you will be taken to the import page. This is where you upload the XML file which will be found in Barber folder / import/ to import data.

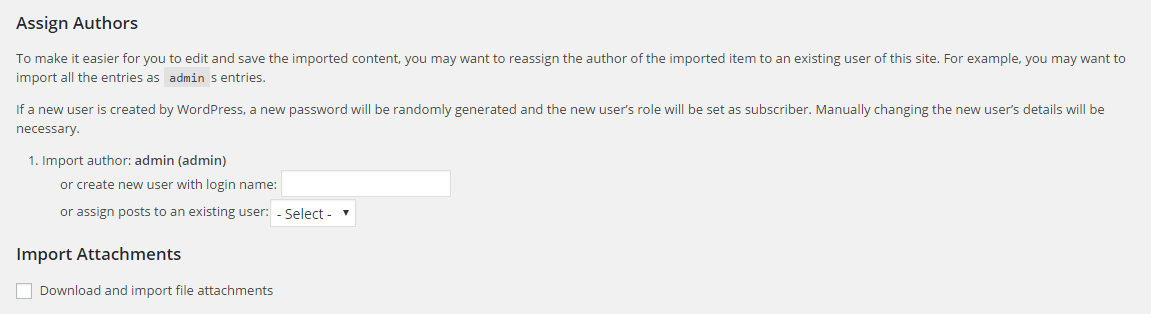
– Step 4: You will then be given the option to assign imported authors to exist authors on your website or create a new account for each author’s posts. Also, there is an option for you to download attachments. If you select this, WordPress will attempt to import all of the images that are attached to the posts and pages you are importing.
- Import Slider Revolution
Remember to install and active Slider Revolution plugin.
– Step 1: Navigate to Slider Revolution in admin sidebar and click Import Slider button.
– Step 2: Click Choose File and select slider import file which placed in import/slider revolution folder. After that, you should select “Import Slider” button.
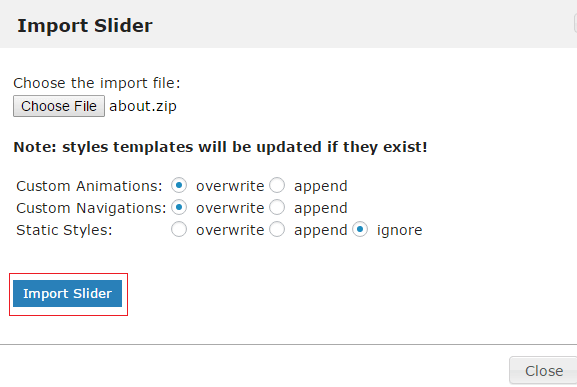
– Step 3: After the process of importing slider finish successfully, you will be redirected to Slider Revolution page.
You can see Slider Revolution Documentation for detail guide.
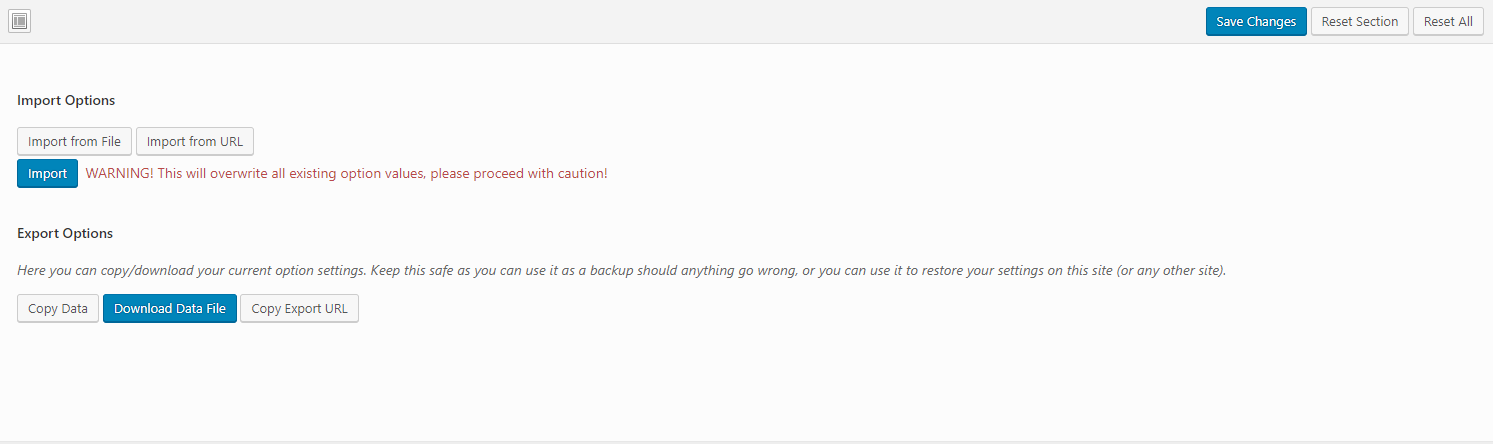
- Import Theme Options
Note: This will overwrite all existing option values, please proceed with caution!
After extract zip package of Barber theme, you can navigate to Theme Options > Import/Export to import Barber Options.
– Step 1: Navigate to Barber Options in admin sidebar and click Import/Export button.
– Step 2: Click Import from File and input path of import file in Import folder. Note: There are 4 import files for each demo. Make sure to use right file before importing. After that, you should select “Import” button.