1. Configuration
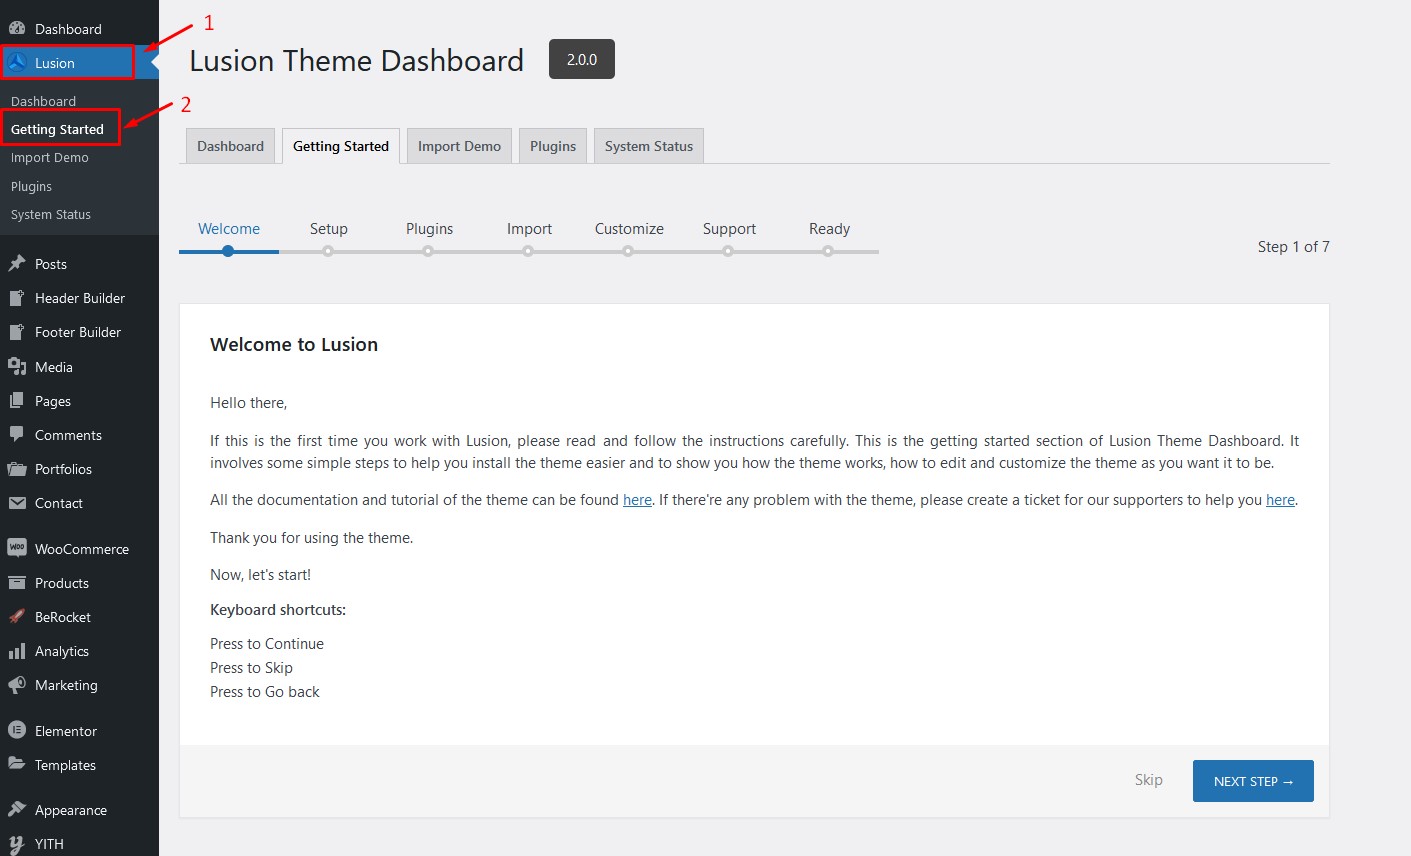
Once you successfully install and activate Lusion theme, Lusion Dashboard will be added to your WordPress menu. Now you can get started to set up your site with Lusion. You will walk through the following steps:
- Name your website and site description
- Install and activate required and recommended plugins
- Import Demo Content
- Sign in your Envato account to get updates
- Customize your site
- Get support resources
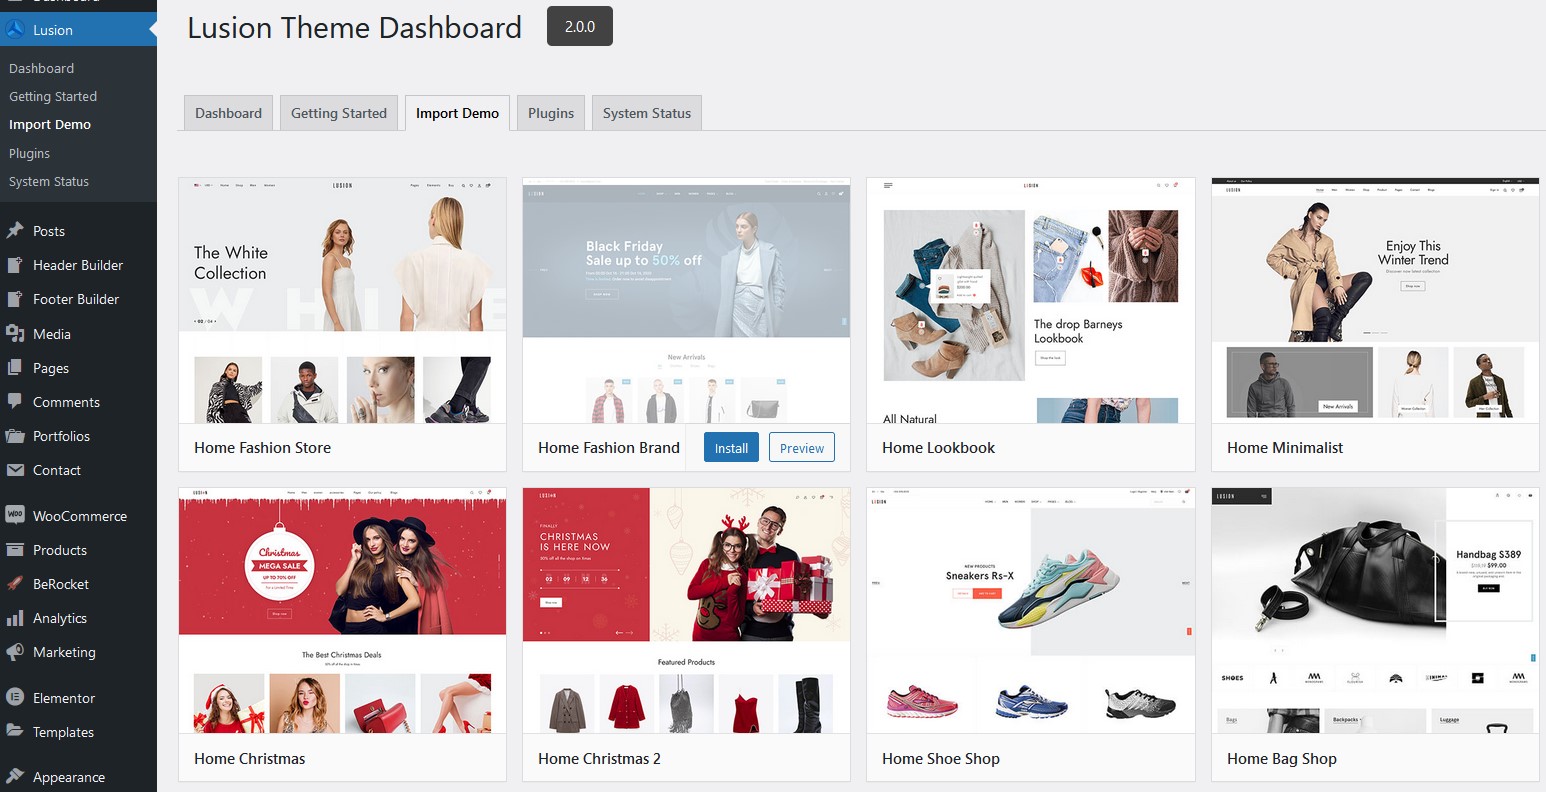
2. Import demo
ArrowTheme Core is a required plugin for the Lusion theme. This plugin is a demo importer that imports all posts/pages, sample sliders, widgets, customization, and more.
Follow these steps below to import demo via ArrowTheme Core:
- Visit Dashboard > Lusion > Import Demo
- Hover on the demo you want and click Install
The importing process may take up to 3 minutes.
3. Plugin Configuration
- Elementor
You can see here for more details.
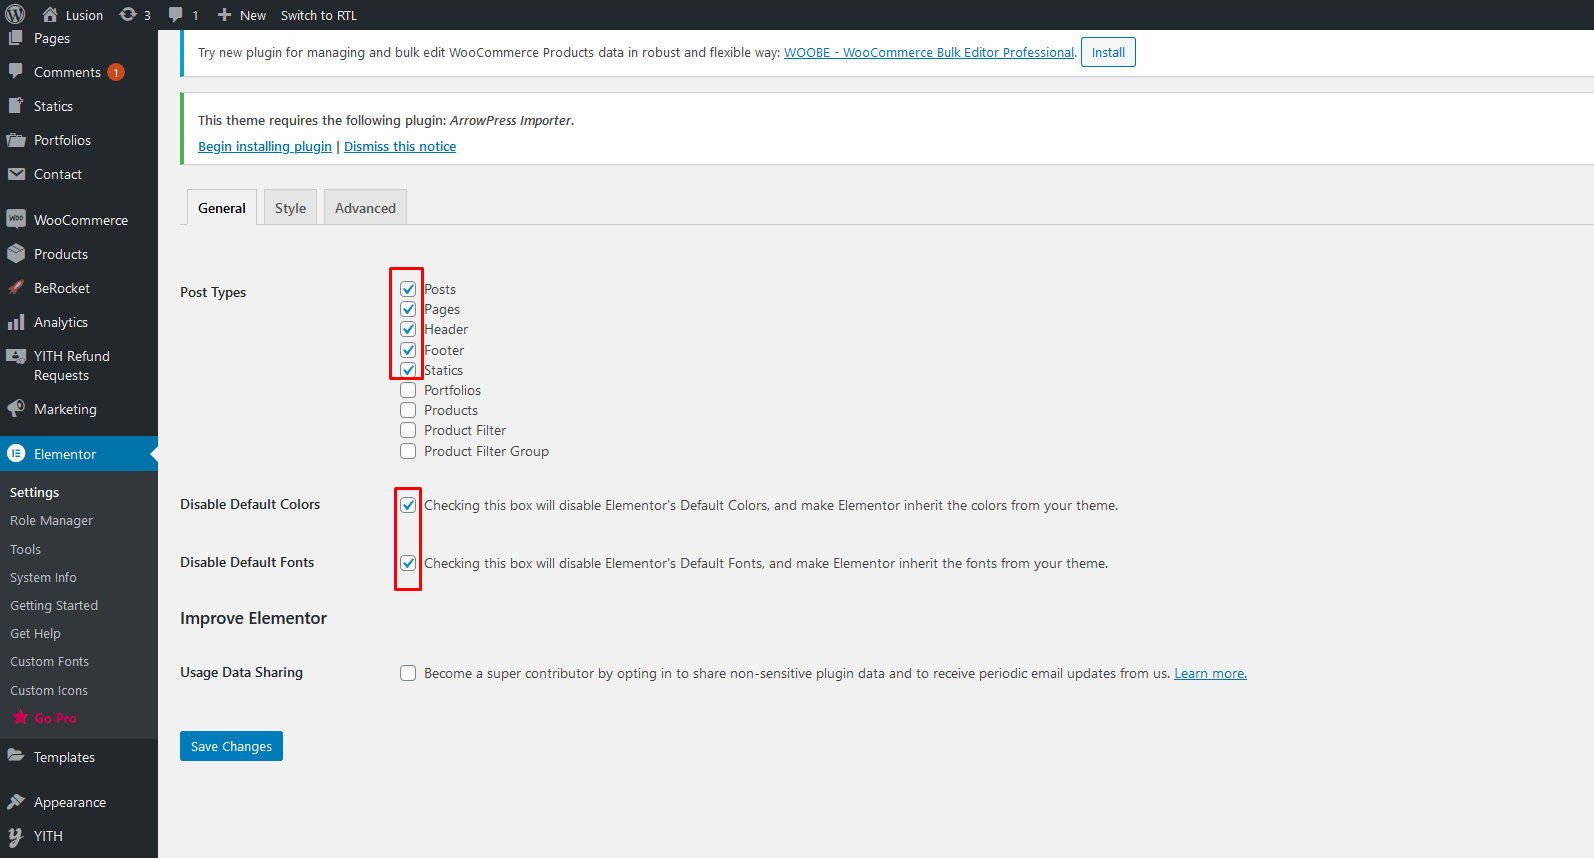
– After installing the Elementor, please go to Elementor > Settings. In the post types field, you should check all post type as the screenshot below.
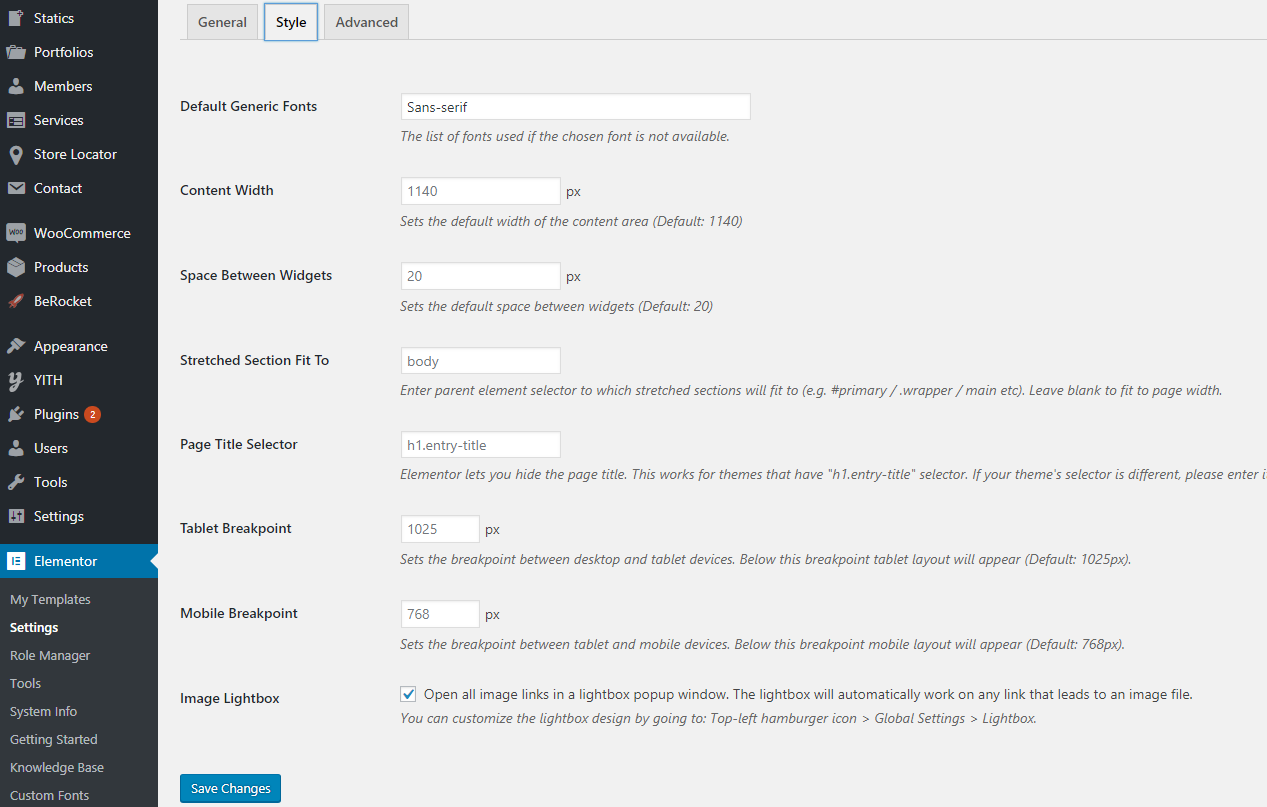
– Easily apply a Style to every page of your site automatically using the drag and drop editor. You can apply style as the screenshot below
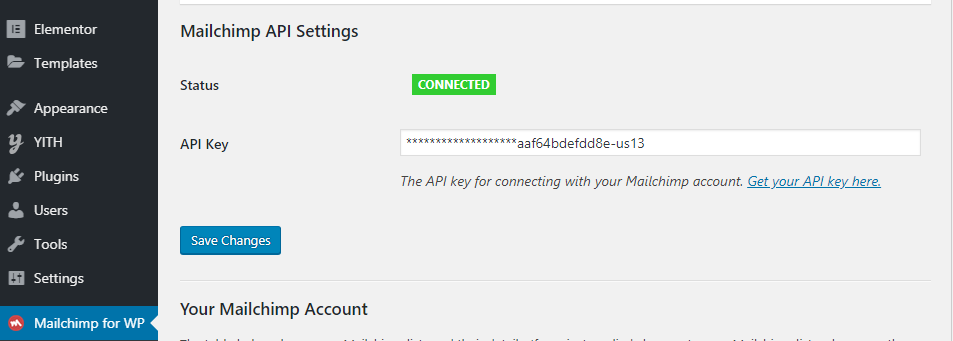
- MailChimp for WP
Go to MailChimp for WP > MailChimp to access general setting page of MailChimp. You should connect to your MailChimp account by entering API Key.
After that, navigate to MailChimp for WP > Forms and create a form with the content below:
< input type="email" name="EMAIL" placeholder="Type your email" required />
<input type="submit" value="Subscribe" />
If a MailChimp form is already existed, you can do nothing or change the form content and click Save changes to display the form in the front end.
For detail instruction, please click MailChimp for WP.
- Contact Form
Go to Contact > Form and create the form you want or edit existing form.
When you want to add a form which displays the same as in our demo site, you should change the content of the contact form in Contact > Form so the form can have a similar style. After changing form content, you can adjust the text or the field to what you want.
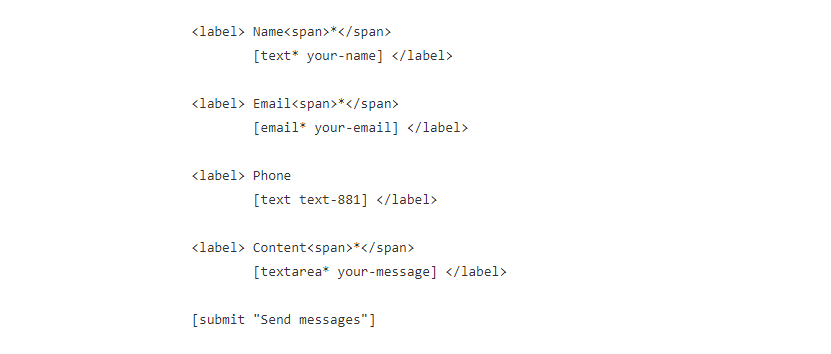
Below is the contact form content we used in our demo site. Each form can have a different style based on the content in the contact form. If you import demo content successfully, you can skip this step.
– Contact form in Contact Us
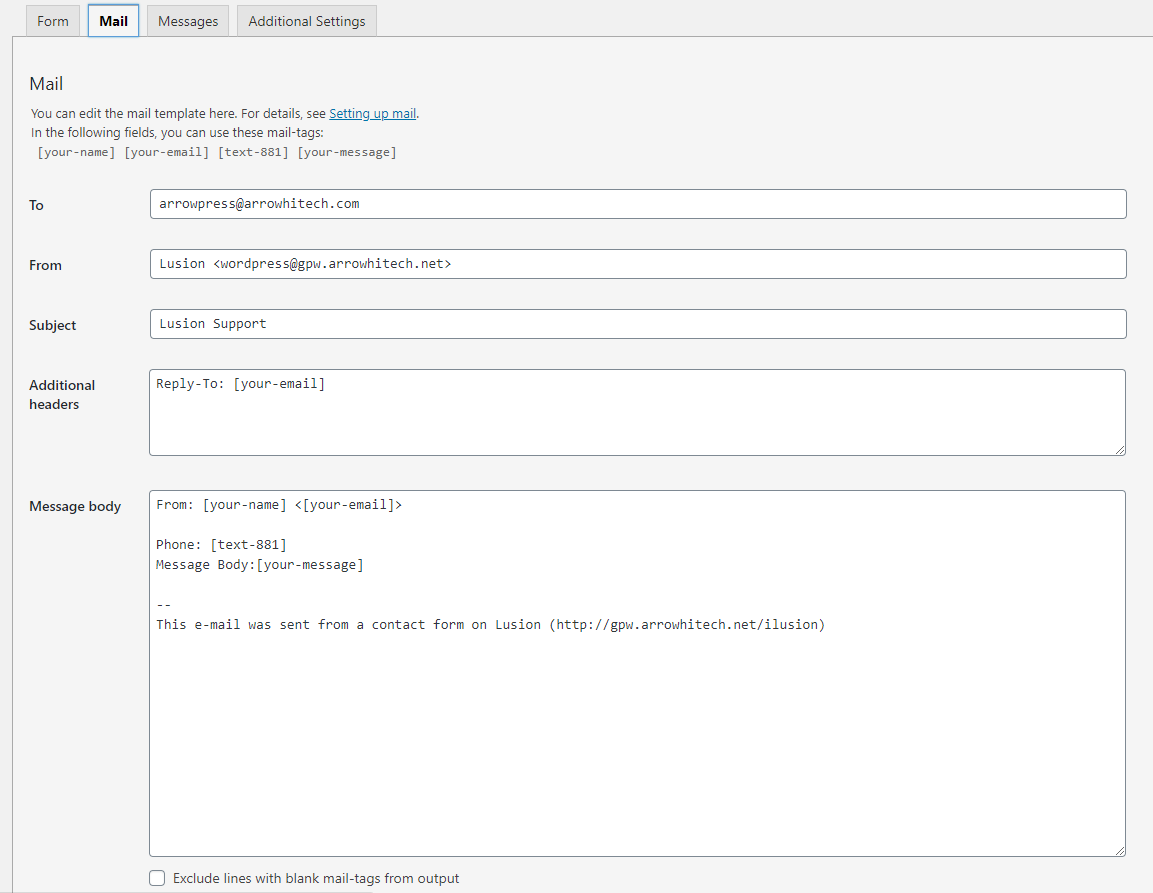
After that, you need to set up Mail tab. Please see this guide for more details. Mail setting
- Woocommerce
WooCommerce is the most popular WordPress eCommerce plugin. Packed full of features, perfectly integrated into your self-hosted WordPress website.
You can see here for more details and woocommerce documentation.
Plugin Advanced AJAX Product Filters
Go to BeRocket > Product Filters to access general setting of BeRocket
After that, in tab JavaScript/CSS, you must add js:
jQuery(".bapf_stylecolor .bapf_head h3").append('<span class="theme-icon theme-icon-upload"></span>');
var $title_color = jQuery(".bapf_stylecolor .bapf_head h3 "); var $div_color = jQuery(".bapf_stylecolor .bapf_body"); $div_color.addClass('open_color'); $title_color.click(function () { $div_color.slideUp(); if ($div_color.hasClass('open_color')) { $div_color.removeClass('open_color'); $div_color.addClass('remove_color'); $title_color.append('<span class= "theme-icon theme-icon-upload"></span>'); $title_color.css('margin-bottom', '10px'); jQuery(this).find('span.theme-icon').remove(); jQuery(this).append('<span class= "theme-icon theme-icon-download"> </span>'); } else { $div_color.slideDown(); $div_color.removeClass('remove_color'); $div_color.addClass('open_color'); jQuery(this).find('span.theme-icon').remove(); jQuery(this).append('<span class= "theme-icon theme-icon-upload"></span>'); $title_color.css('margin-bottom', '27px'); } }); var $rtl = false; if (lusion_params.lusion_rtl == 'yes') { $rtl = true; } var wdw = jQuery(window).width(); jQuery(window).resize(function () { var li = jQuery('.woocommerce ul.products.columns-2 li.product'); for (var i = 0; i < li.length; i++) { var widthPrice = jQuery('.' + jQuery(li[i].className.trim().replace(/\s+/g, '.') + ' .product-desc .product-price .top-desc span.price').selector).width() + 15; if (wdw > 1024) { if ($rtl == false) { jQuery('.' + li[i].className.trim().replace(/\s+/g, '.') + ' .product-desc .woocommerce-loop-product__title').css('padding-right', widthPrice + 'px'); } else { jQuery('.' + li[i].className.trim().replace(/\s+/g, '.') + ' .product-desc .woocommerce-loop-product__title').css('padding-left', widthPrice + 'px'); } } else { if ($rtl == false) { jQuery('.' + li[i].className.trim().replace(/\s+/g, '.') + ' .product-desc .woocommerce-loop-product__title').css('padding-right', '0px'); } else { jQuery('.' + li[i].className.trim().replace(/\s+/g, '.') + ' .product-desc .woocommerce-loop-product__title').css('padding-left', '0px'); } } } }); var li = jQuery('.woocommerce ul.products.columns-2 li.product'); for (var i = 0; i < li.length; i++) { var widthPrice = jQuery('.' + jQuery(li[i].className.trim().replace(/\s+/g, '.') + ' .product-desc .product-price .top-desc span.price').selector).width() + 15; if (wdw > 1024) { if ($rtl == false) { jQuery('.' + li[i].className.trim().replace(/\s+/g, '.') + ' .product-desc .woocommerce-loop-product__title').css('padding-right', widthPrice + 'px'); } else { jQuery('.' + li[i].className.trim().replace(/\s+/g, '.') + ' .product-desc .woocommerce-loop-product__title').css('padding-left', widthPrice + 'px'); } } else { if ($rtl == false) { jQuery('.' + li[i].className.trim().replace(/\s+/g, '.') + ' .product-desc .woocommerce-loop-product__title').css('padding-right', '0px'); } else { jQuery('.' + li[i].className.trim().replace(/\s+/g, '.') + ' .product-desc .woocommerce-loop-product__title').css('padding-left', '0px'); } } } //Woocommerce pagination jQuery('.woocommerce-pagination ul.page-numbers li a').each(function () { var woocommerce_pagination = jQuery(this).attr('href'); if(woocommerce_pagination == '#'){ jQuery(this).css({'pointer-events':'none','opacity':'0.5'}); } });
After that, in tab Selectors, you must add class:

– Change Image Sizes
You can change the product image sizes in Appearance > Customizer > Woocommerce > Product Image on admin sidebar.
– Product image in Shop page: You could change Thumbnail width
– Product image in single product page: You could change Main Image width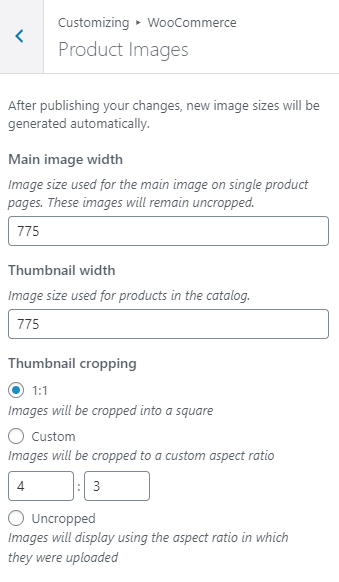
– Change Product Catalog
You can change the product catalog in Appearance > Customizer > Woocommerce > Product Catalog on admin sidebar.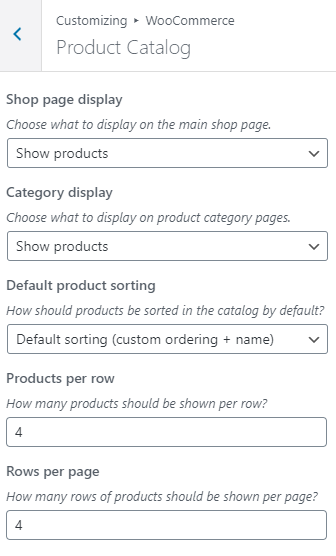
– Enable store notice
Navigate to Appearance > Customizer > Woocommerce > Store Notice, check the box Enable store notice
You can change text in this field
– Change Checkout
You can change the product catalog in Appearance > Customizer > Woocommerce > Checkout on admin sidebar.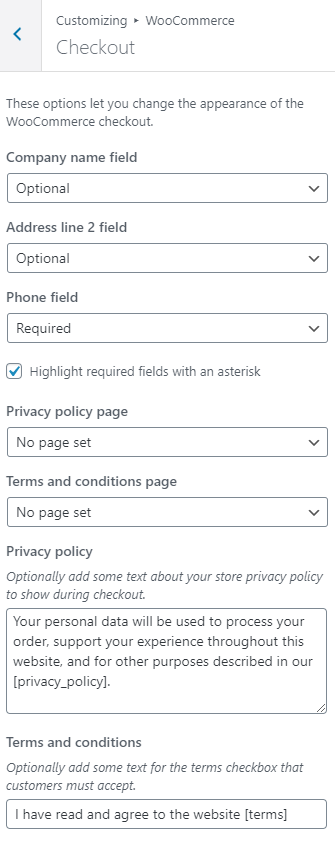
– Enable registration in My Account page
Navigate to Woocommerce > Settings > Accounts, check the box Enable registration on the “My Account” page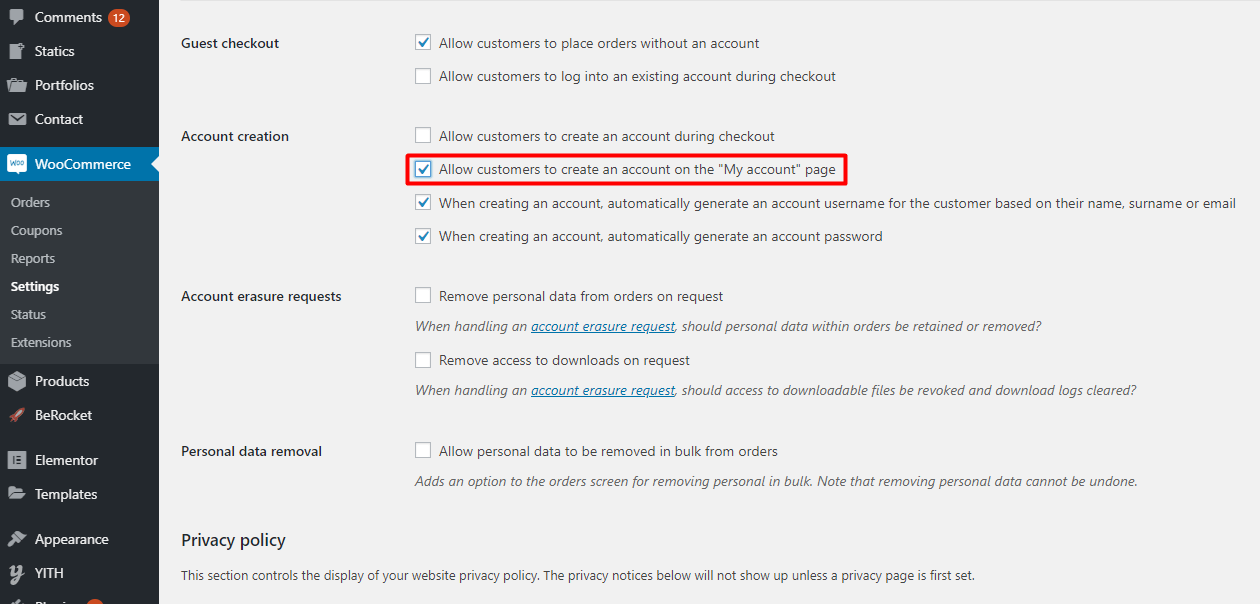
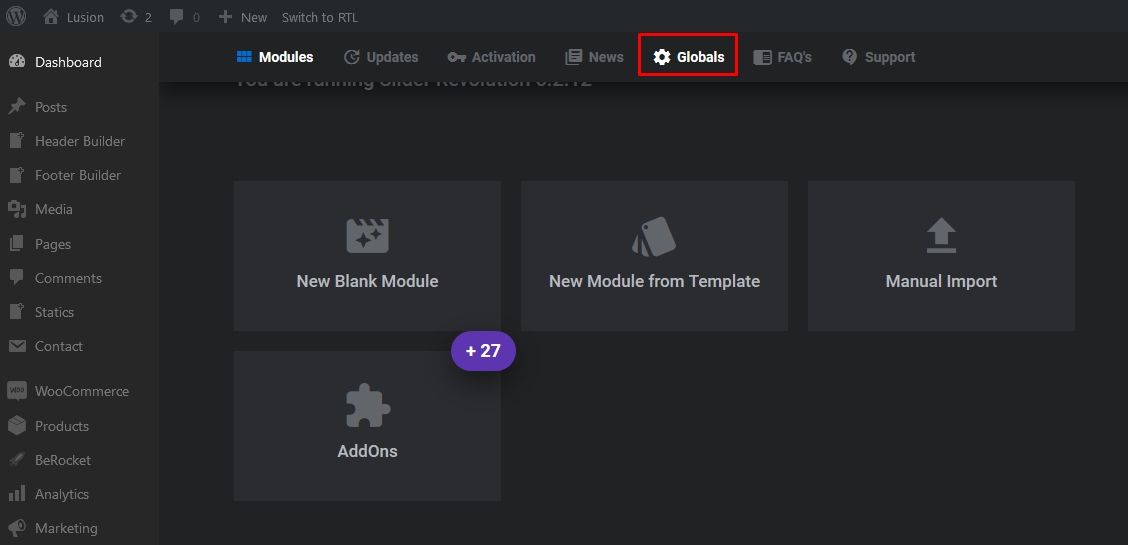
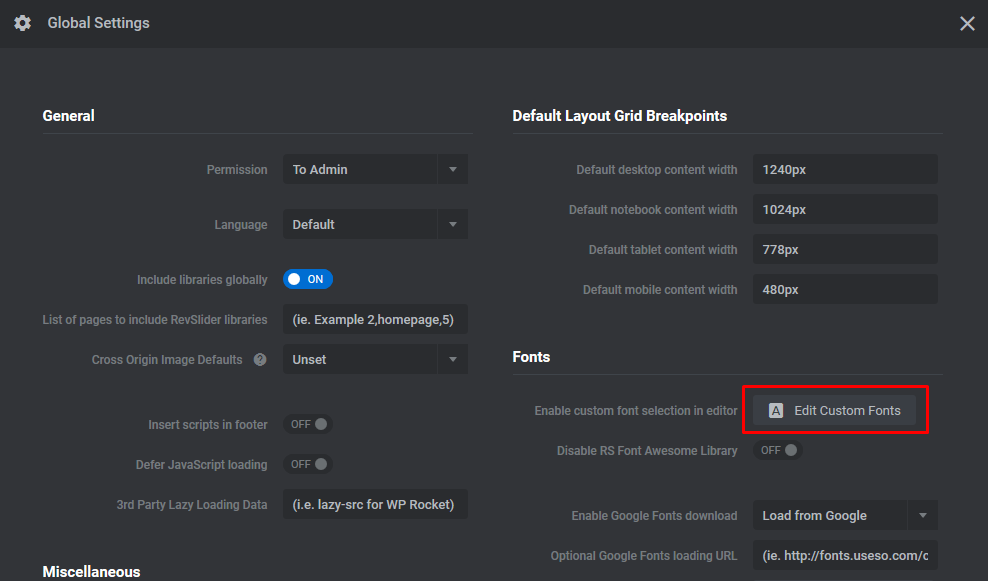
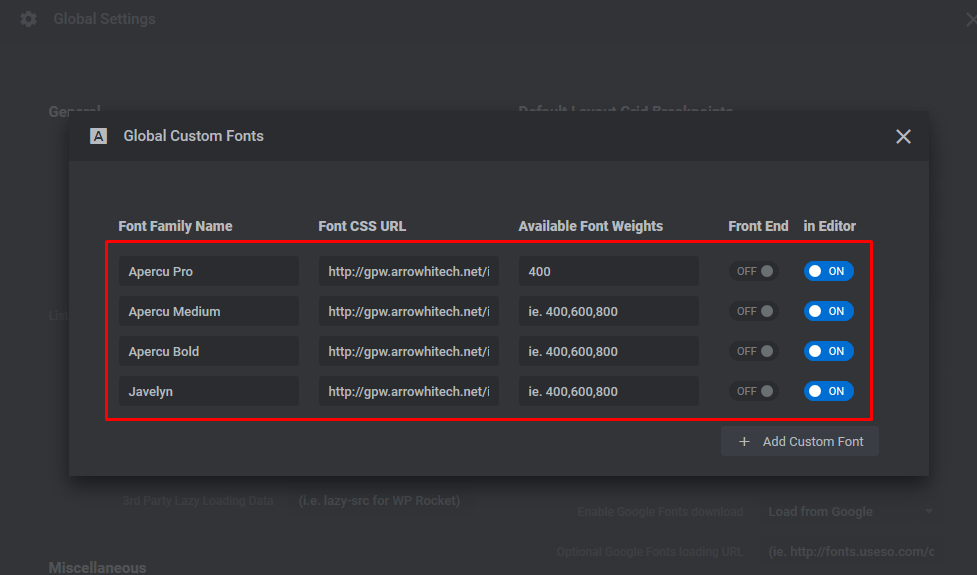
4. Revolution Slider Configuration
Configuration custom font.
You can download webfonts. Then, You need to unzip folder and upload fonts in wp-content\webfonts.
You can go to Revolution Slider -> Globals -> Edit Custom Font -> Add font name and font css URL
For example: font css URL:https://demo.arrowtheme.com/lusion-sample/wp-content/webfonts/stylesheet.css