1. Create Blog Posts
Aki support several post formats such as: Video, blockquote, link, audio, gallery.
Step 1 – Navigate to Posts in your WordPress admin sidebar.
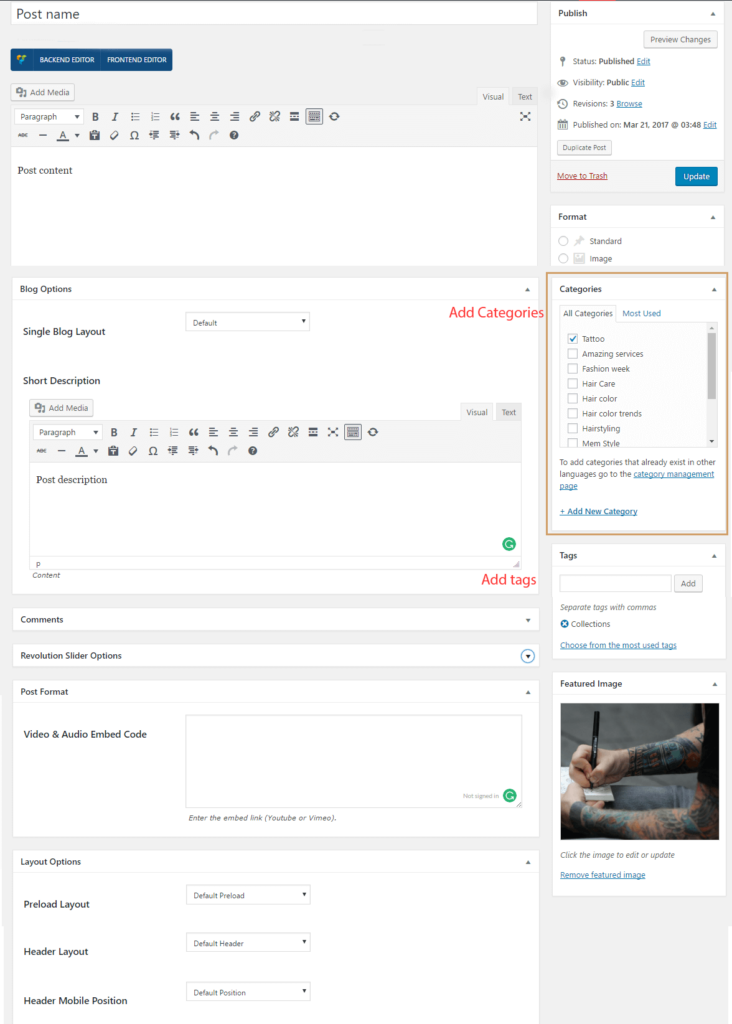
Step 2 – Click on the Add New option to make a new post. Create a title, and insert your post content in the editing field.
Step 3 – Add Categories from the right side. To assign it to the post, check the box next to the Category name.
Step 4 – Add Tags from the right side. Type the name of the tag in the field, separate multiple tags with commas.
Step 5 – Click the first Featured Image Box, select an image and click the Set Featured Image button.
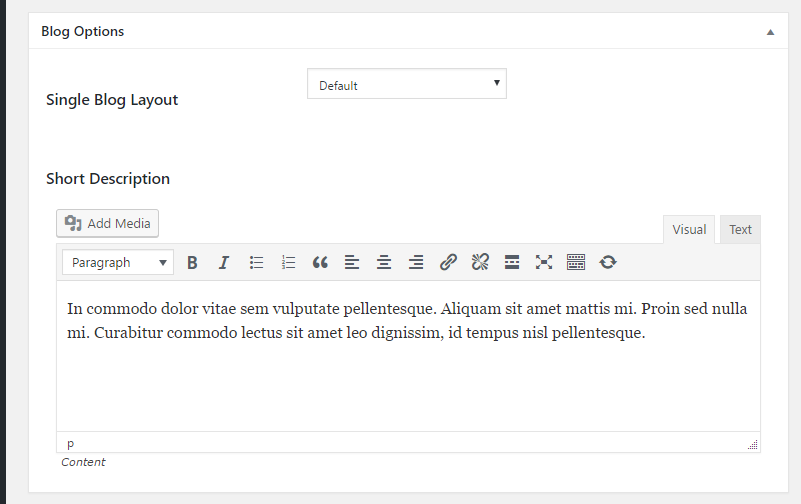
Step 6 – Add content for “Short description” and select single blog layouts in Blog Options. The “Short description” content will display as the summary in blog list.
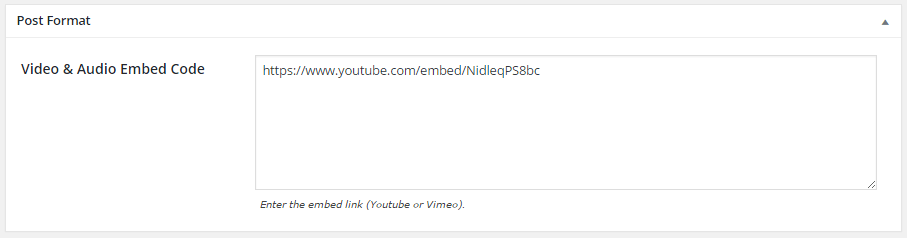
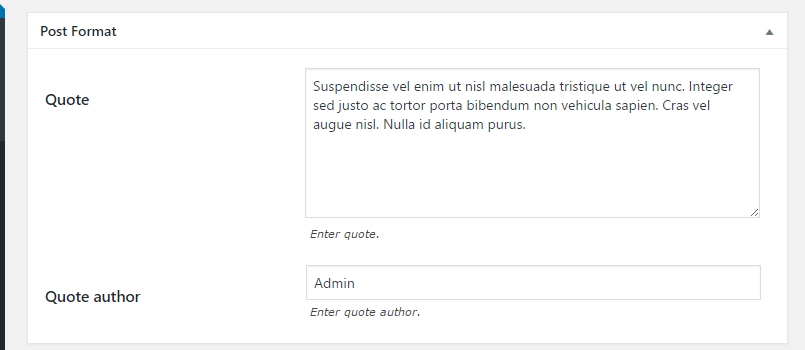
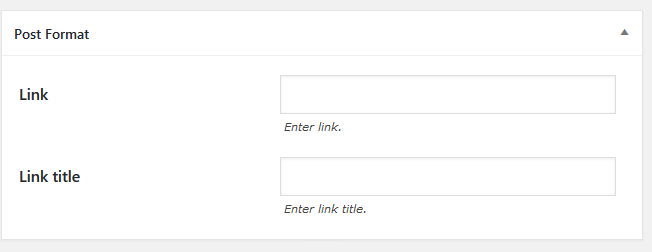
Step 7 – Select Post Format and enter suitable content for post format in Post Format box.

– Video and audio format: you will need to enter embed link of youtube, vimeo or soundcloud or paste the iFrame embed from either Youtube or Vimeo into the Video Embed Code field in Video & Audio Embed Code.
– Gallery format: If you choose Gallery format, you will see Image Gallery box display in the right of page. Image in gallery will be shown as slider.

– Blockquote format: If you choose Blockquote format, you will need enter quote and quote author
– Link format: For Link format, you will need enter title and link
Step 8 – Select options in Layout Options box.
Step 9 – Once you are finished, click Publish to save the post.
2. Create Gallery
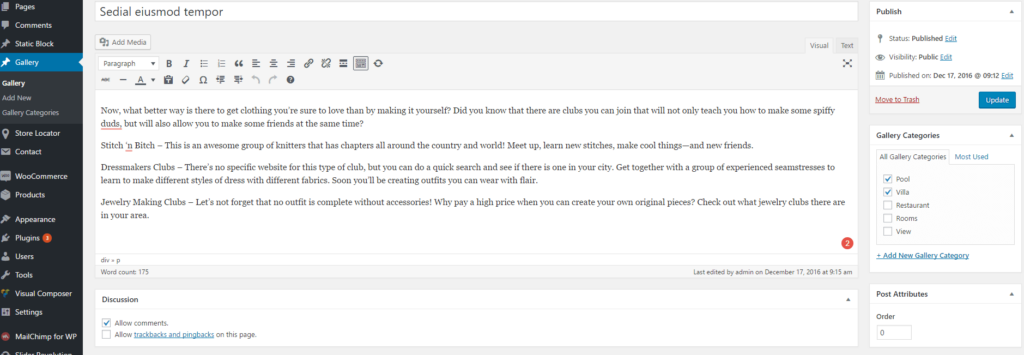
Step 1 – Navigate to Gallery in your WordPress admin sidebar. Click Add New to make a new post.
Step 2 – Enter title.
Step 3 – Insert your post content in the editing field.
Step 4 – Add Categories from the right side. To assign it to the post, check the box next to the category name.
Step 5 – Add Featured Image. In order to add featured image for your post, click the first Featured Image Box, select an image and click the Set Featured Image button.
You should use big size image (min width and height is 1230px) for featured image so it can crop image size and work perfectly with each gallery layout.

Step 6 – Adding gallery image.

Step 7 – Select options in Layout Options box.

Step 8 – Once you are finished, click Publish or Update in the right side to save the post.
3. Create a static block content
In order to add or edit static block content, you can follow these basic steps below.
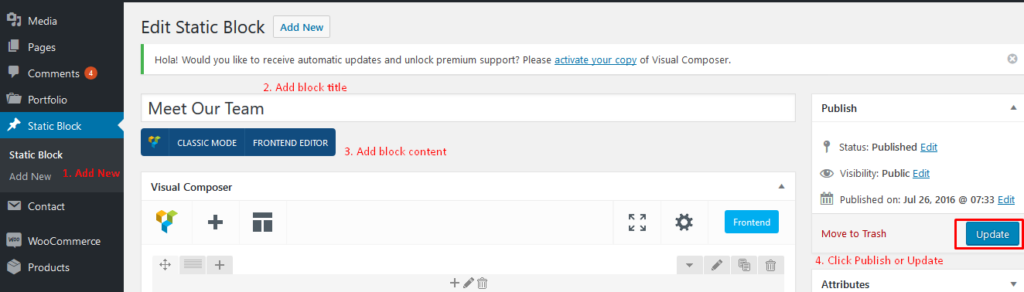
Step 1 – Navigate to Static Block in your WordPress admin sidebar. Click Add new if you want to create new, otherwise, click Static Block and select post if you want to edit.
Step 2 – Enter title
Step 3 – Enter content. You can use Visual Composer to add shortcode to content.
Make sure to enable Visual Composer for static block in Visual Composer > Role Manager > check the box “block”. Please see Plugin Configuration > Visual Composer.
Step 4 – Once you are finished, click Publish or Update in the right side to save changes.
4. Create a page
You can use Visual Composer to add shortcode into page content. For detail option of each Aki shortcode, please see Shortcode section.
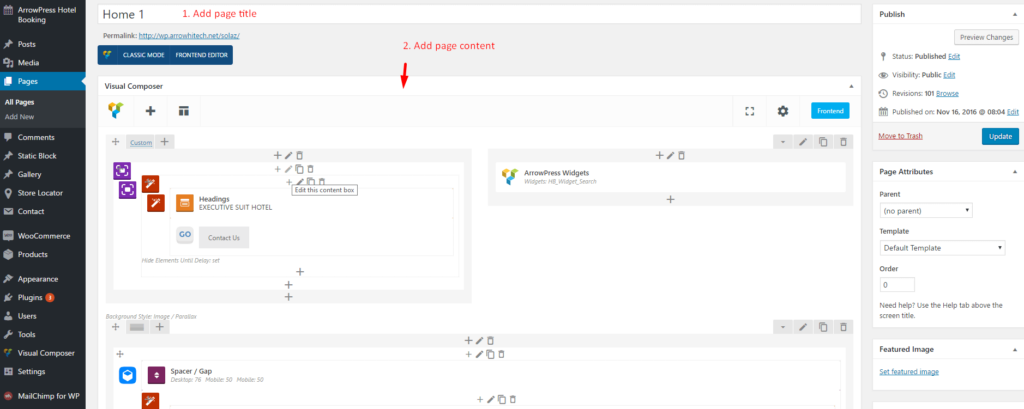
1. Step 1 – Navigate to Pages in your WordPress admin sidebar. Click Add new if you want to create new, otherwise, click All Pages and select post if you want to edit.
2. Step 2 – Enter page title
3. Step 3 – Enter content. You can use Visual Composer to add shortcode to content. Make sure to enable Visual Composer for page. Please see Plugin Configuration > Visual Composer for more detail.
4. Step 5 Select options in Layout Options.
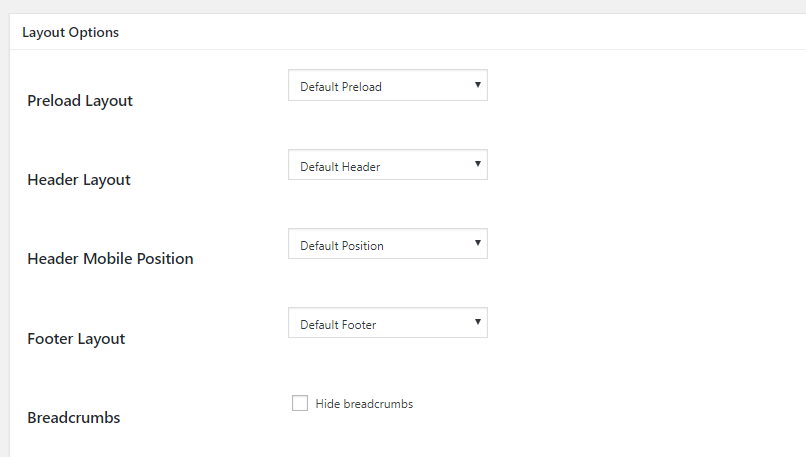
Note: Header and Footer selection in Layout Options will have higher priority than General Theme Options.
5. Step 5 – Once you are finished, click Publish or Update in the right side to save changes.
5. Set Up Coming Soon Page
1. Navigate to Theme Options > Coming Soon and change the title, content and select the options to what you want.
2. Go to Pages > Add New
3. Add page title and select page template: Coming Soon.

4. Click Publish.
5. Go to Settings > Reading and set coming soon page is the homepage.
6. Create Page with fixed header
1. Create or edit a page in Pages. Go to Pages > Add new to create new page.
2. Scroll down until you see Skin Options box.
3. Check the box Header fixed.
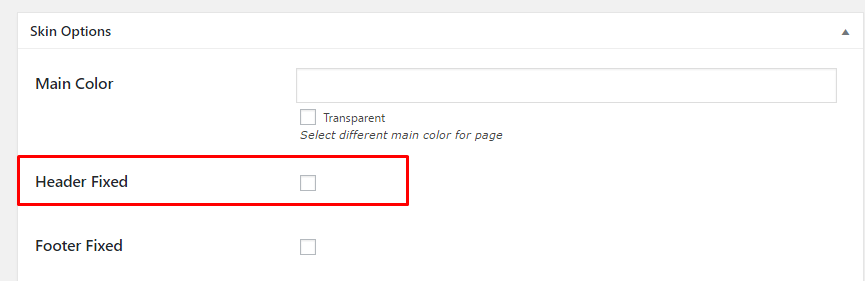
4. Click Publish or Update.
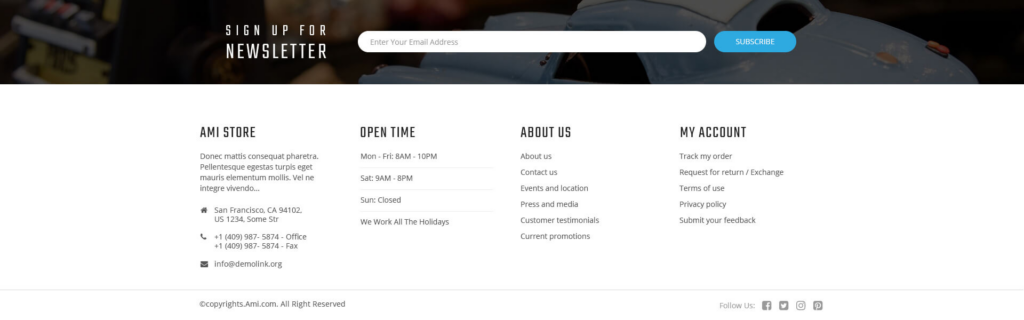
7. Change footer content
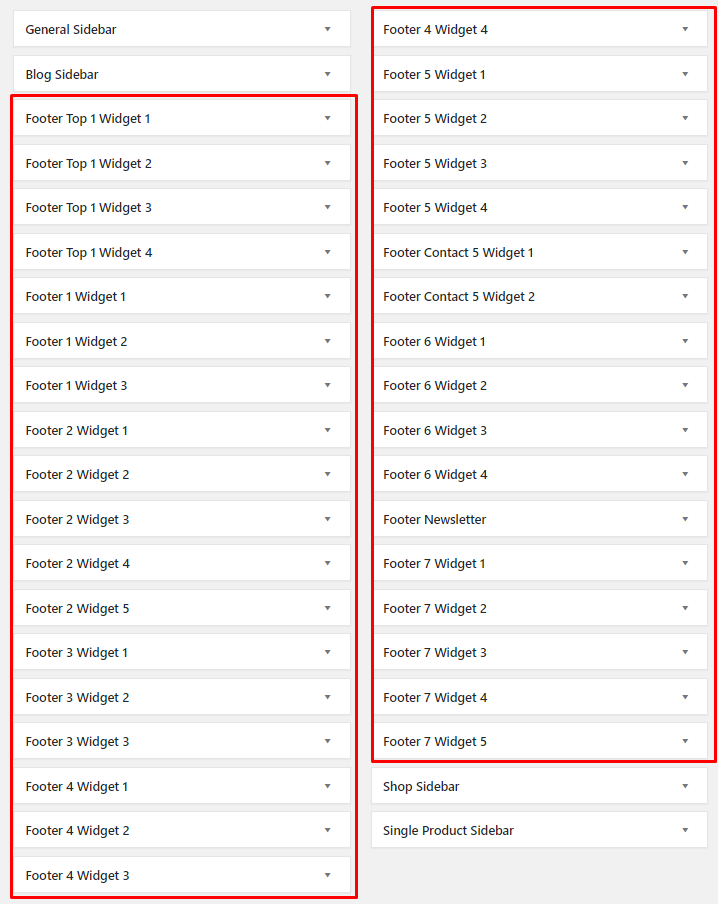
You can change almost content in footer in Theme Options > Footer > select footer you use and Appearance > Widget. Go to Appeareance > Widget, you can find footer sidebar for each footer. Below will be detail guide for each footer type.
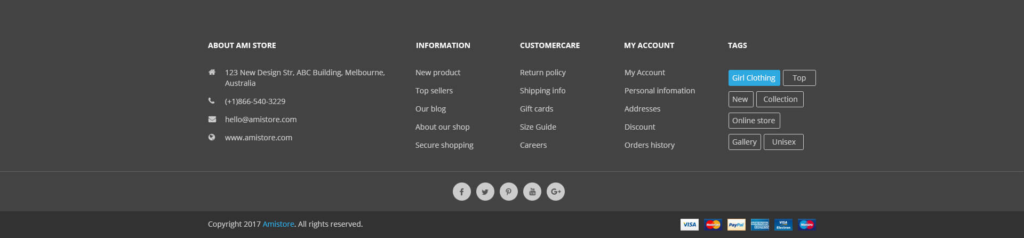
1. Footer 1:
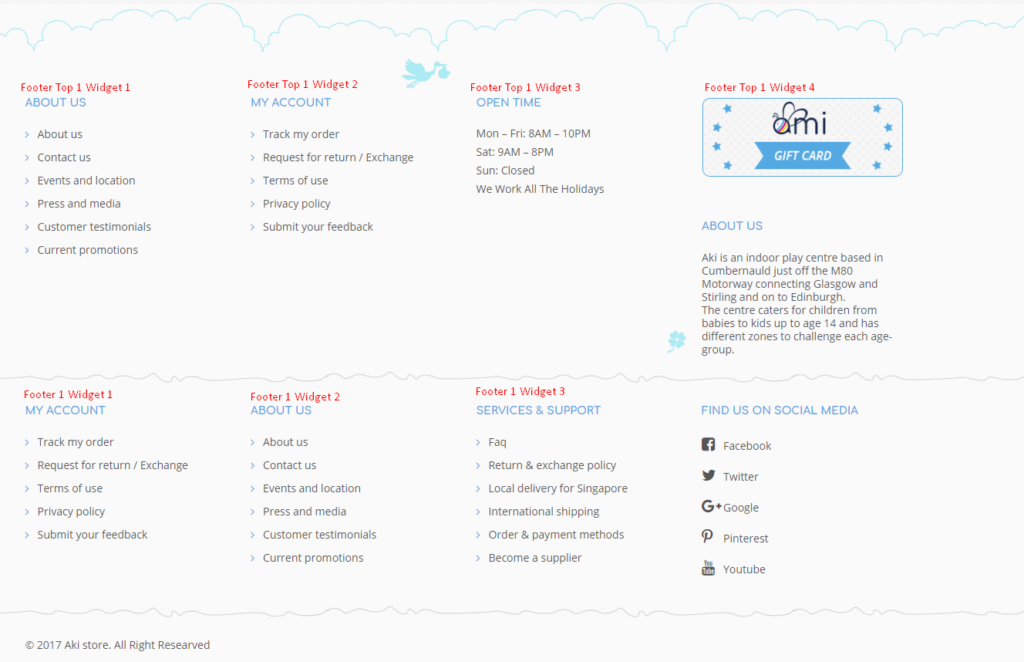
To change the content, you should go to Appearance > Widget and edit widgets in footer sidebar.

2. Footer 2:
3. Footer 3:
– Changing footer info.
- Go to Theme Options > footer > select footer 3.
- Change footer description
- Click Save Changes
– Changing footer content in footer sidebar.
- Go to Appearance > Widget.
- Change the content of Footer 3 widget 1,2,3. You can add other widget to footer sidebar or edit existing widget in sidebar.
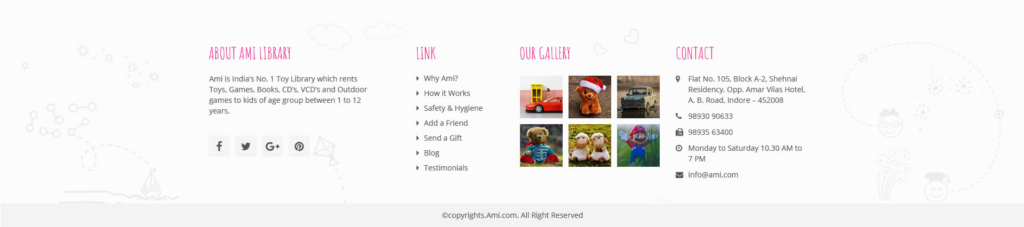
4. Footer 4:
– Changing footer content in footer sidebar.
- Go to Appearance > Widget.
- Change the content of Footer 4 widget 1,2,3,4. You can add other widget to footer sidebar or edit existing widget in sidebar.
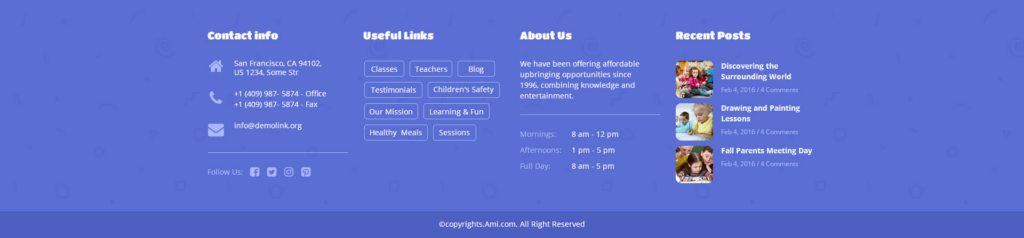
5. Footer 5:
– Changing footer content in footer sidebar.
- Go to Appearance > Widget.
- Change the content of Footer 5 widget 1,2,3,4. You can add other widget to footer sidebar or edit existing widget in sidebar
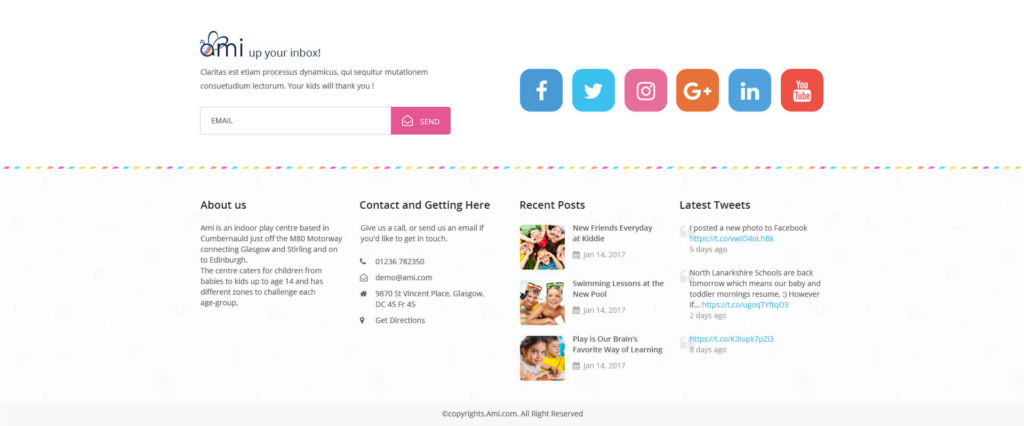
6. Footer 6:
– Changing footer content in footer sidebar.
- Go to Appearance > Widget.
- Change the content of Footer 6 widget 1,2,3,4. You can add other widget to footer sidebar or edit existing widget in sidebar.