Install plugins
In order to use the theme, you should install and activate all required plugins such as ArrowTheme Core, Easy Appointments, Elementor, Kirki Toolkit. All other plugins which recommended, it ups to you whether to use it or not. For example, if you don’t want to use Shop features, you can deactivate and delete all WooCommerce plugins.

– First method
Install plugins via installing plugins message.After installing and activating the theme you will see the message about installing required plugins at the top of the page.
You should click Begin installing plugins link or go to Appearance > Install Plugins in order to install needed plugins for ArrowIT theme.

You will be redirected to Install Required Plugins page, here you will find all of the theme required plugins. In order to install these plugins, you just need to check all of them and select install then click apply. It will need to a while to install plugins successfully.
When the installation process is done, you can click Return to Required Plugins Installer and select active then check all plugins to active these plugins.

– Second method
Install plugins via WordPress Admin Panel.
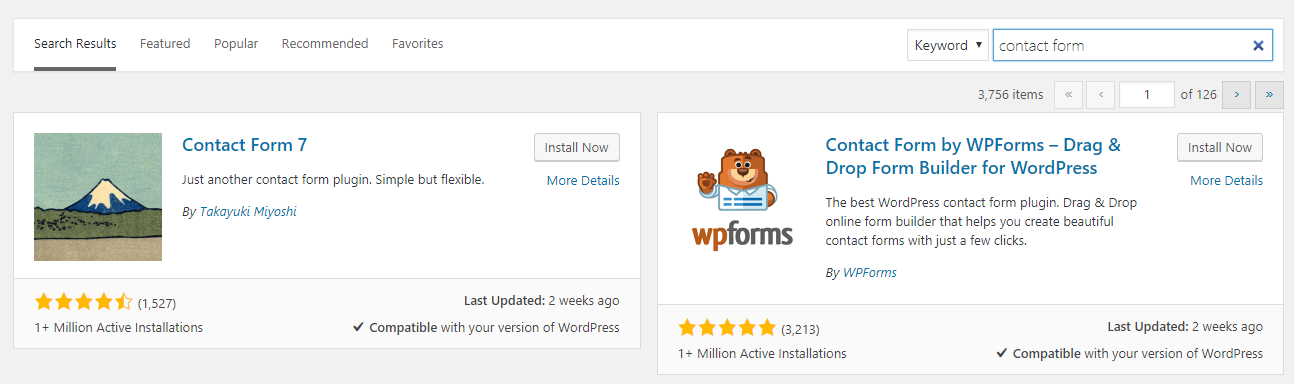
Besides, you can install some plugins which available in wordpress.org by navigating Plugins > Add New in admin sidebar. You should enter plugin name to search plugin and click “Install Now” to install the plugin you want. After that, click “Active” button to start using that plugin.

– Third method
Install plugins manually (Via FTP)
If you want to manually install plugins, you can follow some basic steps below.
- Download your WordPress Plugin to your desktop and extract plugin folder if it is a zip archive.
- With your FTP program, upload the Plugin folder to the wp-content/plugins folder in your WordPress directory online.
- Go to Appearance > Plugins and find the newly uploaded Plugin in the list.
- Click Activate to activate it.
After finishing plugin install, you need to configure the plugins.
Plugin Configuration
Some plugins will need to config setting to use.
You can install some plugins such as Elementor, Kirki Toolkit which available in wordpress.org by navigating Plugins > Add New in admin sidebar. You should enter plugin name to search plugin and click “Install Now” to install the plugin you want. After that, click “Active” button to start using that plugin.
– Elementor
You can see here for more details.
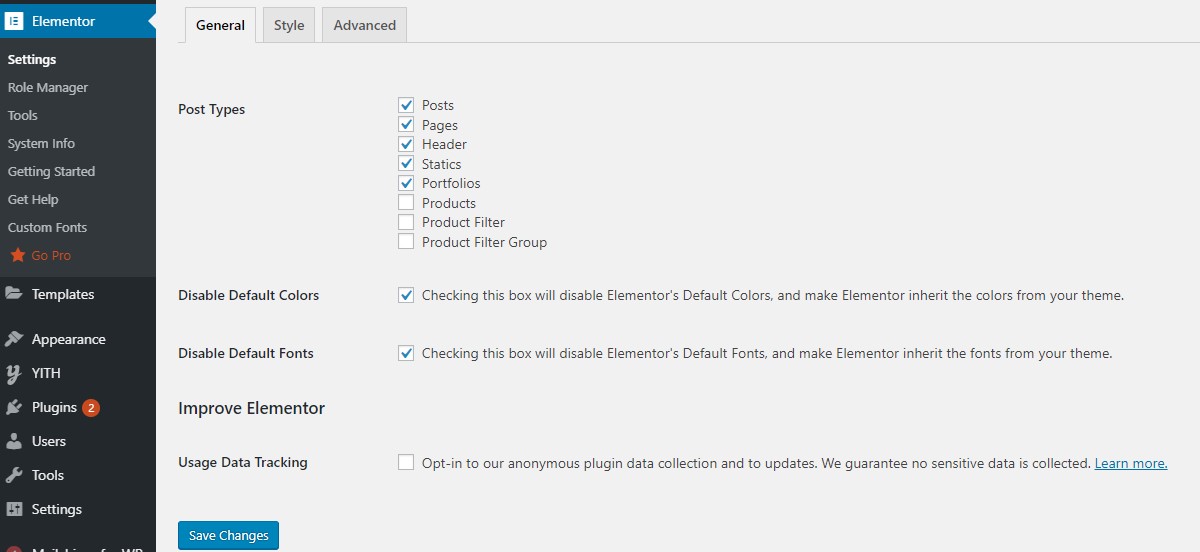
– After installing the Elementor, please go to Elementor > Settings. In the post types field, you should check all post type as the screenshot below.
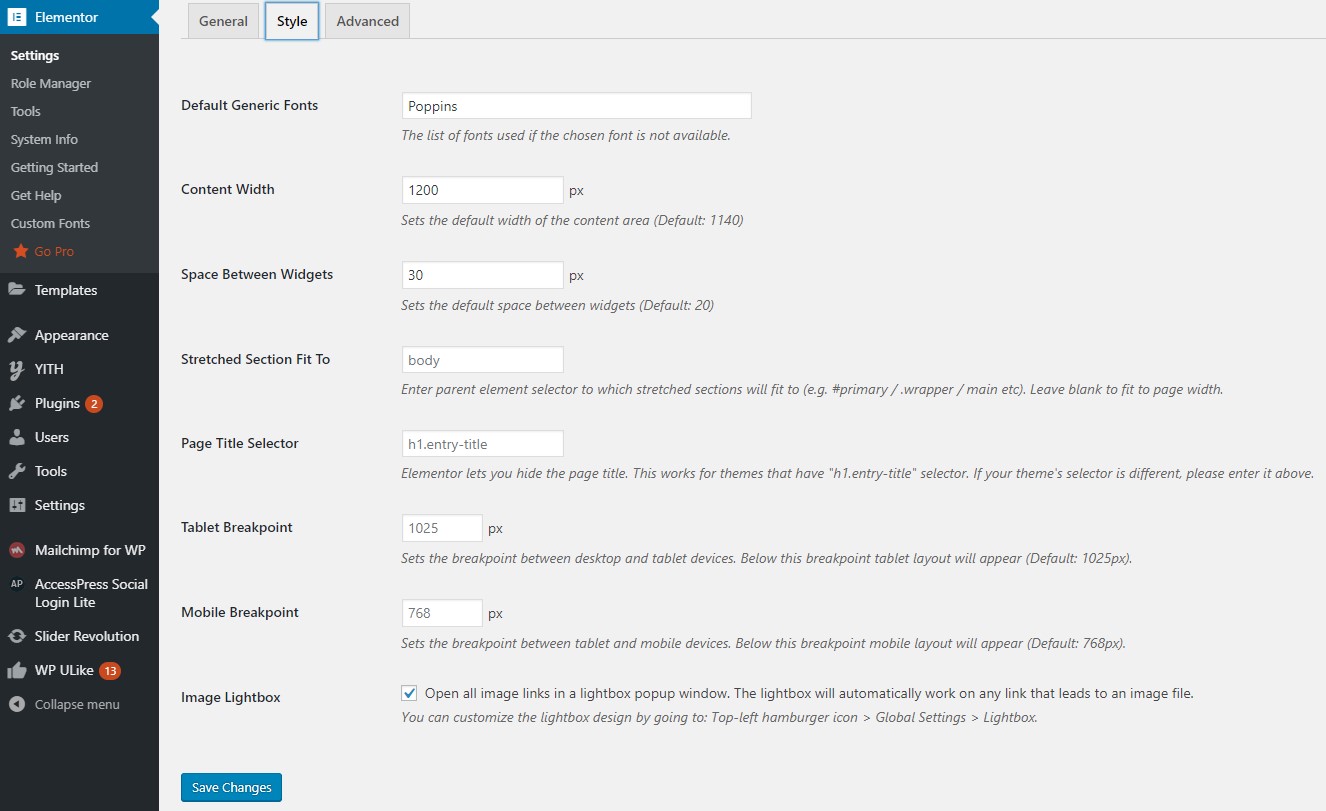
– Easily apply a Style to every page of your site automatically using the drag and drop editor. You can apply style as the screenshot below
– MailChimp for WP
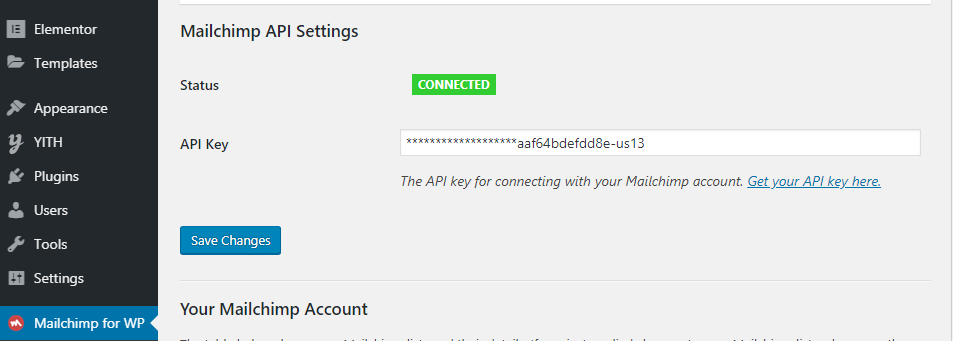
Go to MailChimp for WP > MailChimp to access general setting page of MailChimp. You should connect to your MailChimp account by entering API Key.
After that, navigate to MailChimp for WP > Forms and create a form with the content below content <p class=”form-input email”> <input type=”email” name=”EMAIL” placeholder=”Enter Your Email Address*” required /> </p> <p class=”form-submit submit”> <input type=”submit” value=”Subscribe” /> </p>
If a MailChimp form is already existed, you can do nothing or change the form content and click Save changes to display the form in the front end.
For detail instruction, please click MailChimp for WP.
– Contact Form
Go to Contact > Form and create the form you want or edit existing form.
When you want to add a form which displays the same as in our demo site, you should change the content of the contact form in Contact > Form so the form can have a similar style. After changing form content, you can adjust the text or the field to what you want.
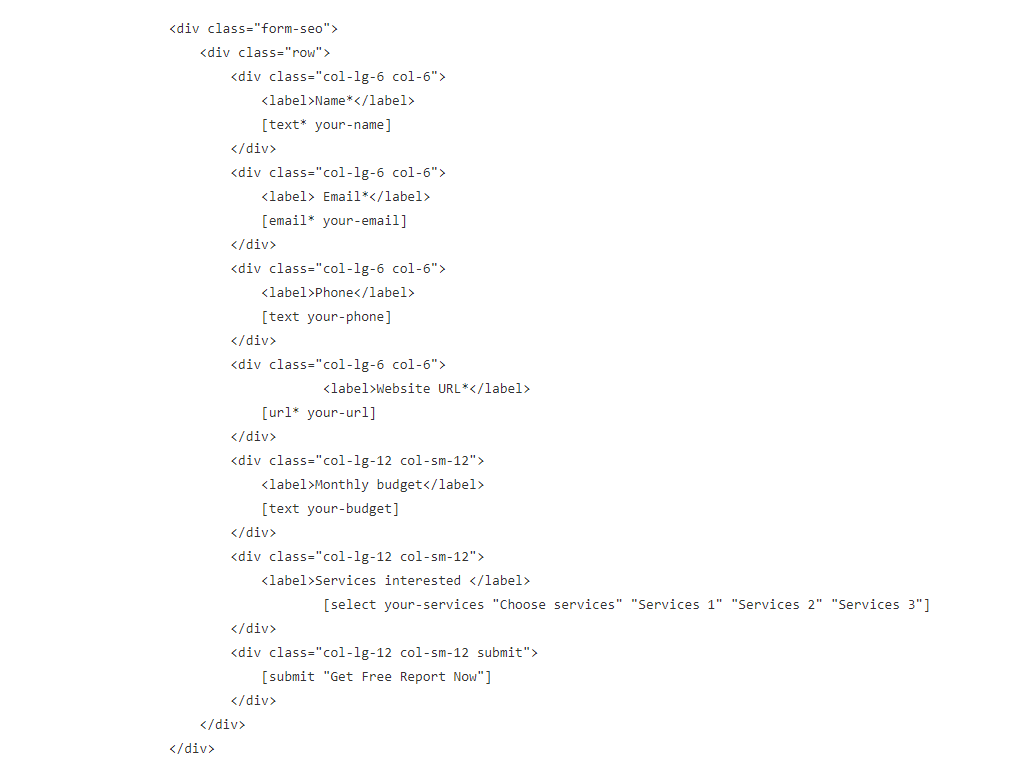
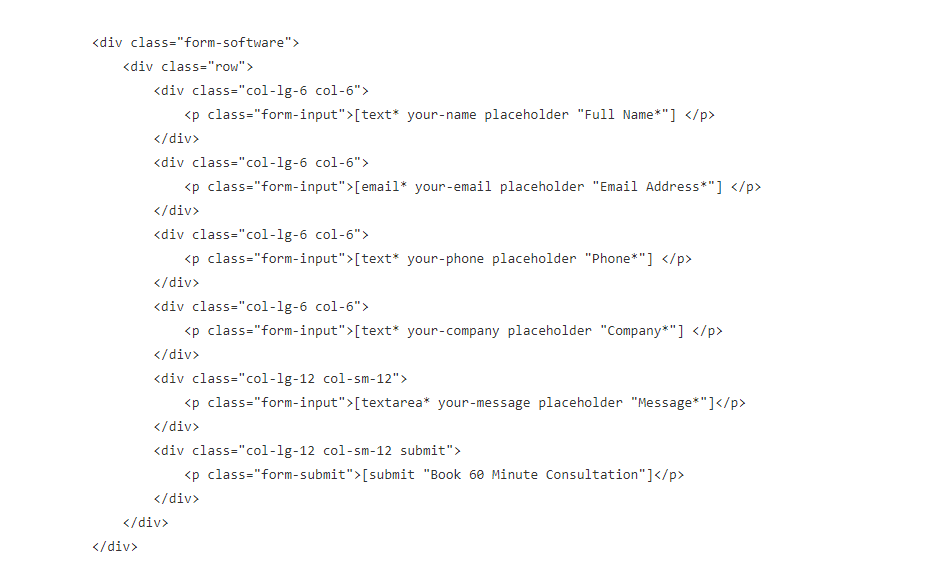
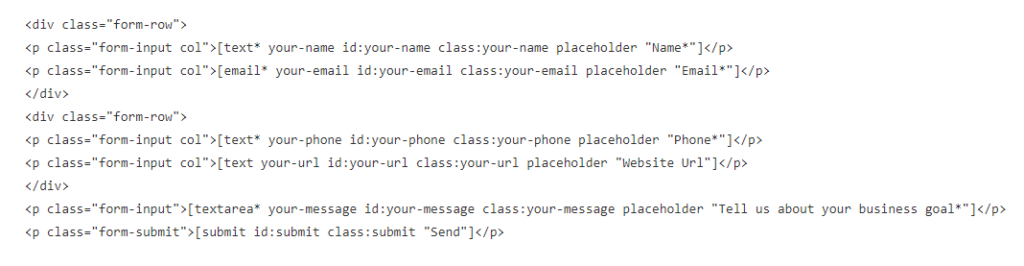
Below is the contact form content we used in our demo site. Each form can have different style based in the content in the contact form. If you imported demo content successfully, you can skip this step.
– Contact form in Home Seo
– Contact form in Home Software
– Contact form in Contact Us

– Contact form in Footer 02

– Contact form in Footer 02
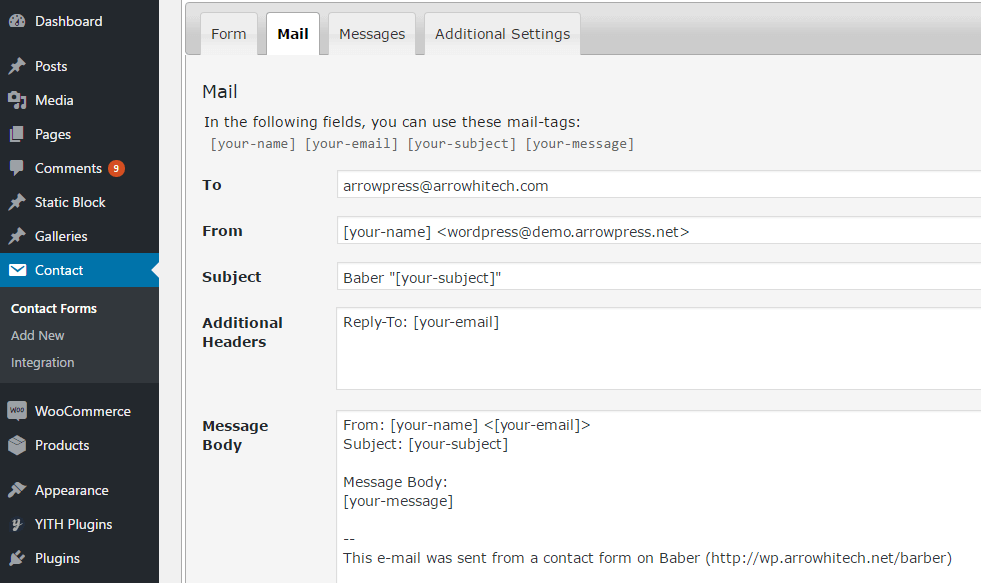
After that, you need to set up Mail tab. Please see this guide for more detail. Mail setting
– Woocommerce
WooCommerce is the most popular WordPress eCommerce plugin. Packed full of features, perfectly integrated into your self-hosted WordPress website.
You can see here for more details and woocommerce documentation.
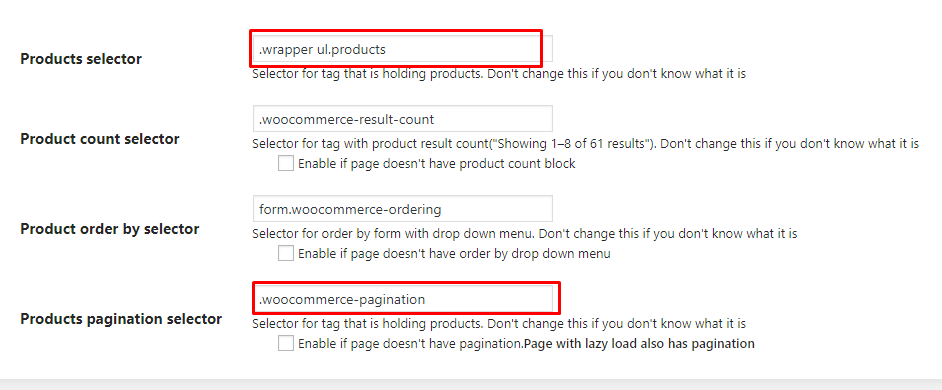
Plugin Advanced AJAX Product Filters
Go to BeRocket > Product Filters to access general setting of BeRocket
After that, in tab Selectors, you must add class:
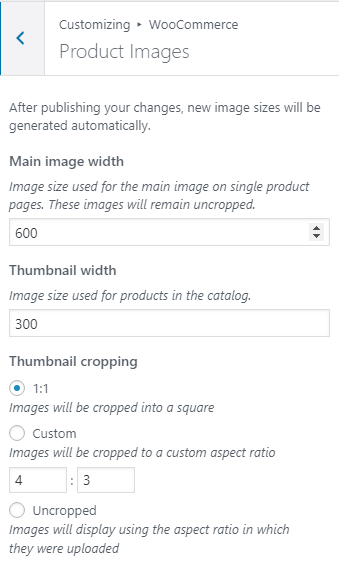
– Change Image Sizes
You can change the product image sizes in Appearance > Customizer > Woocommerce > Product Image on admin sidebar.
– Product image in Shop page: You should change Thumbnail width
– Product image in single product page: You should change Main Image width
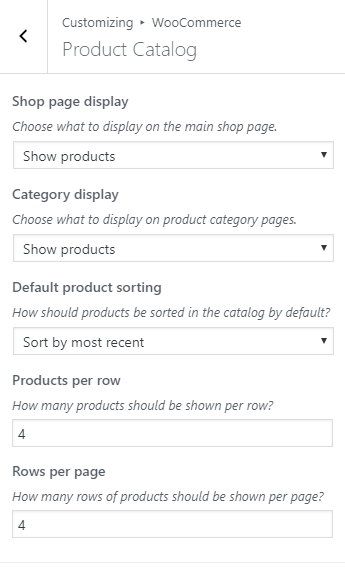
– Change Product Catalog
You can change the product catalog in Appearance > Customizer > Woocommerce > Product Catalog on admin sidebar.
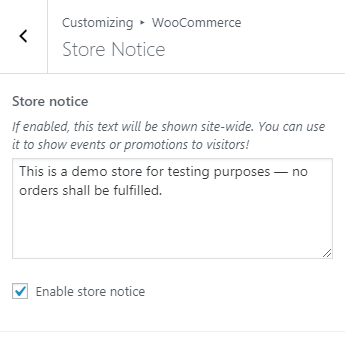
– Enable store notice
Navigate to Appearance > Customizer > Woocommerce > Store Notice, check the box Enable store notice
You can change text in this field
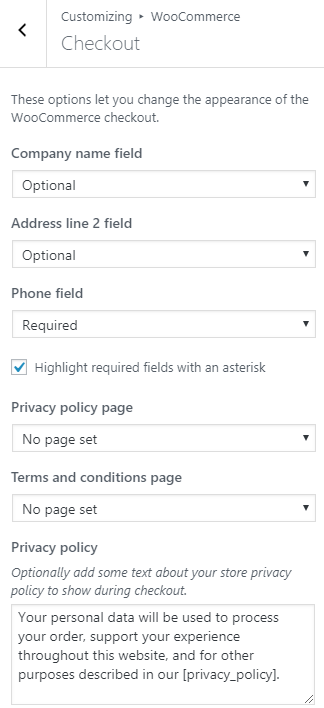
– Change Checkout
You can change the product catalog in Appearance > Customizer > Woocommerce > Checkout on admin sidebar.
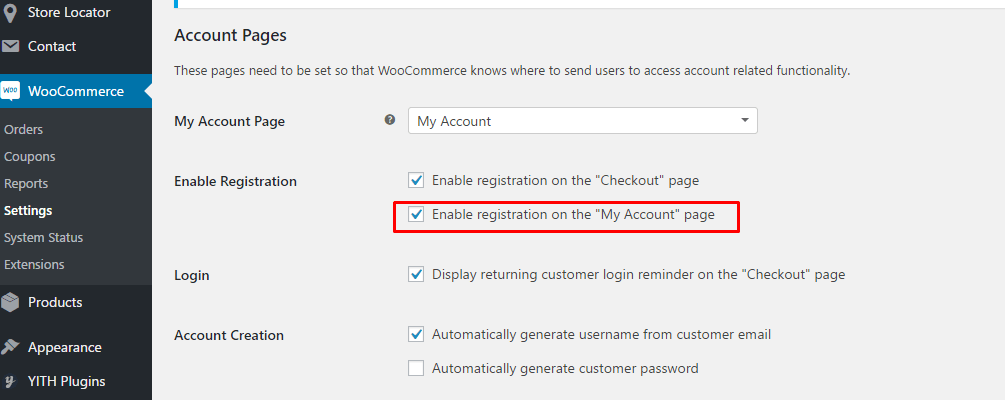
– Enable register in My Account page
Navigate to Woocommerce > Settings > Accounts, check the box Enable registration on the “My Account” page
– Regenerate Thumbnails
Regenerate Thumbnails allows you to regenerate the thumbnails for your image attachments. This is very handy if you’ve changed any of your thumbnail dimensions (via Settings -> Media) after previously uploading images or have changed to a theme with different featured post image dimensions.
You can either regenerate the thumbnails for all image uploads, individual image uploads, or specific multiple image uploads.
You can see here for more details.
Please go Tools > Regen.Thumbnails and click Regenerate All Thumbnails.
Once Required Plugins are configured, you may be interested in installing sample content as our demo sites. In the next section, we will guide you about demo installation.