1. Front-end Builder
GENERAL
Go to Admin -> MGS -> Front-end Builder [General]
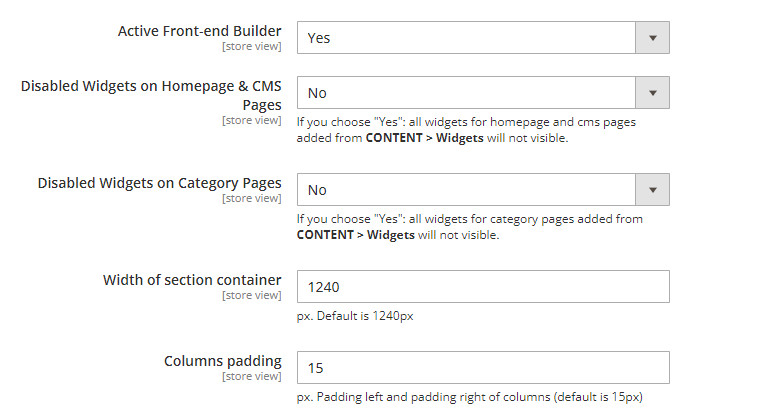
- Active Front-end Builder: Set “Yes” to use Front-end Builder
- Disabled Widgets on Homepage & CMS Pages: Enabled or Disabled
- Disabled Widgets on Category Pages: Enabled or Disabled
- Width of section container: Enter width of container
- Columns padding: Enter padding value for columns
OWL SLIDER (SINGLE SLIDE)
Go to Admin -> MGS -> Front-end Builder [OWL Slider (Single Slide)]
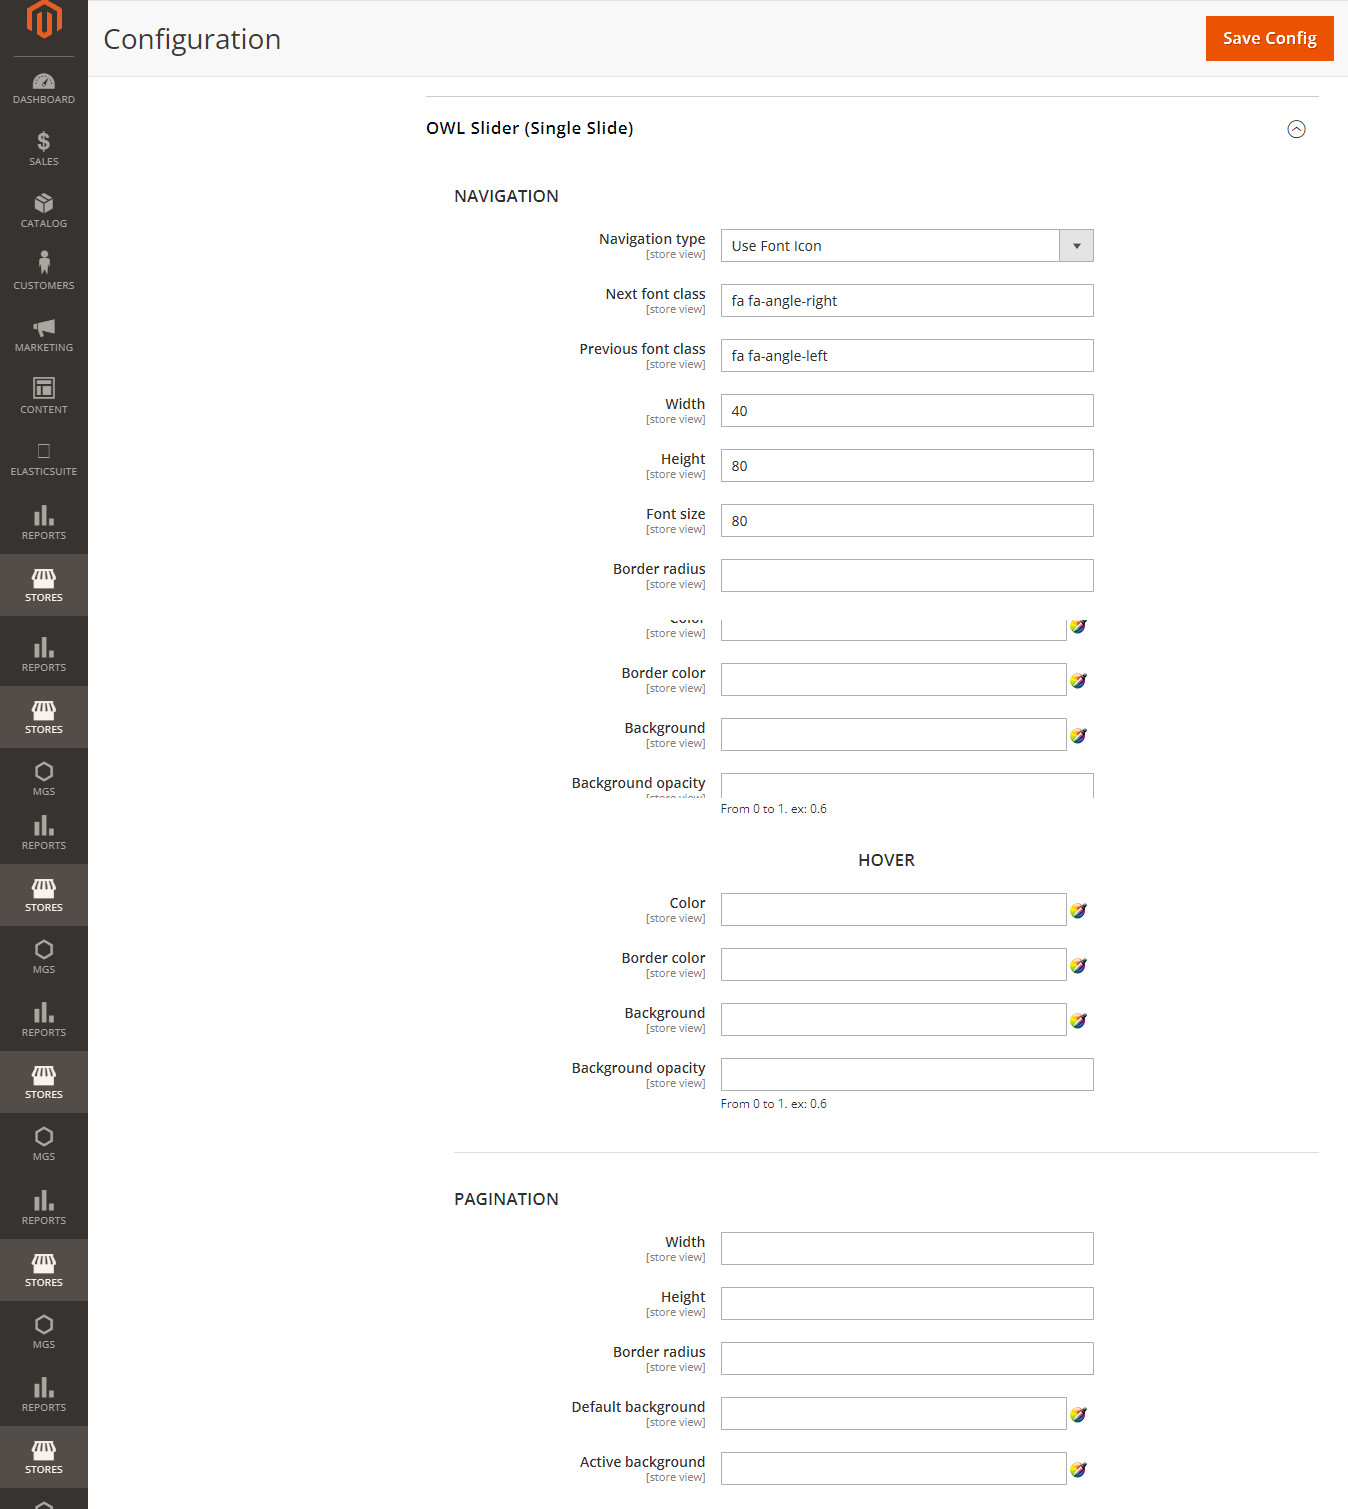
- Navigation: Setting navigation type, width, height, font-size, color, border, background
- Pagination: Setting width, height, border, background
OWL SLIDER (MULTIPLE SLIDES)
Go to Admin -> MGS -> Front-end Builder [OWL Slider (Multiple Slides)]
Setting is the same with OWL Slider (Single Slide) however they apply for Multiple Silders
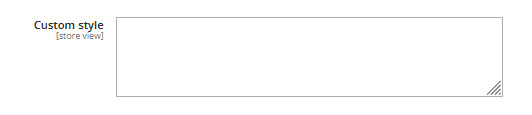
CUSTOM STYLE
In Backend, go to MGS -> Front-end Builder -> [Custom Style] -> Custom Style
You can add your own custom style for your site.
EXPORT – IMPORT – RESTORE
In Backend, go to MGS -> Front-end Builder -> [Export - Import - Restore]
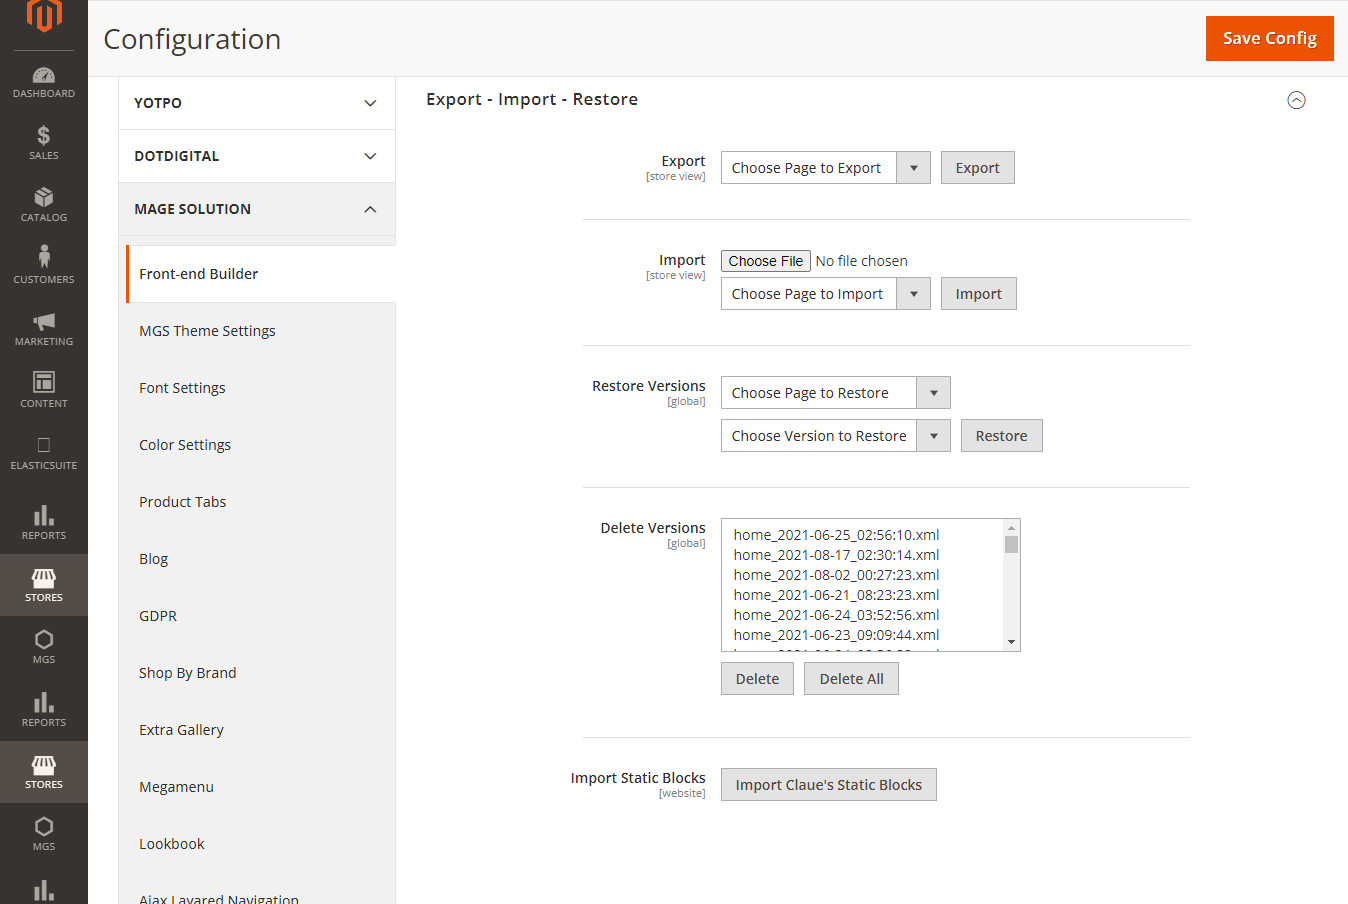
- Export: You can export any page by Choosing page to export -> click Export button
- Import: Click here to see more detail
- Restore Version: After import a xml page, theme will save it. Therefore you can use these pages anytime you want
- Delete Version: Click to Delete button to delete version unneccessary
- Import Static Block: Click here to see more detail
2. MGS Theme Settings
GENERAL SETTINGS
Go to Admin -> MGS -> MGS Theme Settings [General]
- Width: We theme provides 1024px, 1170px, 1366px and full width max width mode, you can choose one as you prefer. You can apply this option to any home versions.
- Layout: You can choose boxed or wide layout of entire store.
- Display back to top icon: Enabled or Disabled
- Enable Lazy Load: Enabled or Disabled
- Lazy Load Image: Upload image for lazyload
HEADER
Go to Admin -> MGS -> MGS Theme Settings [Header]
- Header version: You can choose one of 7 header versions
- Header absolute: Enable or Disable
- Logo on mobile: Upload logo for mobile
- Elements: Choose elements which appear on header
- Minicart type: Choose minicart type
- Search type: Choose search type
- Sticky menu: Enable or Disable
- Sticky menu on mobile: Enable or Disable
- My Account type: Choose my account type
- Display login form: Enable or Disable

- Footer version: You can choose one of 6 footer version
- Parallax: Enable or Disable
- Use Custom Copyright: Enable or Disable
CATALOG
Go to Admin -> MGS -> MGS Theme Settings [Catalog (General Setting of Category Page and Catalog Search Page)]
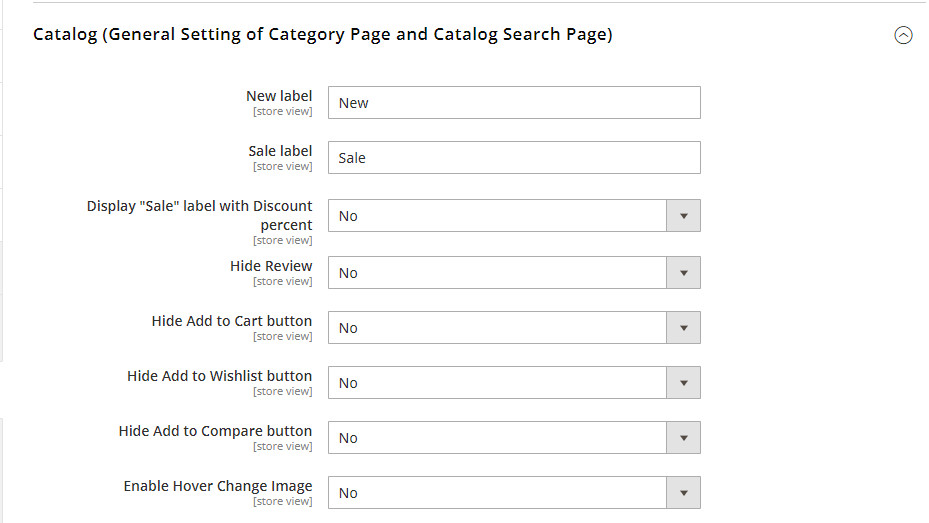
- New label: Enter name of new lable

- Sale label: Enter name of sale lable
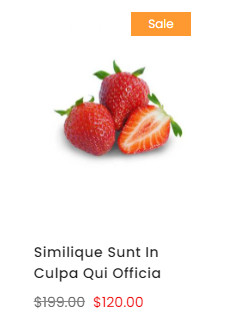
- Display “Sale” label with Discount percent: Enable or Disable
- Hide Review: Enable or Disable
- Hide Add to Cart button: Enable or Disable
- Hide Add to Wishlist button: Enable or Disable
- Hide Add to Compare button: Enable or Disable
- Enable Hover Change Image: Enable or Disable
CATEGORY PAGE
Go to Admin -> MGS -> MGS Theme Settings [Catalog]

With Catalog Settings, you can config:
- Default Page Layout: Config default layout (1 column, 2 columns left, 2 columns right, 3 columns) for category page.
- Number Of Product Per Row: Config (default value) number of product per row for product grid mode.
- Category Image position: Config position of image category
- Category Description position: Config position of description
- CMS Block position: Config position of CMS block
- Enable change product per row: You can change product show per row
- Values number product per row to show: Config number of product per row
- Default value number product per row: Config default number of product per row
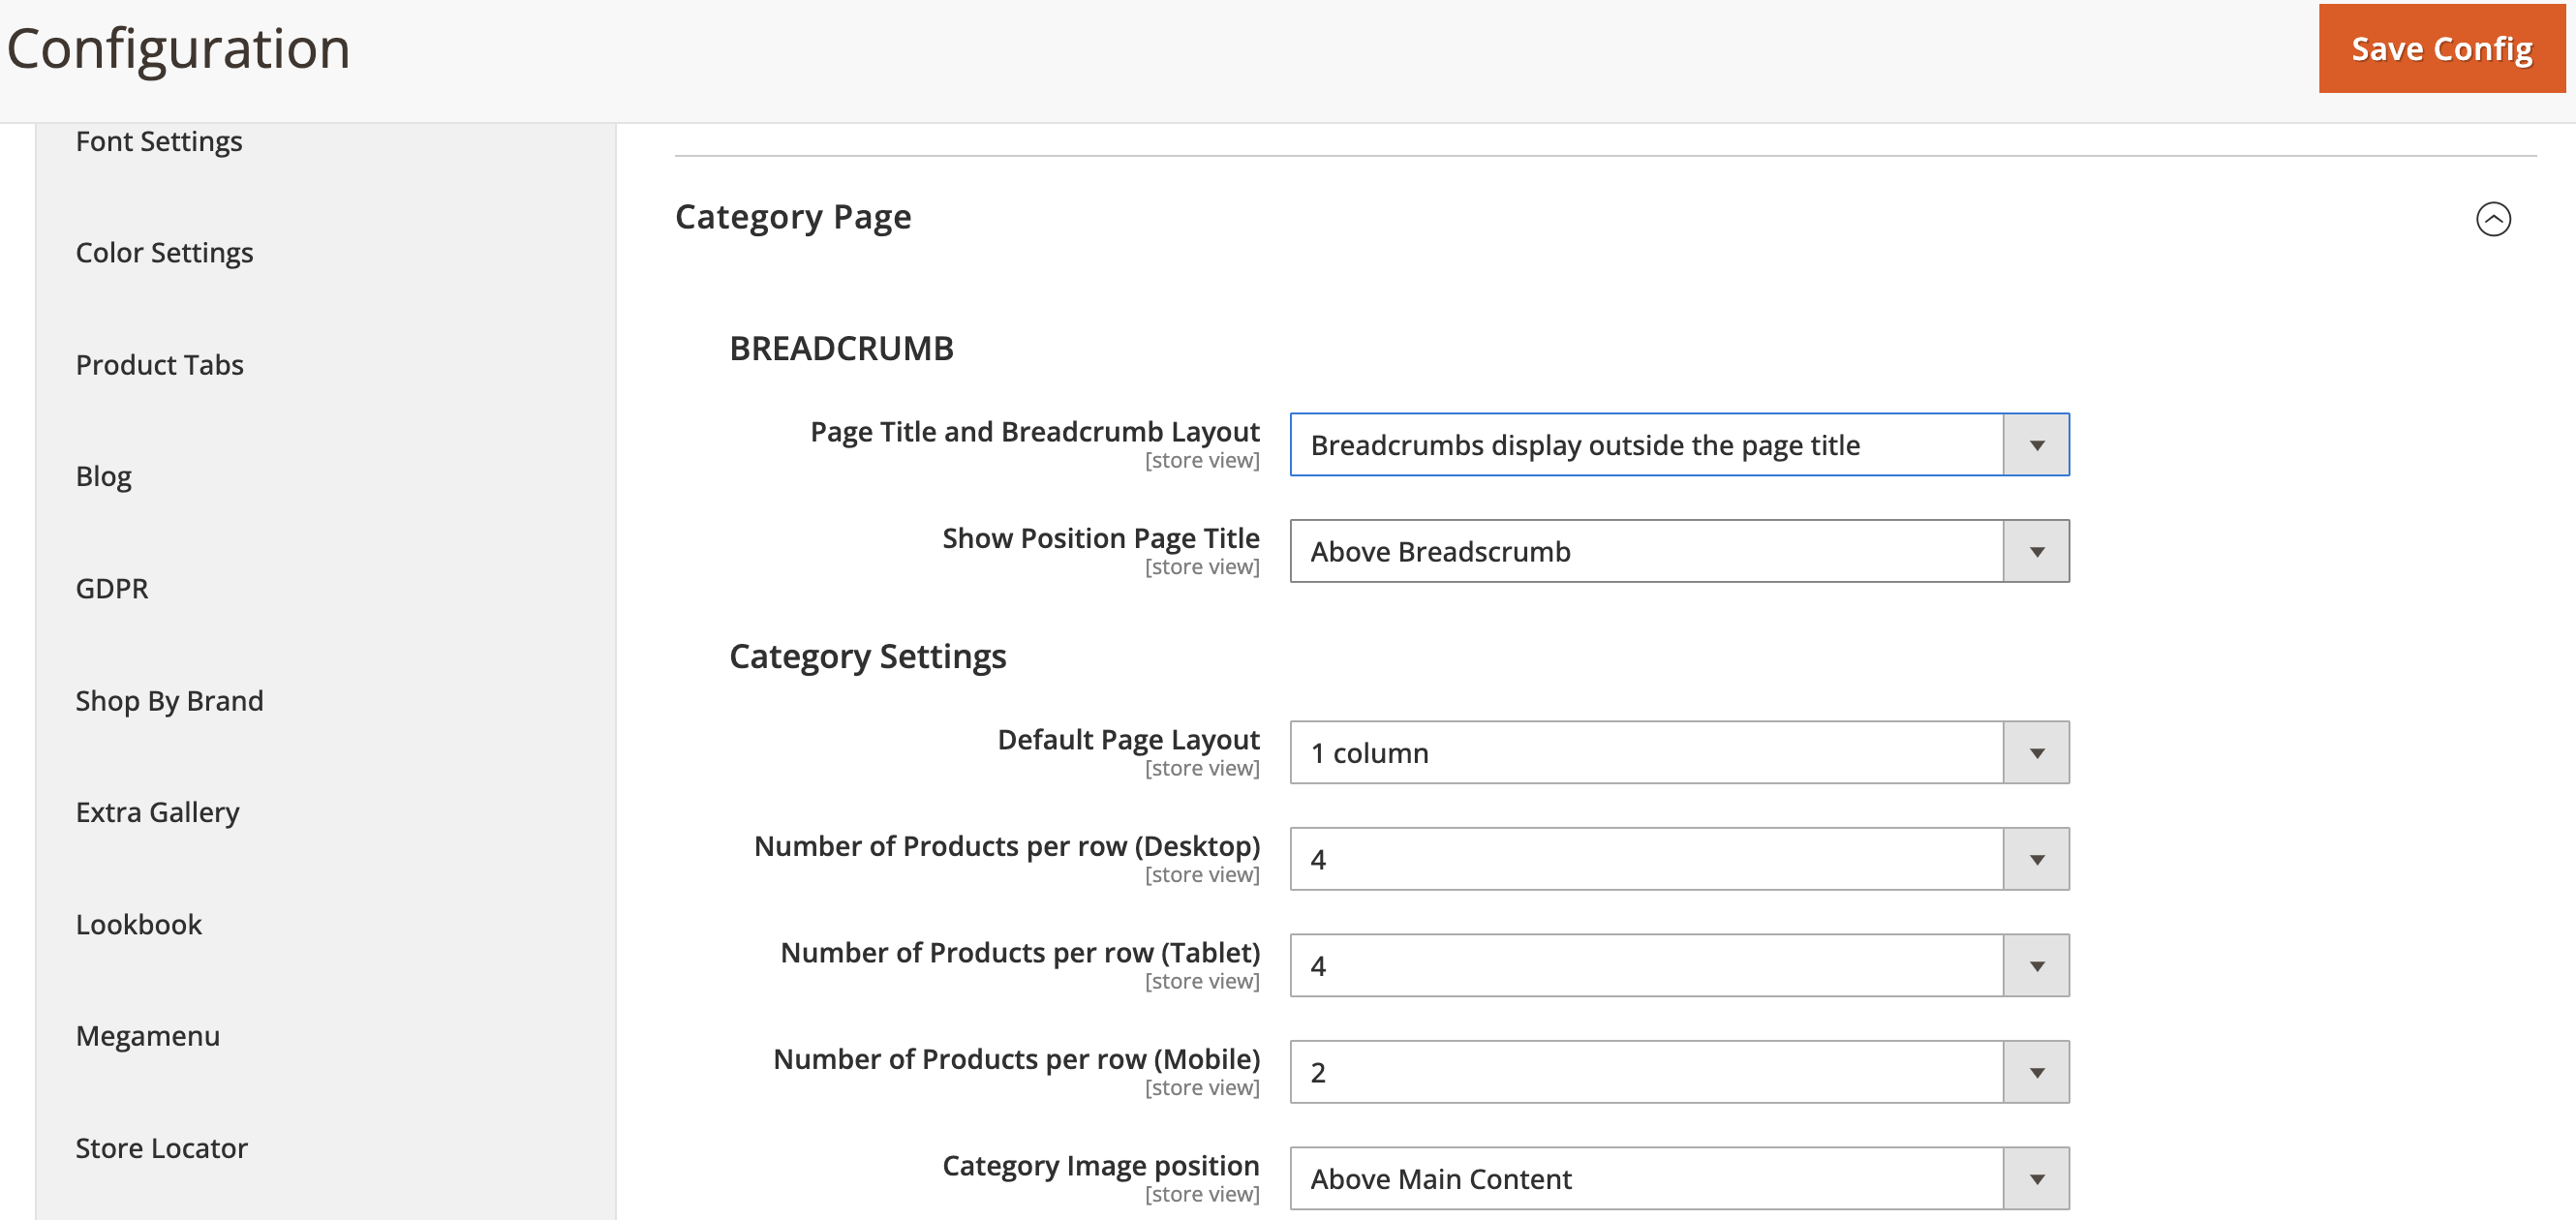
With Catalog Breadcrumbs Settings , you can config:
- Page Title and Breadcrumb Layout : choose the breadcrumb design styles in the Category Page.
- Show Position Page Title: choose where to display page title when choosing layout Breadcrumbs display outside the page title
CATALOG SEARCH PAGE
Go to Admin -> MGS -> MGS Theme Settings [Catalog Search Page]
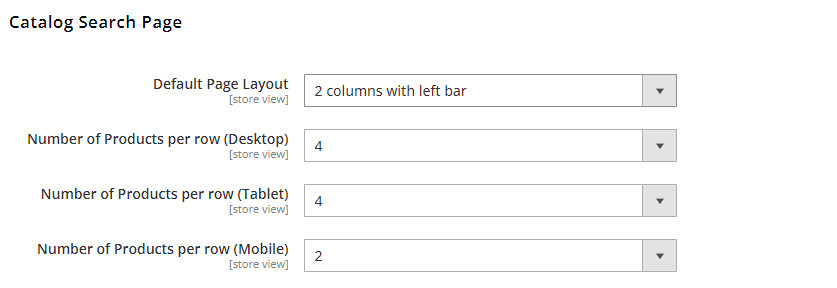
- Default Page Layout: Choose layout for search page
- Number of Products per row (Desktop): Set number of product appear pew row on desktop
- Number of Products per row (Tablet): Set number of product appear pew row on tablet
- Number of Products per row (Mobile): Set number of product appear pew row on the mobile
PRODUCT DETAIL SETTINGS
Go to Admin -> MGS -> MGS Theme Settings [Product Details Page]
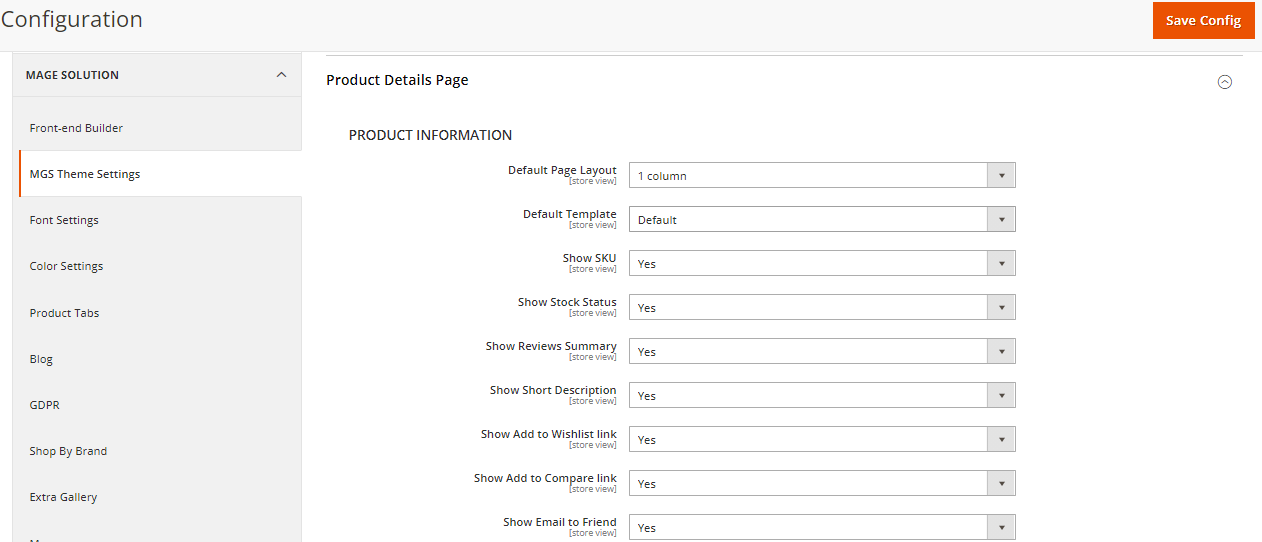
With Product Details Settings, you can config product detail page:
- Default Page Layout: Choose layout for product detail page
- Default Template: Choose template for product detail page
- Show Sku: Enable or Disable
- Show Stock Status: Enable or Disable
- Show Reviews Summary: Enable or Disable
- Show Add to Wishlist Link: Enable or Disable
- Show Add to Compare Link: Enable or Disable
- Show Short Description: Enable or Disable
- Show Upsell Products: Enable or Disable
- Show Email to Friend: Enable or Disable
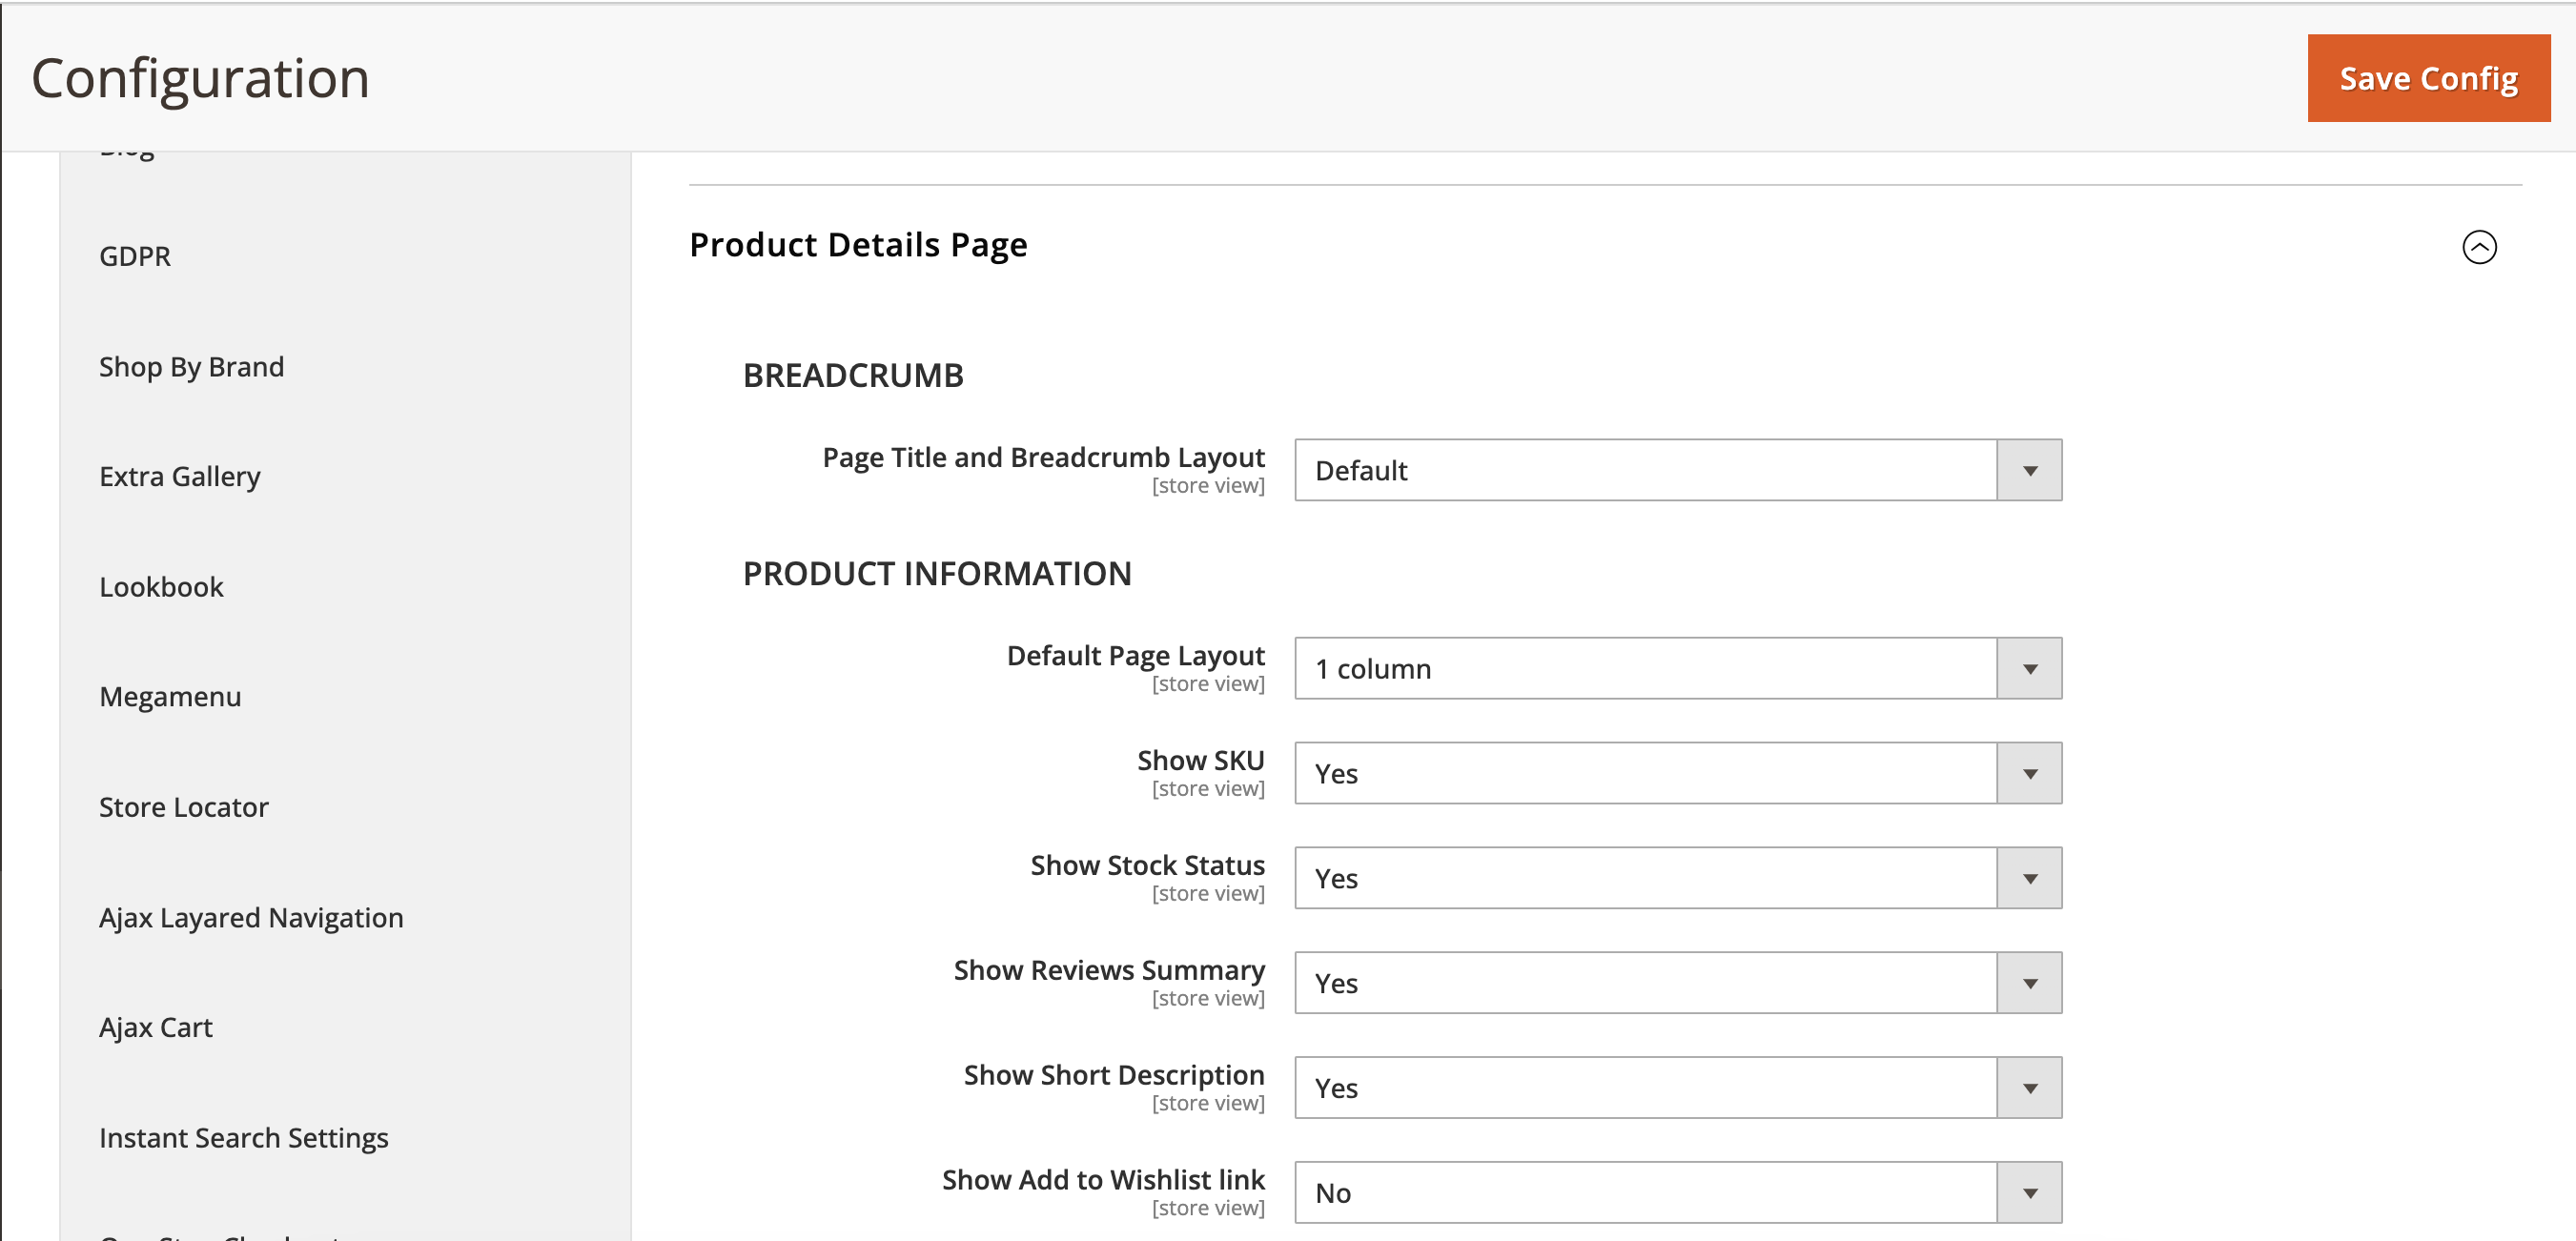
With Product Details Breadcrumbs Settings , you can config:
- Page Title and Breadcrumb Layout : choose the breadcrumb design styles in the Category Page.
- Show Position Page Title: choose where to display page title when choosing layout Breadcrumbs display outside the page title
PRODUCT IMAGE DIMENTION
Go to Admin -> MGS -> MGS Theme Settings [Product Image Dimention]
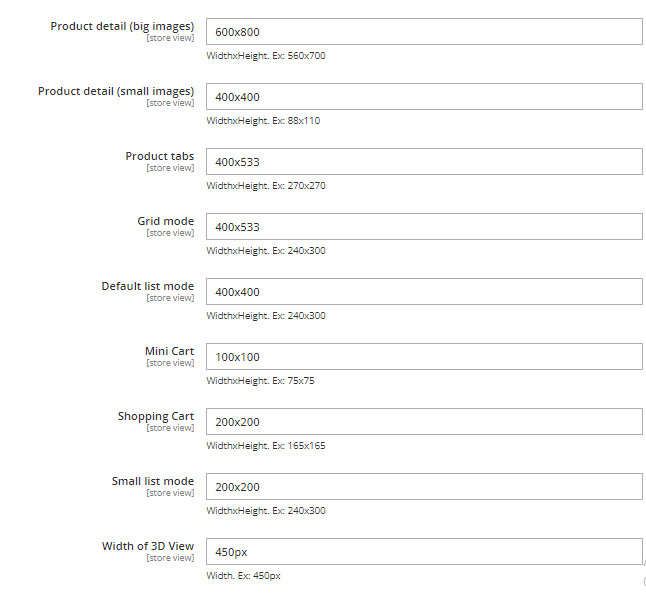
With Product Details Settings, you can config product detail page:
- Product detail (big images): Set dimension for big image on product detail page
- Product detail (small images): Set dimension for small image (thumbnail) on product detail page
- Product tabs: Set dimension for image on product tabs
- Grid mode: Set dimension for image on grid mode
- Default list mode: Set dimension for image on default list mode
- Mini Cart: Set dimension for image on mini cart
- Shopping Cart: Set dimension for image on shopping cart
- Small list mode: Set dimension for image on small list mode
- Width of 3D View: Set dimension for image 3D
SHOPPING CART PAGE
Go to Admin -> MGS -> MGS Theme Settings [Shopping Cart Page]
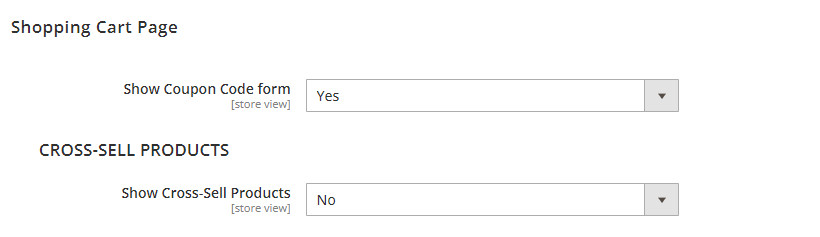
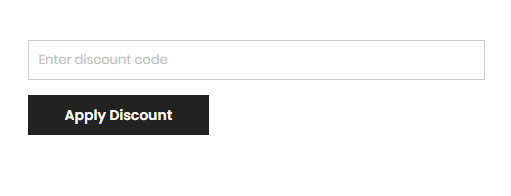
- Show Coupon Code form: Enable or Disable
- Show Cross-Sell Products: Enable or Disable
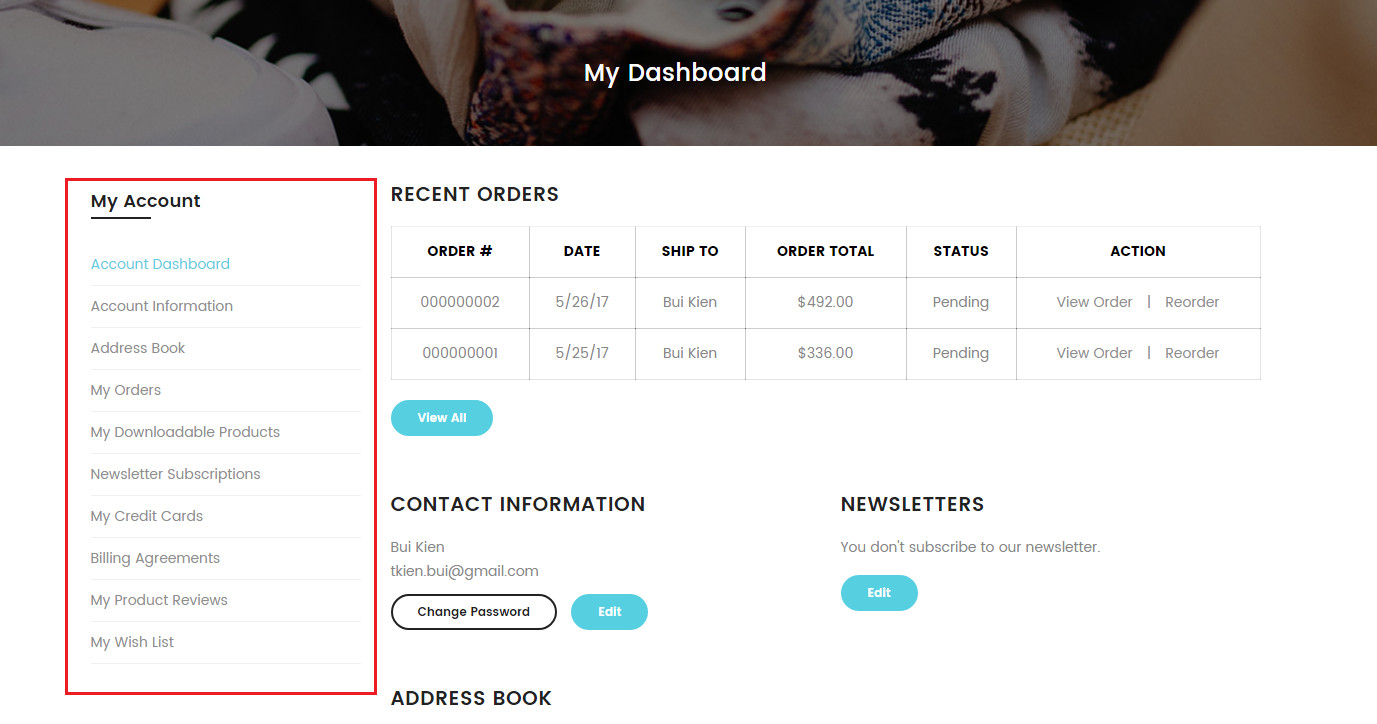
CUSTOMER NAVIGATION LINKS SETTINGS
Go to Admin -> MGS ->MGS Theme Settings [Customer Navigation Links]
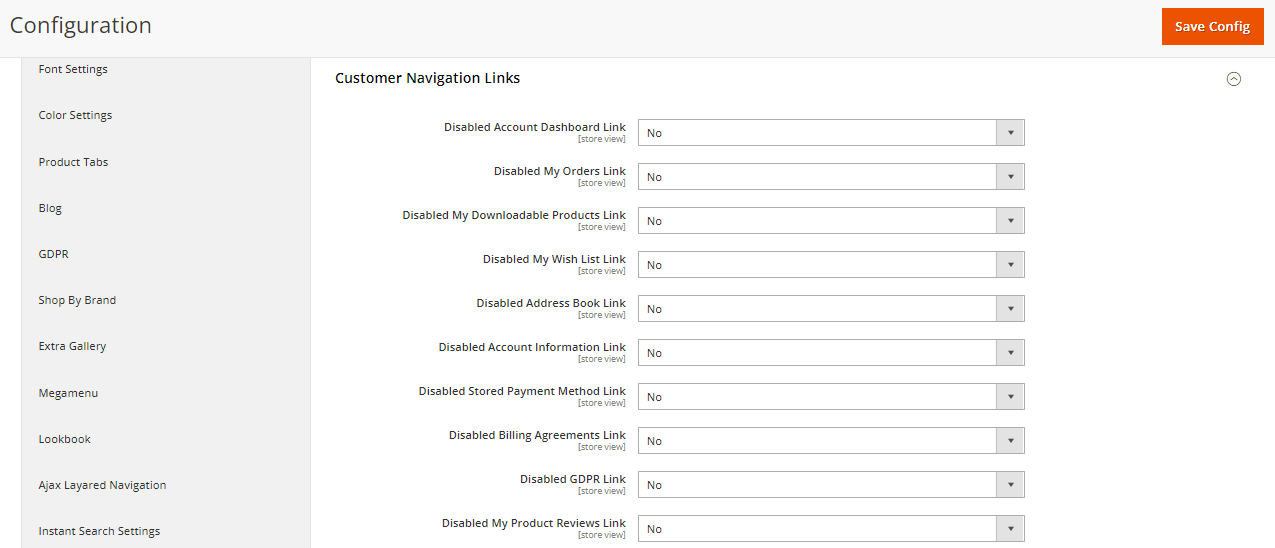
You can enabled or disabled link on customer Navigation Links
NEWSLETTER POPUP
Go to Admin -> MGS ->MGS Theme Settings [Newsletter Popup]. To show newsletter popup, change value of field Enable Newsletter Popup to Yes
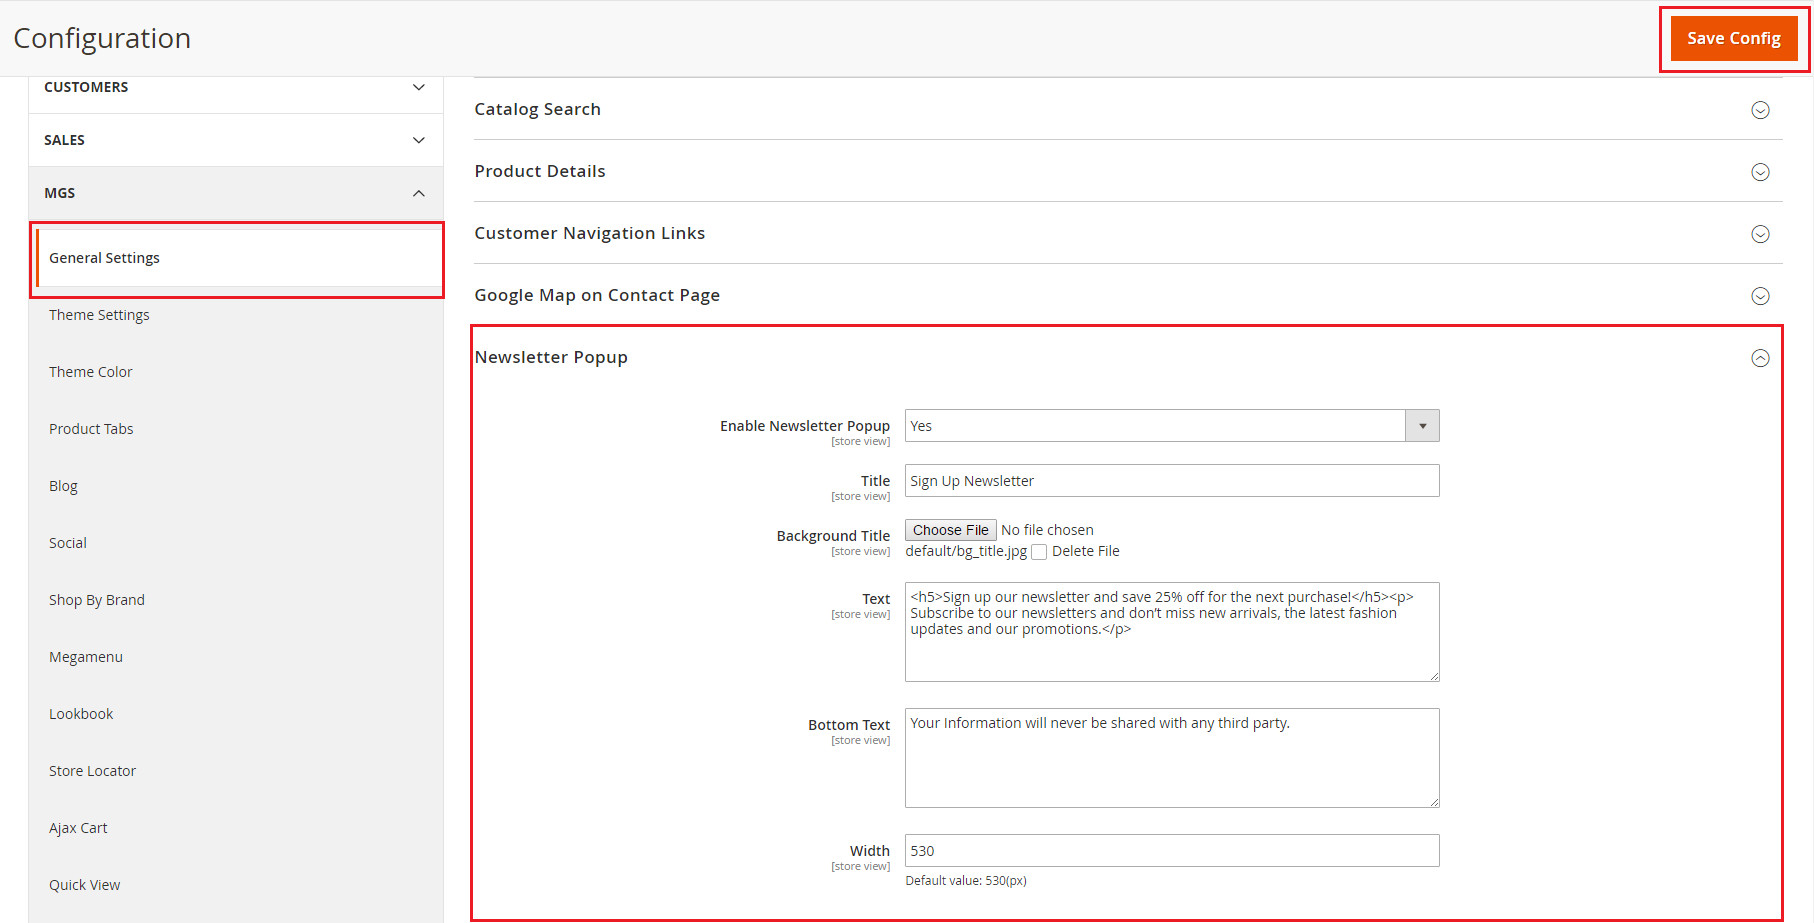
Demo

CONTACT US PAGE
Go to Admin -> MGS ->MGS Theme Settings [Contact Us Page]
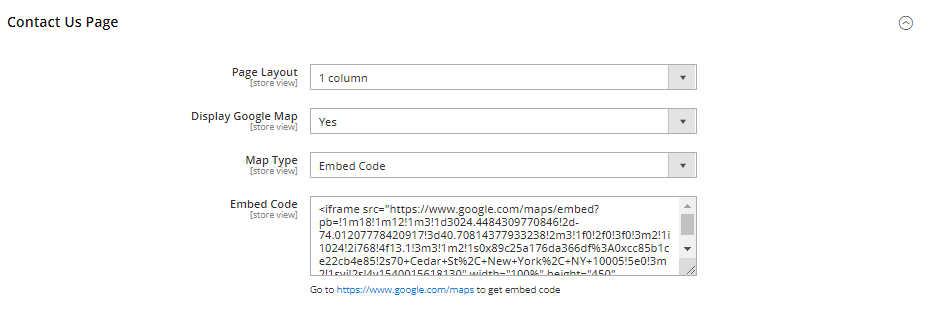
- Page Layout: Choose layout for Contact page
- Display Google Map: Enable or Disable. If you set Enable, you must set Map Type and Embed Code
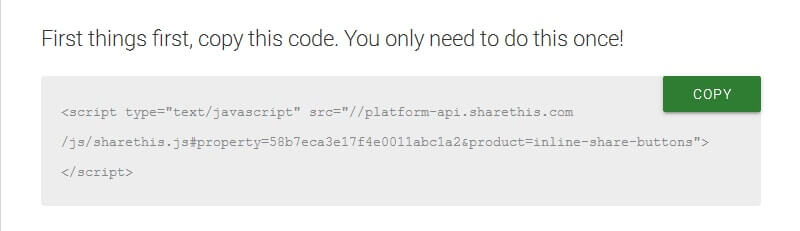
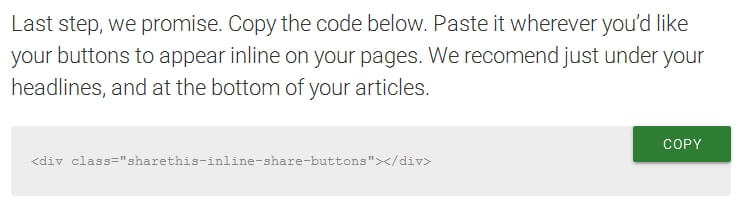
SHARETHIS
To use share this, you need go to http://www.sharethis.com/. Click Get Share Buttons button to config and get code. ShareThis returns for you script and html code.
Script
Html
Go to Admin -> MGS -> Theme Settings [Share This]
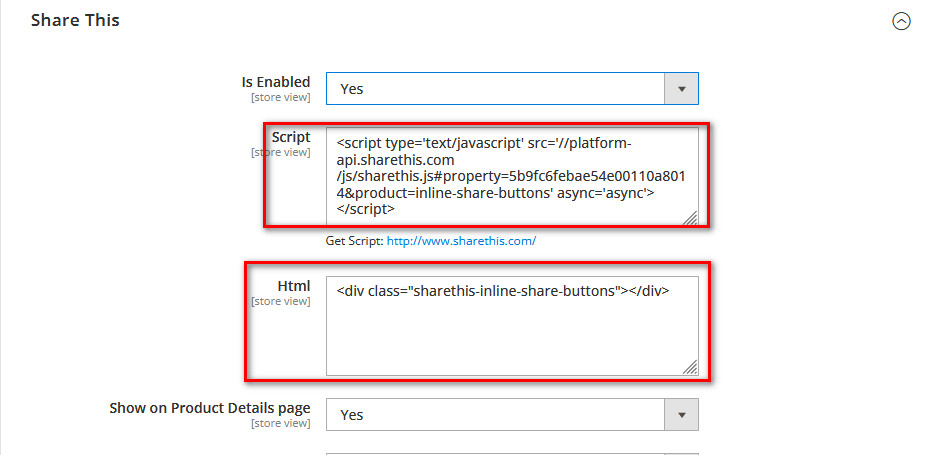
You can show share this on product detail page, category page, blog detail page, portfolio page.
PAGE TITLE AND BREADCRUMB
Go to Admin -> MGS ->MGS Theme Settings [Page Title and Breadcrumb]
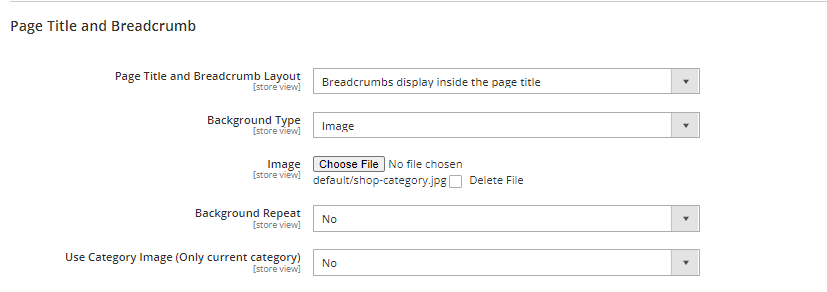
- Page Title and Breadcrumb Layout: Choose layout for Page Title and Breadcrumb
- Background Type: Choose background type
- Background Repeat: Enable or Disable
- Use Category Image (Only current category: Enable or Disable
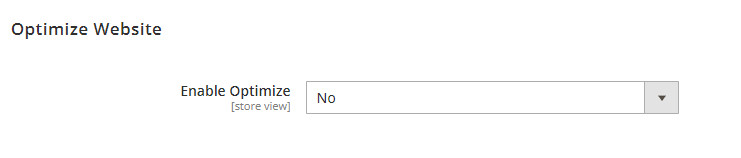
OPTIMIZE WEBSITE
To increase performance and speed of website, you can go to Admin -> MGS ->MGS Theme Settings [Optimize Website] and Enable Optimize
3. Front Settings
CUSTOM YOUR FONT
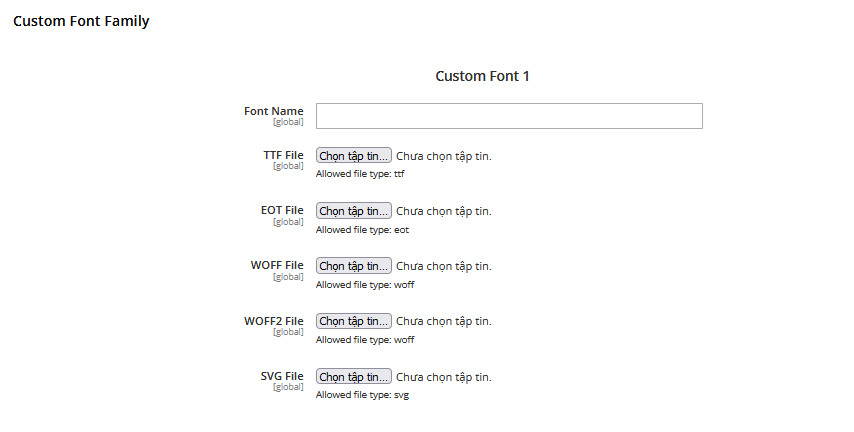
DECLARE YOUR FONT
If you have a font. You can add TTF File, EOT File, WOFF File, SVG File to declare new font for your site.
In Backend, go to MGS -> Font Setting -> Custom Font Family
Declare Font Name and browse and save config to upload file.
DECLARE FONT FOR ELEMENT
In Backend, go to MGS -> Theme Setting -> [Custom Style] -> Custom Style
Add css for element with code:
- Default Font:
body { font-family: "YourFontName" !important; } - Heading 1:
h1 { font-family: "YourFontName" !important; } - Heading 2:
h2 { font-family: "YourFontName" !important; } - Heading 3:
h3 { font-family: "YourFontName" !important; } - Heading 4:
h4 { font-family: "YourFontName" !important; } - Heading 5:
h5 { font-family: "YourFontName" !important; } - Heading 6:
h6 { font-family: "YourFontName" !important; } - Menu heading:
.navigation li.level0 a.level-top, .navigation ul.container .level0 > a { font-family: "YourFontName" !important; } - Price:
.price, .price-box .price { font-family: "YourFontName" !important; } - Button:
.btn { font-family: "YourFontName" !important; }
FONT SETTINGS
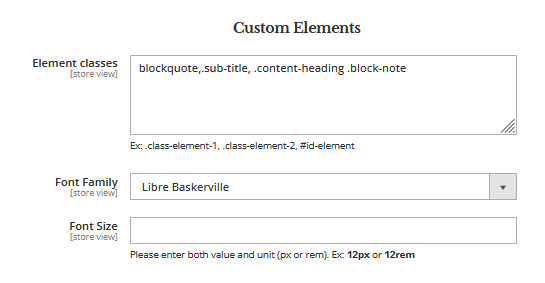
In Backend, go to MGS -> Font Settings -> [Font]
Options for fonts of page elements: default font, heading 1, heading 2, heading 3, heading 4, heading 5, heading 6, button, price, menu heading, menu link
We use google font for them
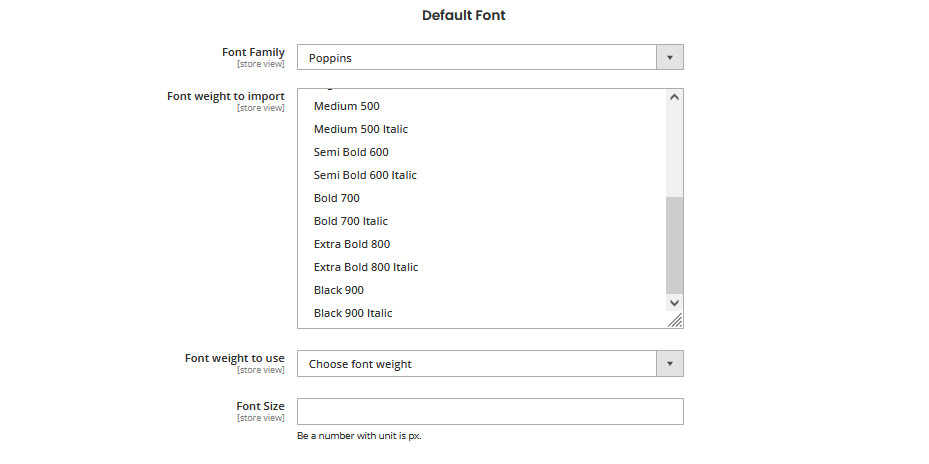
You can add font for special class if you want. Input css selectors to textarea Element use font and choose font use for it.
4. Color Settings
From Admin panel, go to MGS → Color Setting → [Header Color]
You can set color for:
- Header background (Background, border color text color, link color, link hover color)
- Top header (Background color, link color, link hover color, text color)
- Middle header(Background, border color, text color, link color, link hover color)
- Bottom header(Background, border color, text color, link color, link hover color)
MENU COLOR
From Admin panel, go to MGS → Color Setting → [Menu color]
To show setting color for Main content, you can change “Custom Color” to Yes first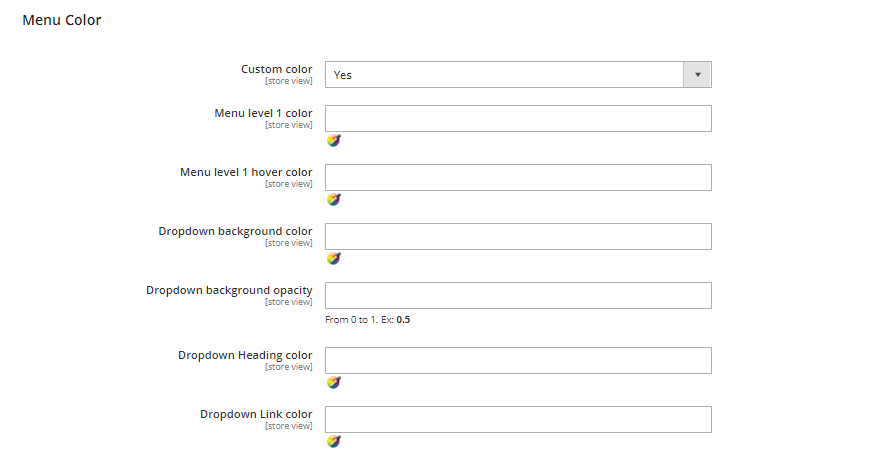
You can set color for:
- Menu color
- Dropdown color
FOOTER COLOR
From Admin panel, go to MGS → Color Setting → [Footer]
To show setting color for Footer, you can change “Use Custom” to Yes first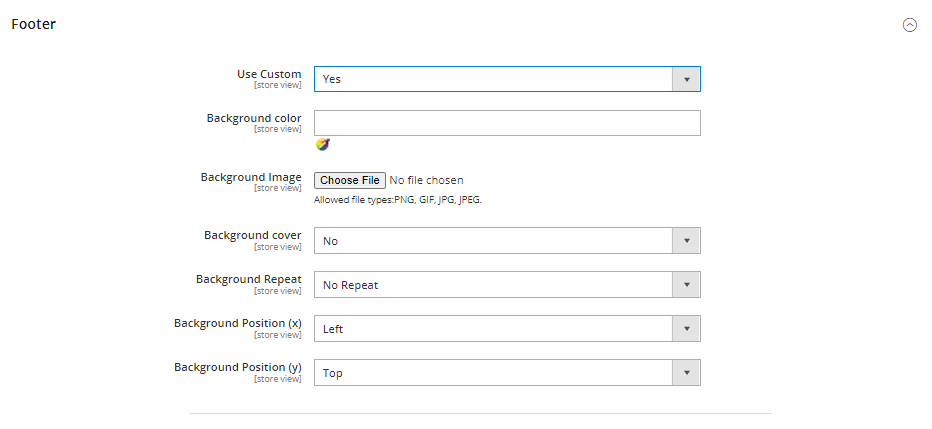
You can set color for: